vscode

10 amazing VS Code tips and tricks for rapid coding

10 powerful VS Code tricks to massively enhance your productivity.

From rapid navigation to speedy code editing, these tips will help you achieve your coding goals faster than ever with a top-notch development experience.

1. Publish repo to GitHub in literal seconds

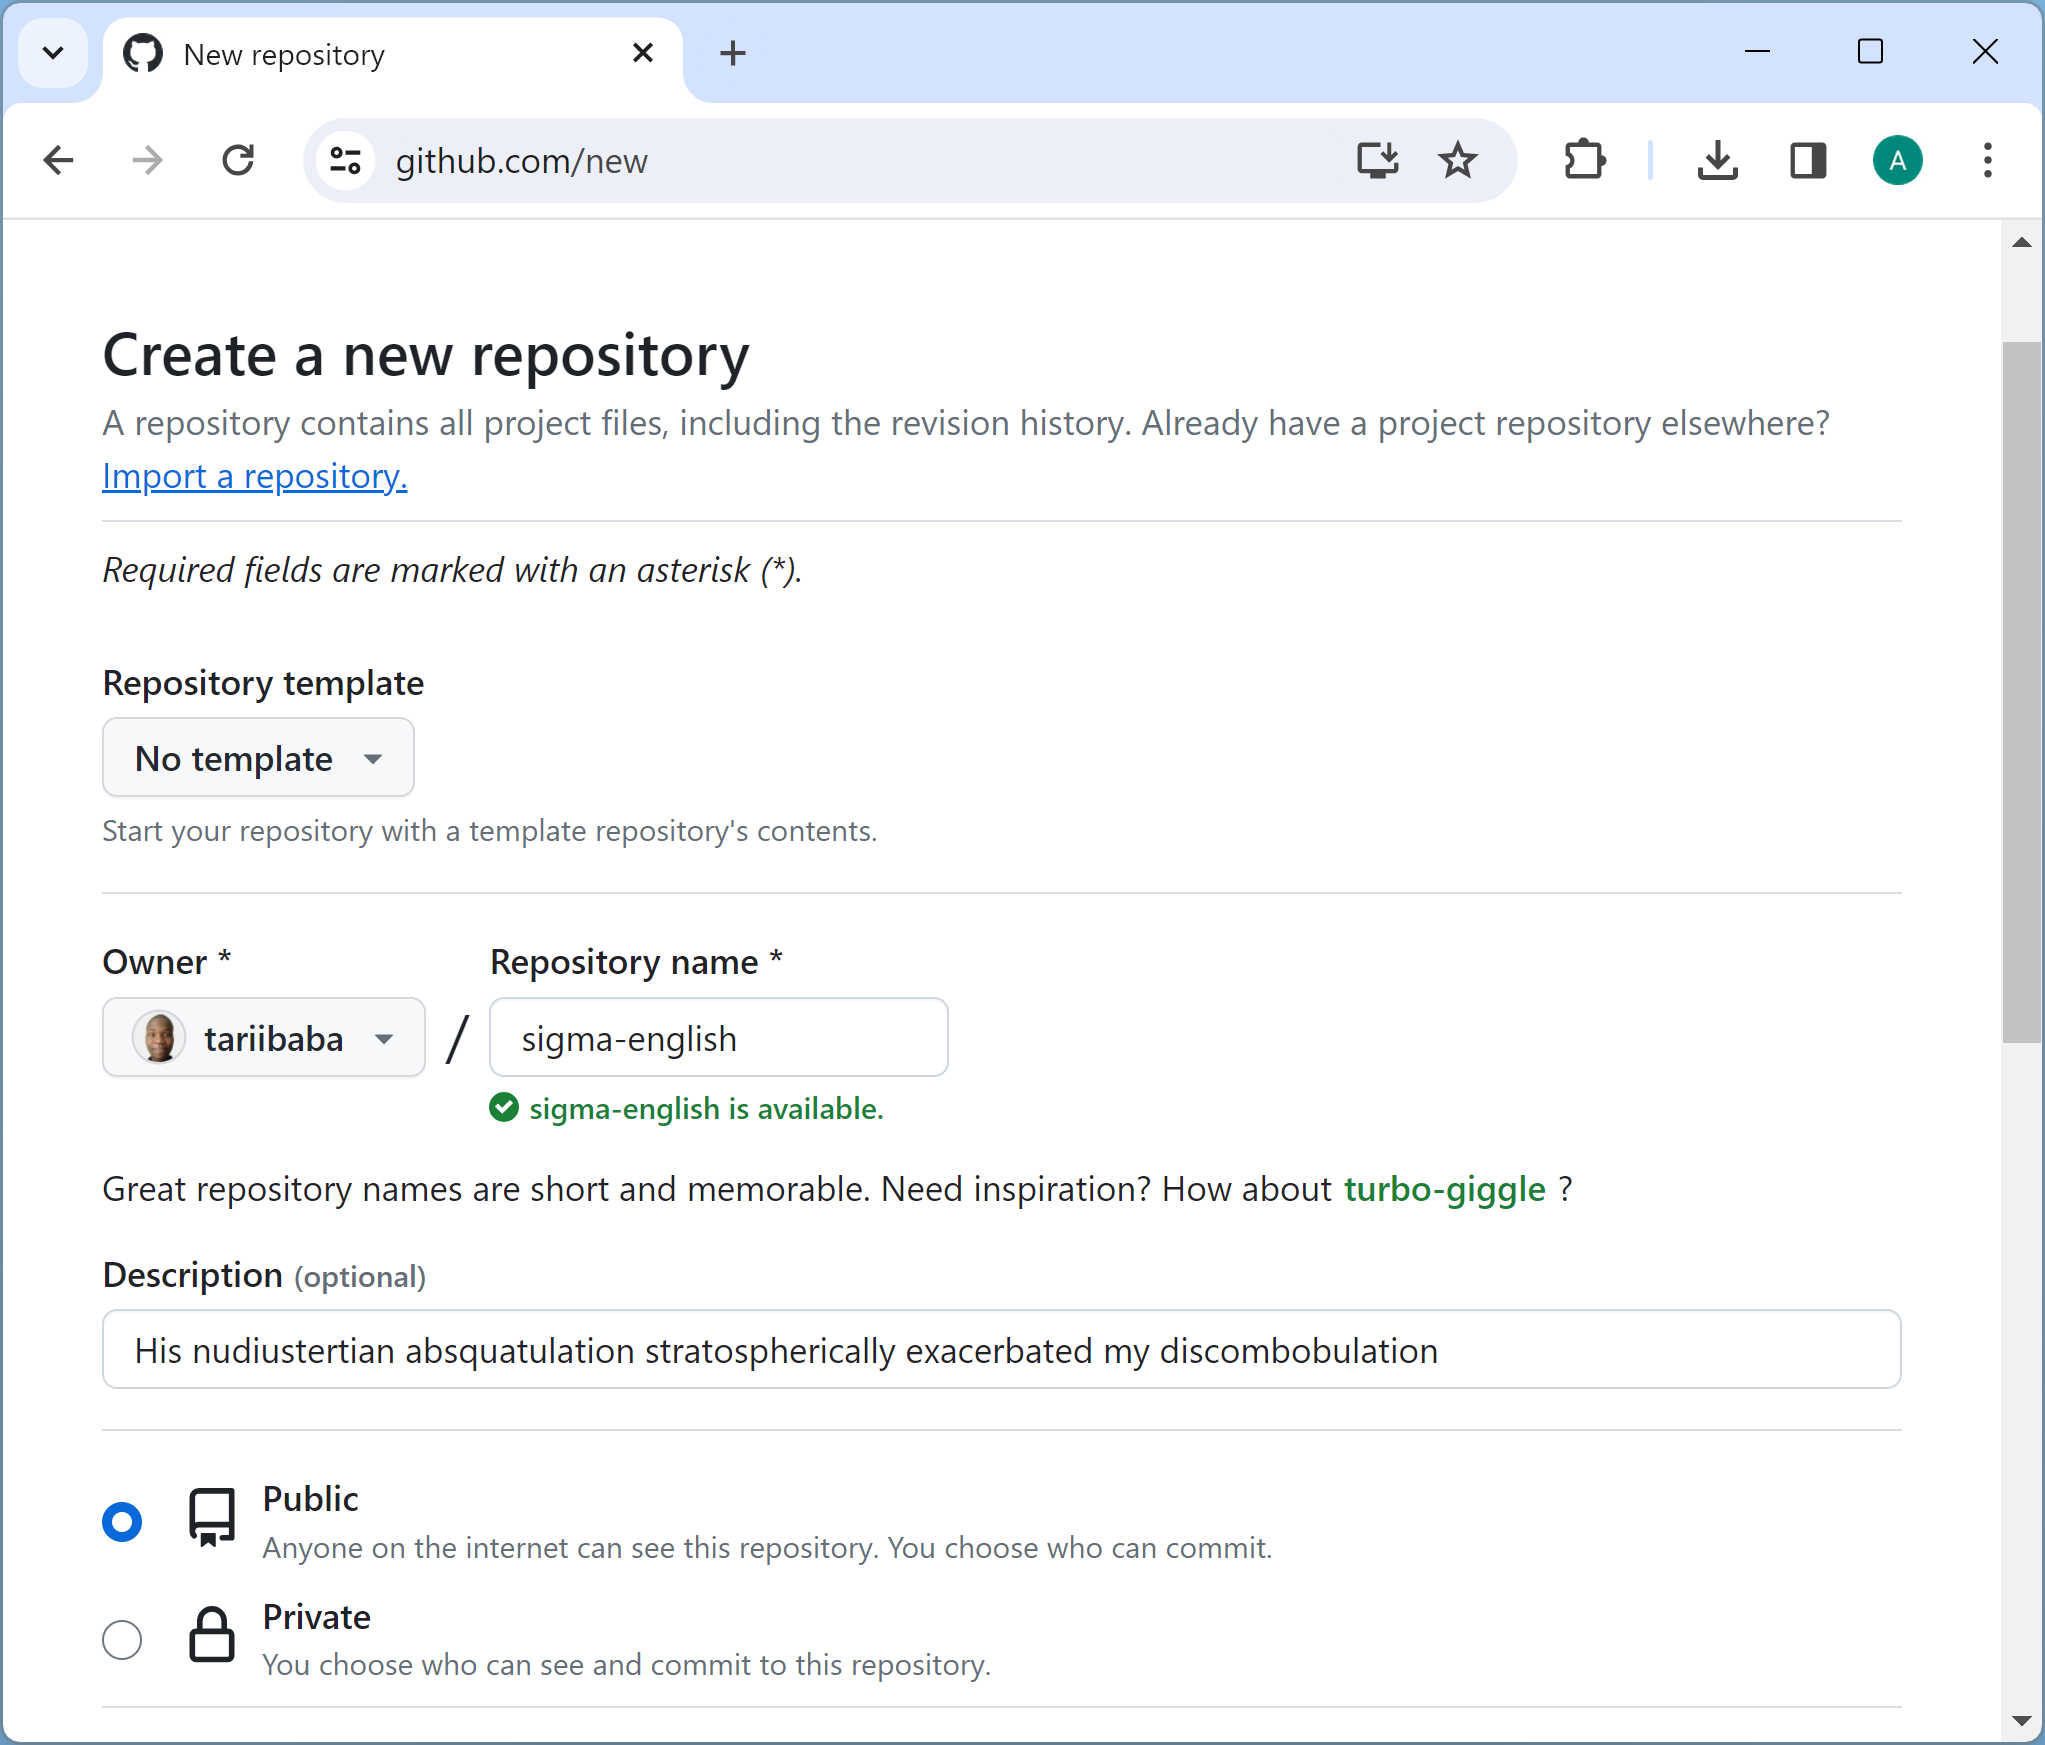
Do you remember this?

Or maybe you still do this?

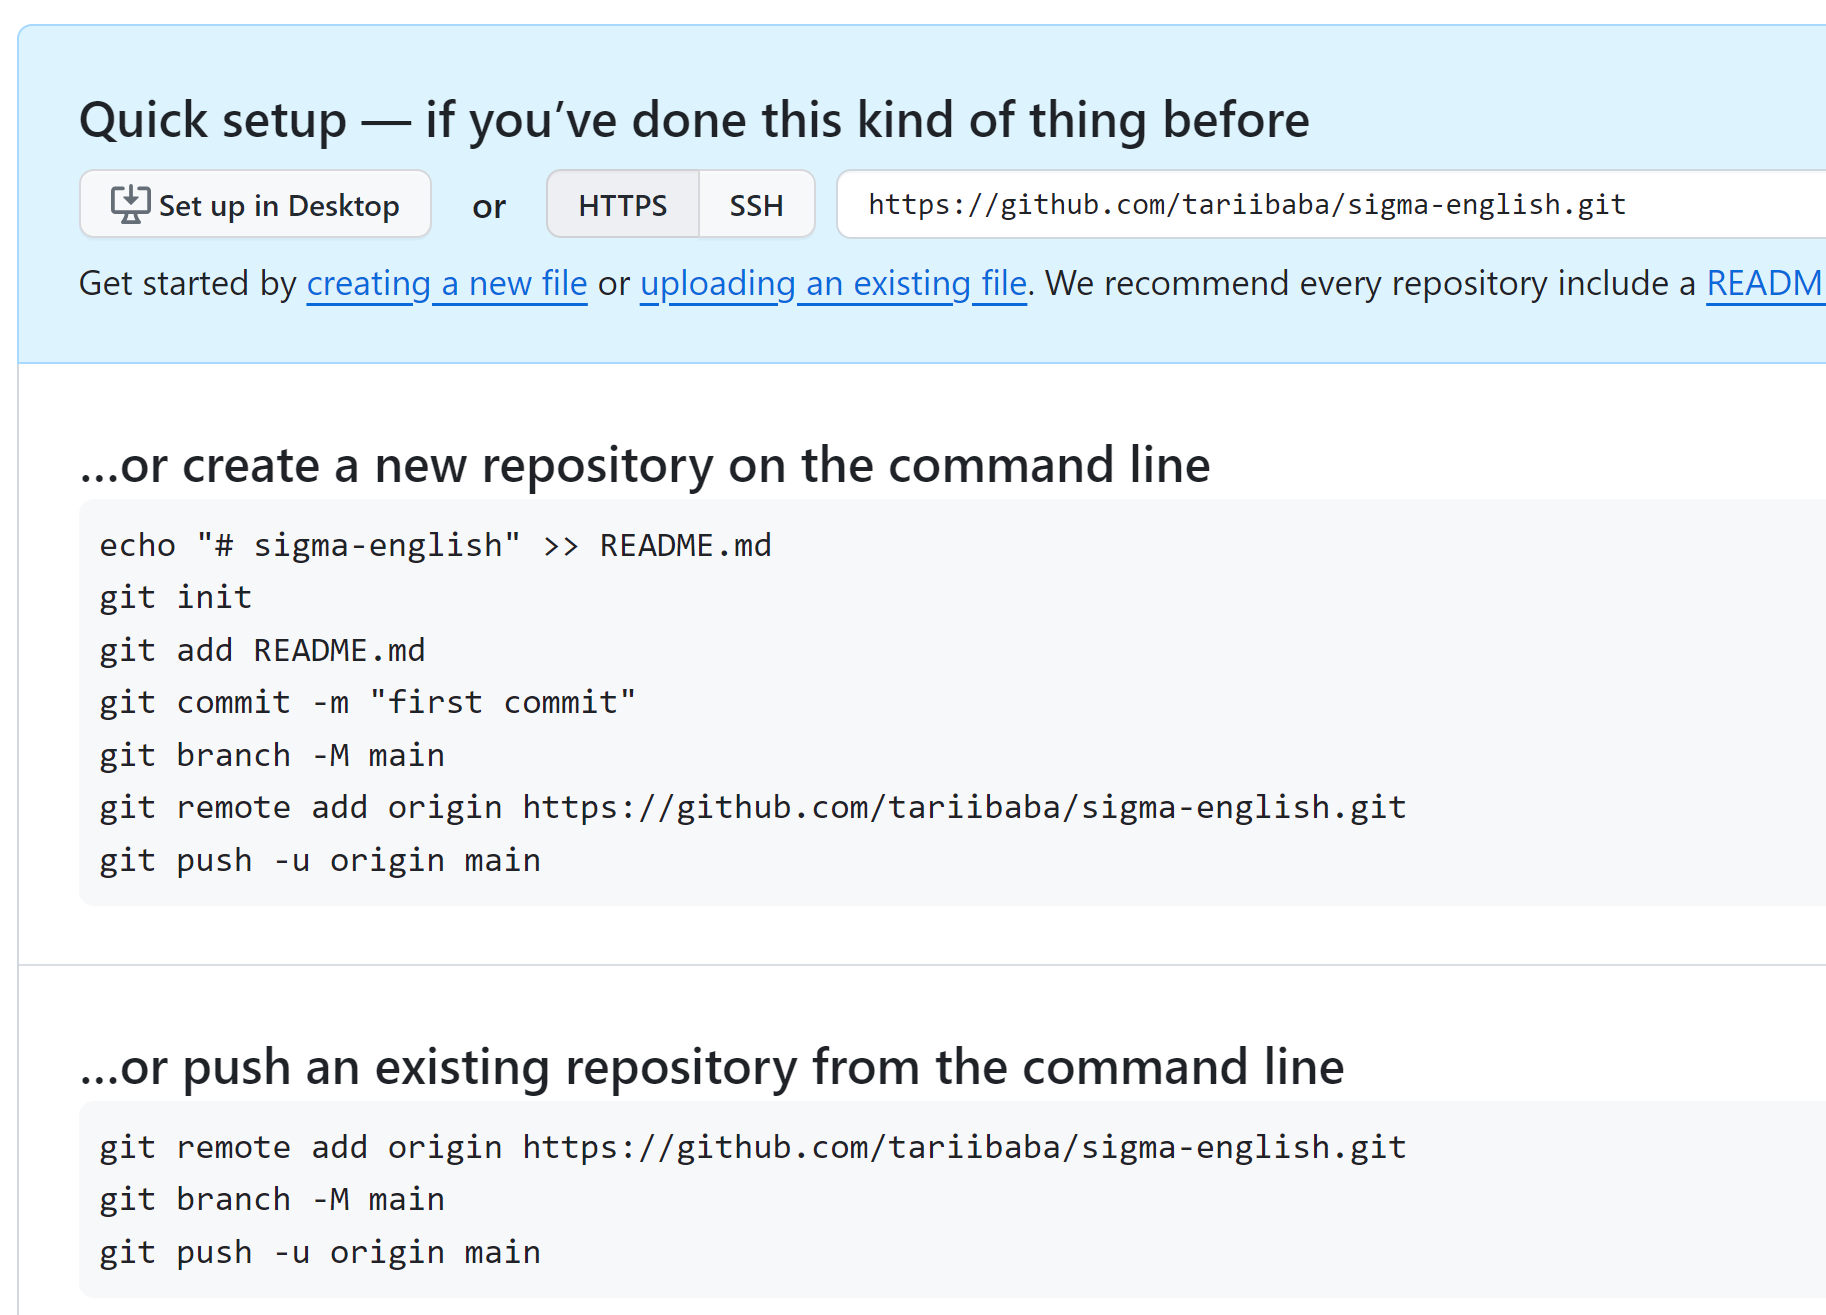
It’s the old-school way of publishing your code to GitHub. Create a repo, enter name and details, create remotes…

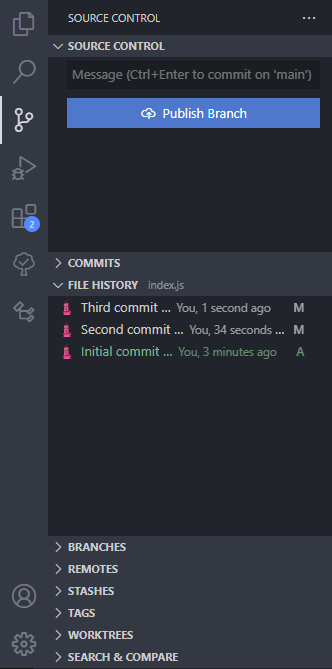
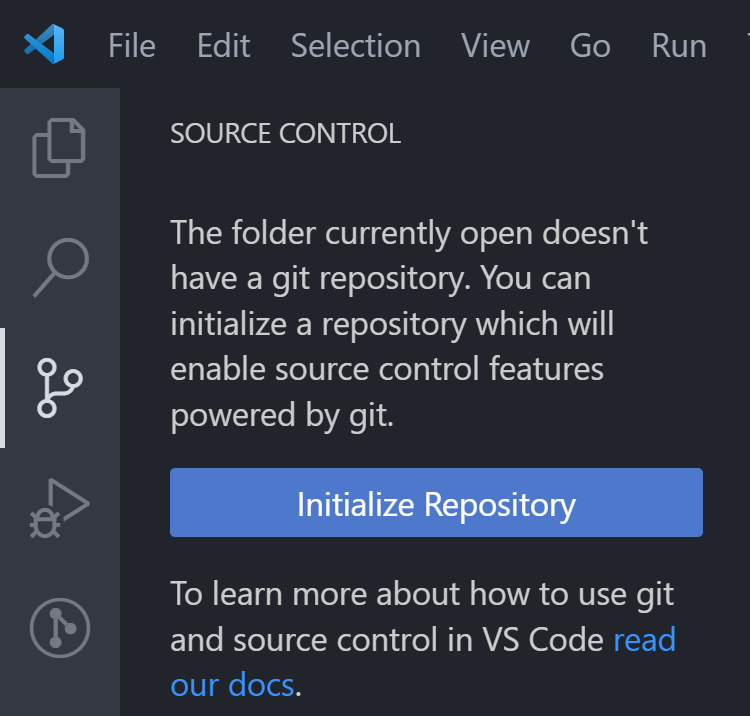
With VS Code you don’t need to do this anymore. From the Source Control panel you can now quickly publish any local repo to GitHub in just 2 clicks.

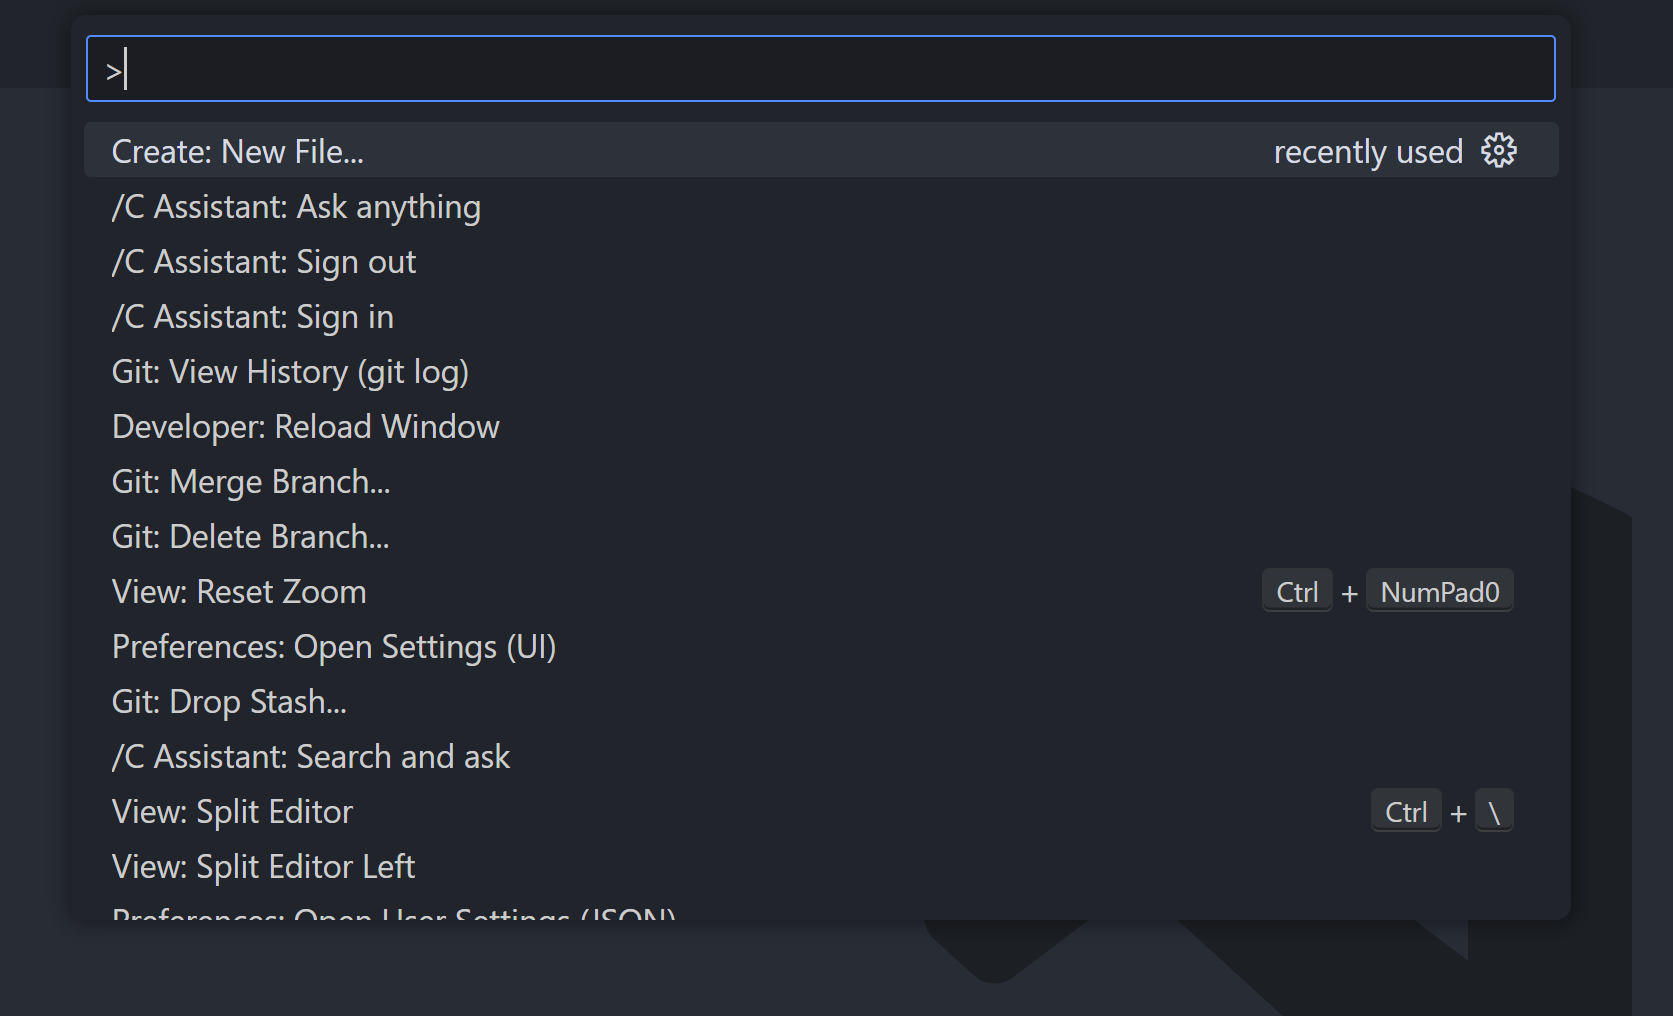
And forget git init: creating the repo is even easier with a single click:

You can safely forget about git init

Quickly commit with Ctrl + Enter:

Now easily publish your repo in seconds:

Okay this is definitely more than “seconds” — but that was the Internet connection’s fault. Ideally it should be like this:

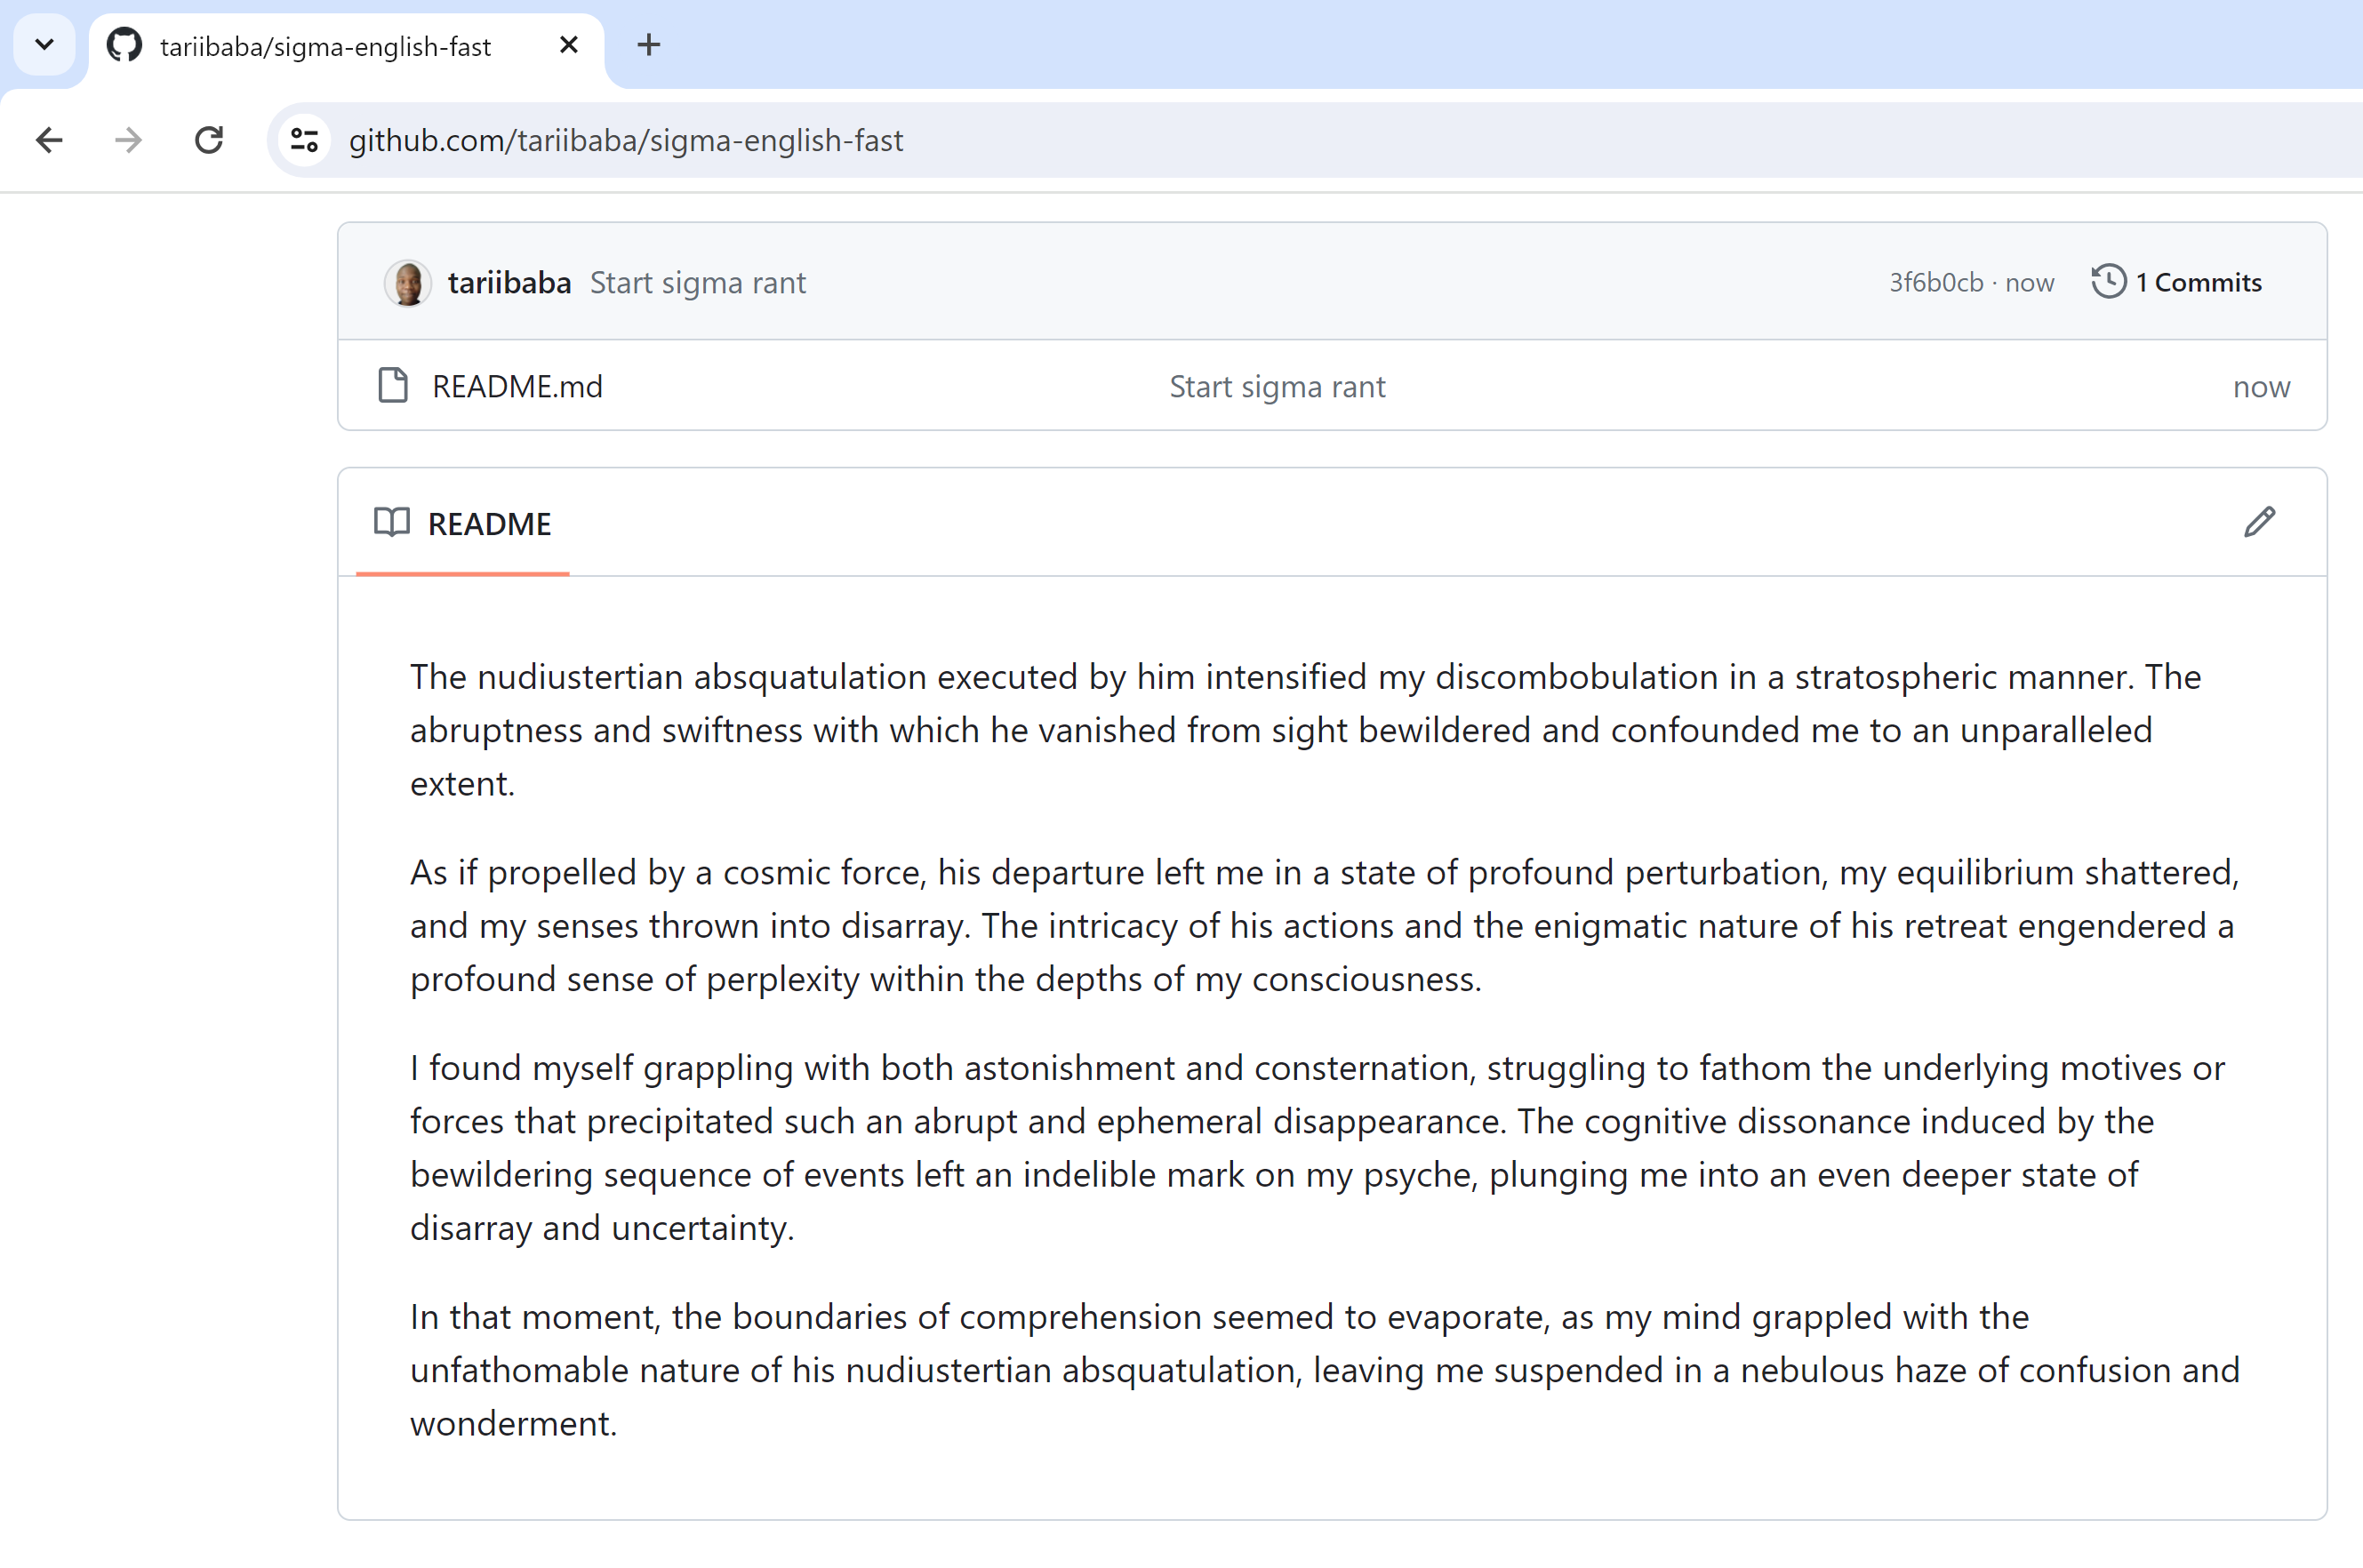
Now we can enjoy our Sigma English rant directly on GitHub:

2. Workspaces for multi-codebase coding

There was a point when I couldn’t do without this feature.

And you won’t when your project is sprawling with numerous inter-connected codebases stored in different folders that all make an important part of the system.

In one of our projects, we had at least 3 folders.

  1. One folder for Firebase-y stuff: Functions, DB security rules, and more.
  2. One folder for the Next.js website/app.
  3. One folder for the cross-platform app codebase.

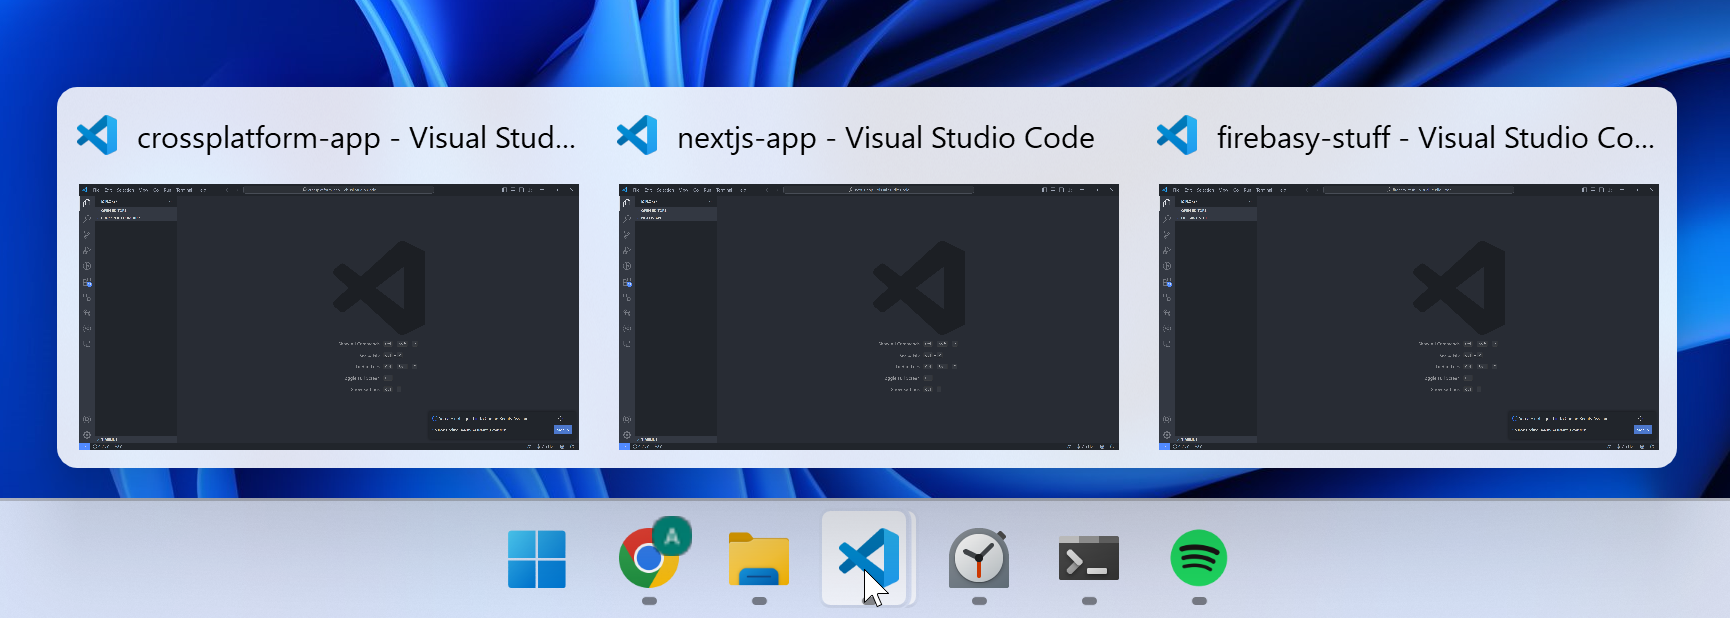
Imagine the pain of having to switch back and forth between these in 3 open VS Code windows; opening terminals here and there, searching for the wrong file in the wrong codebase, mixing up your Alt + Tab sequence with other open apps, along with the mental confusion and delay it causes anytime you switch apps.

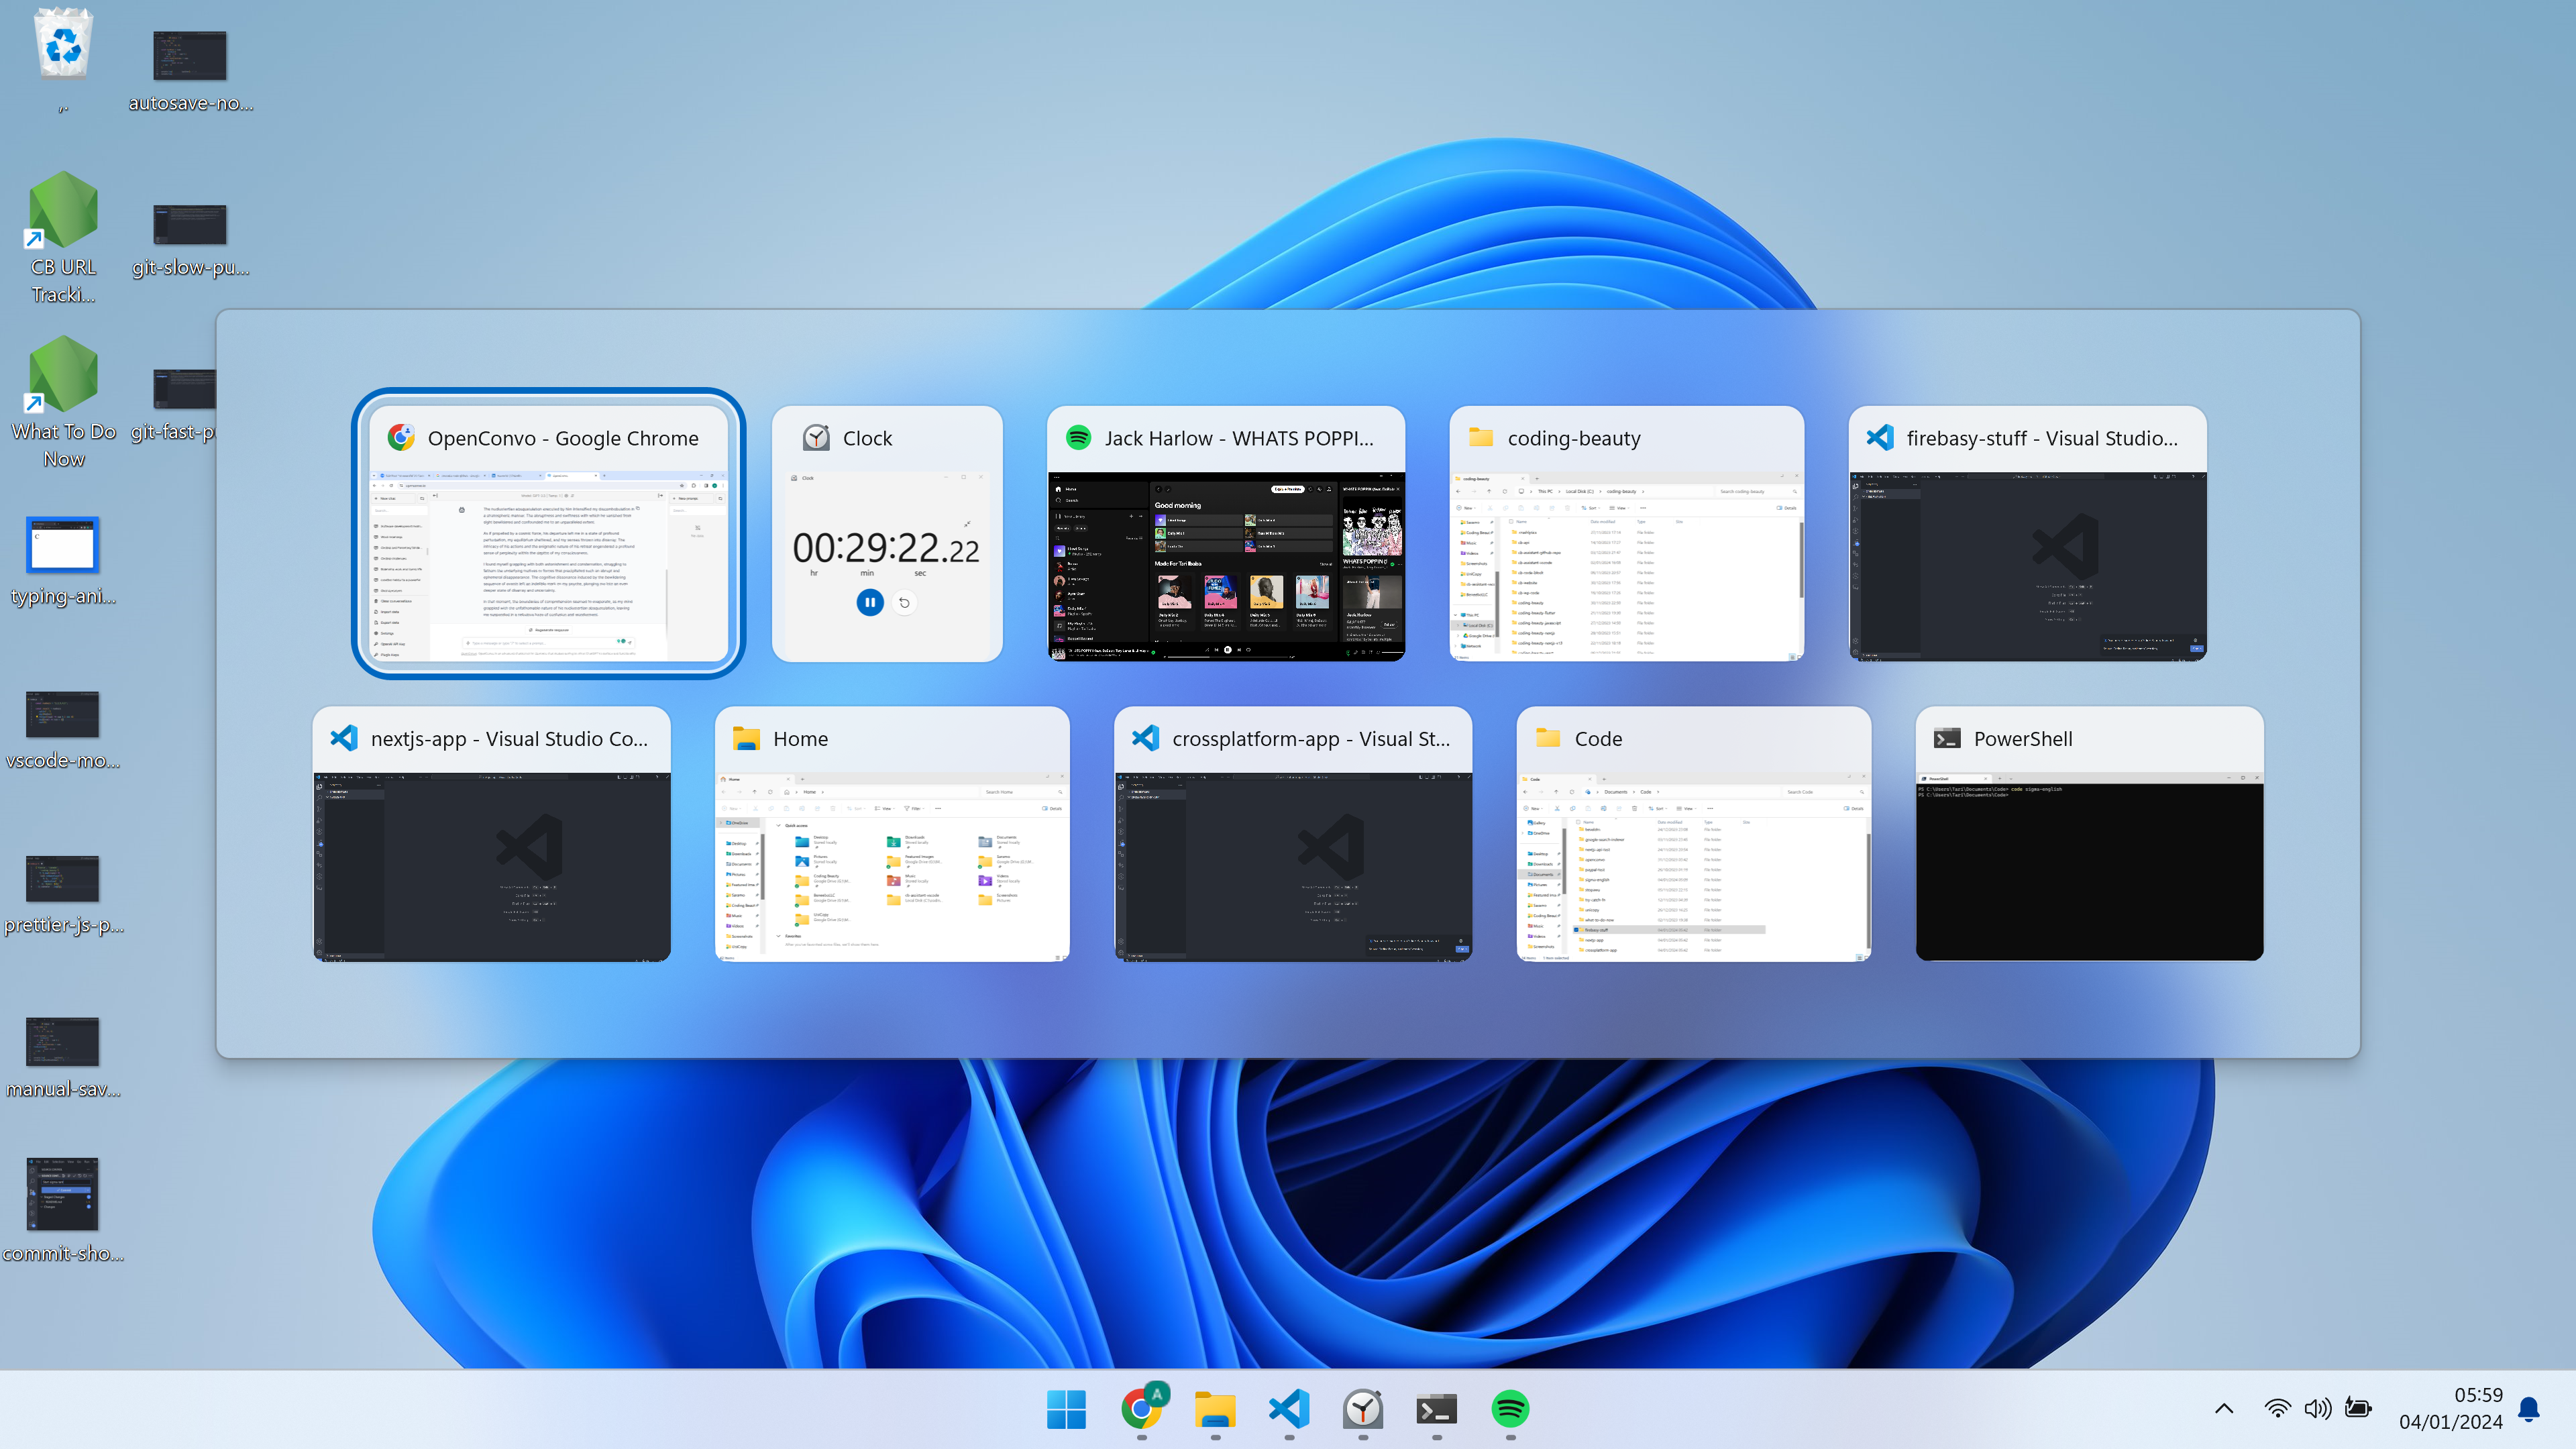
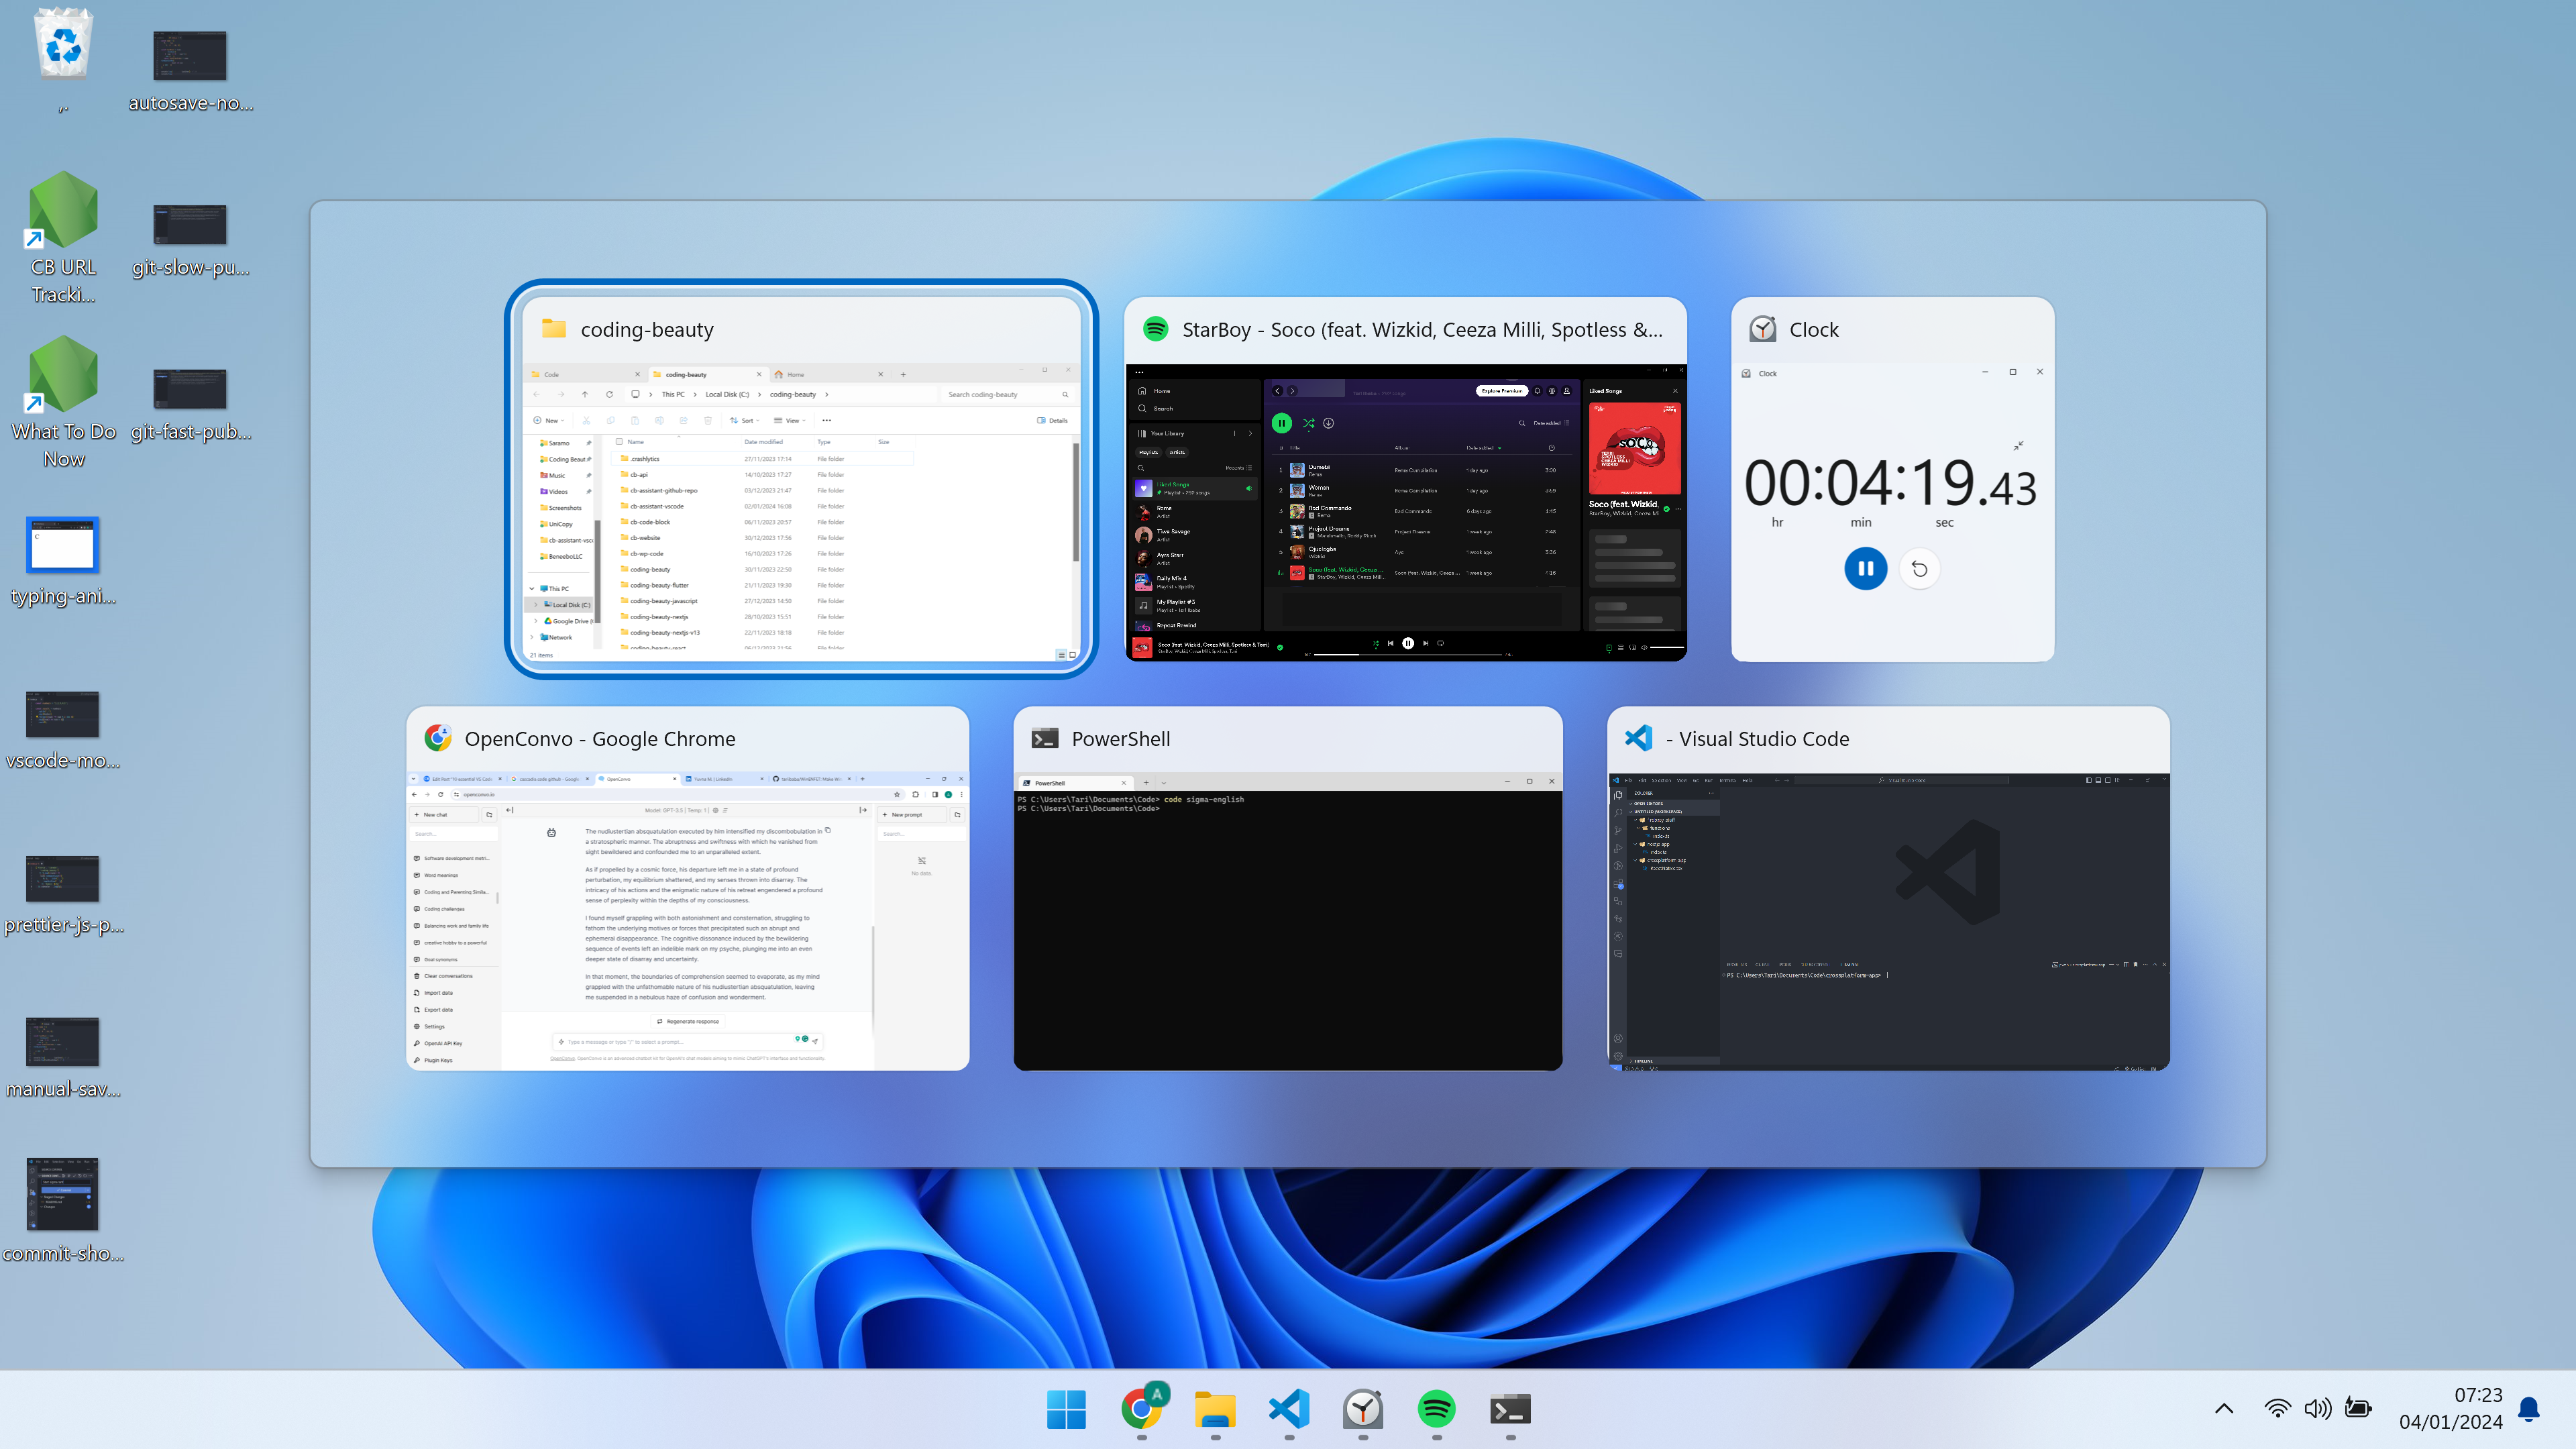
And don’t forget this 👇. This is a pain.

The pain of clicking twice and having to select the correct window based on their titles.

This is why we need workspaces — one window with all the files and subfolders you need.

Sidenote: And if you’re a Windows user struggling to manage your File Explorer you probably want to try this tiny utility (WinENFET).

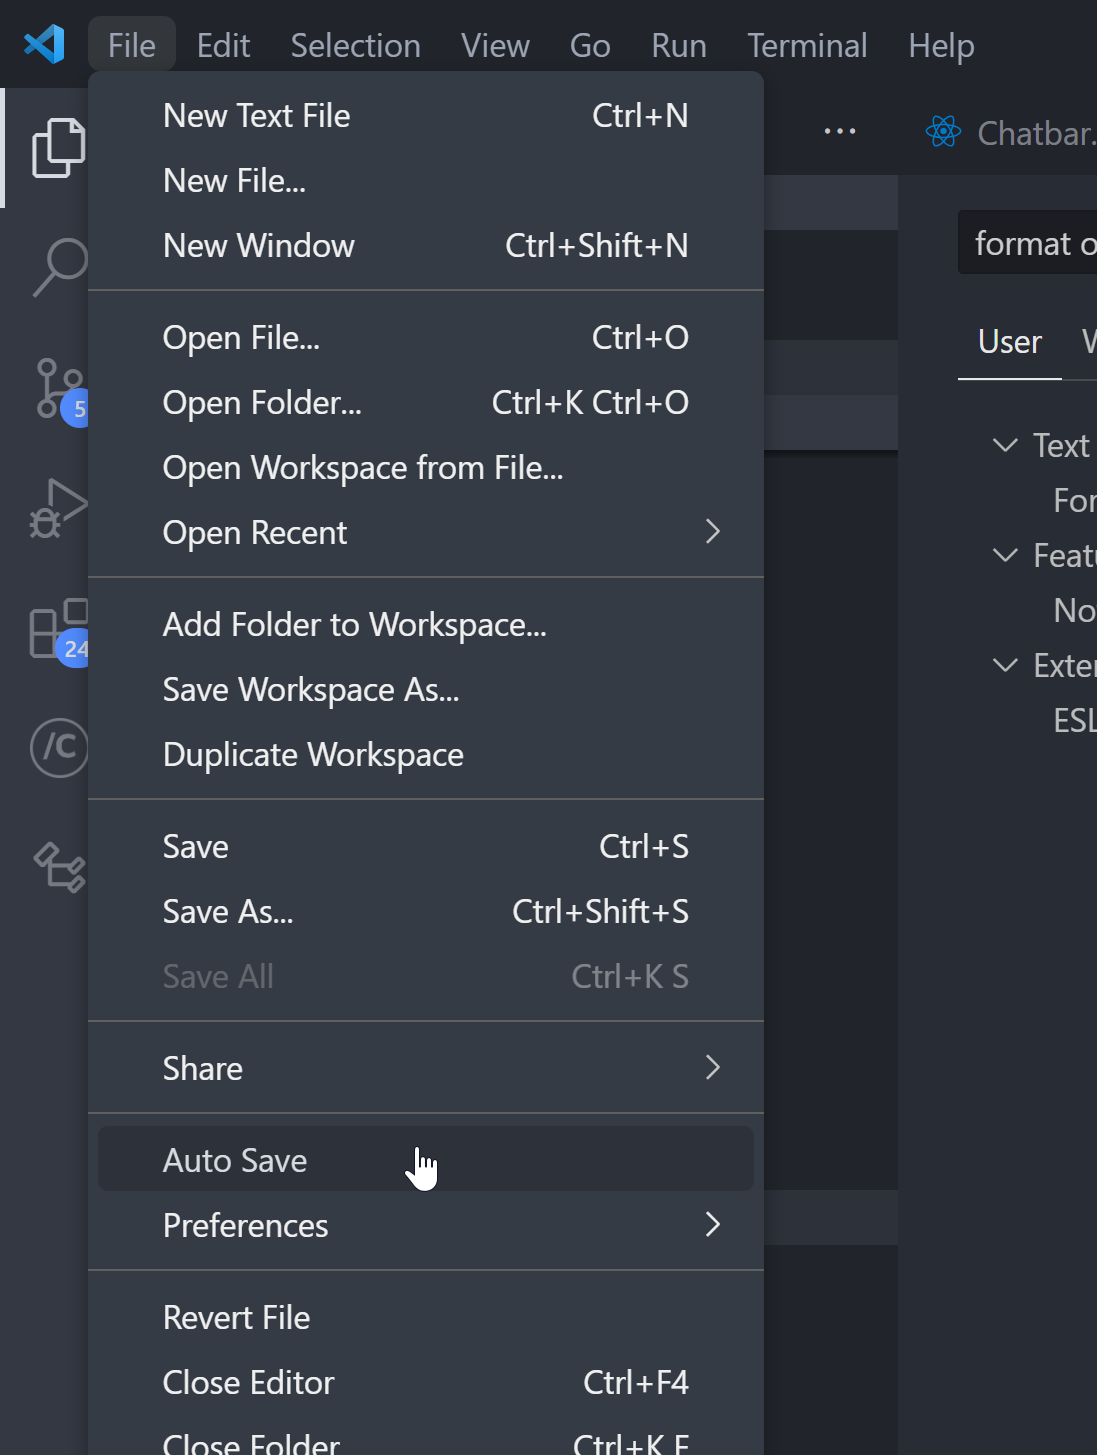
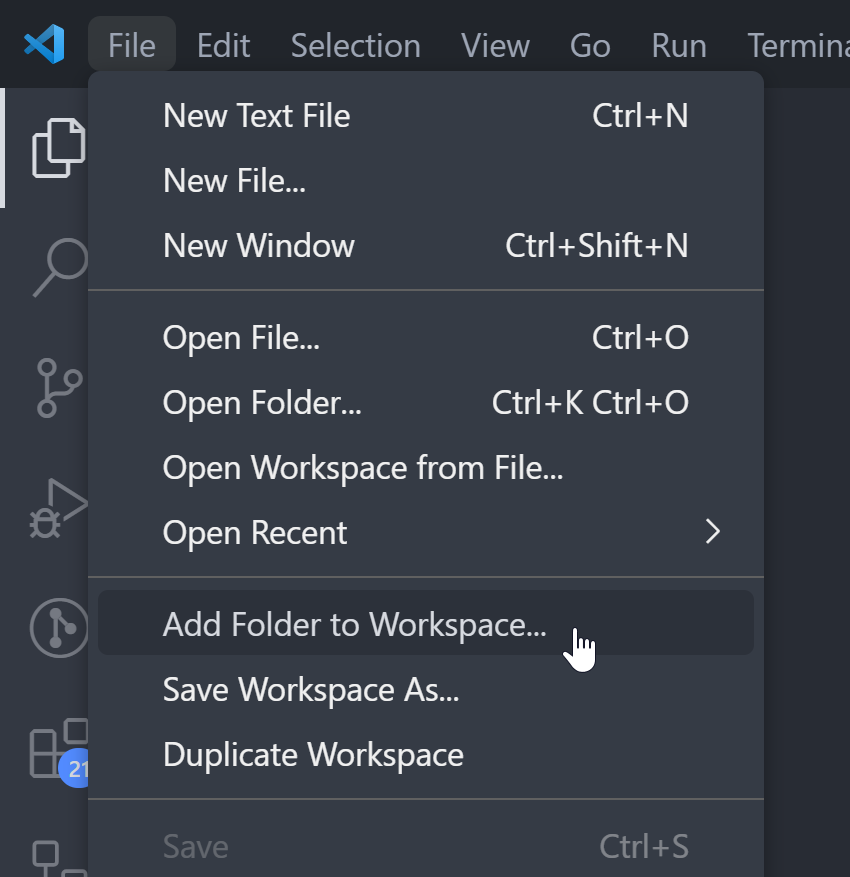
Every folder is a workspace to VS Code, so you can easily add more folders with File > Add Folder to Workspace…

When everything is done you’ll have all the folders you need and their files easily accessible on the File Explorer pane.

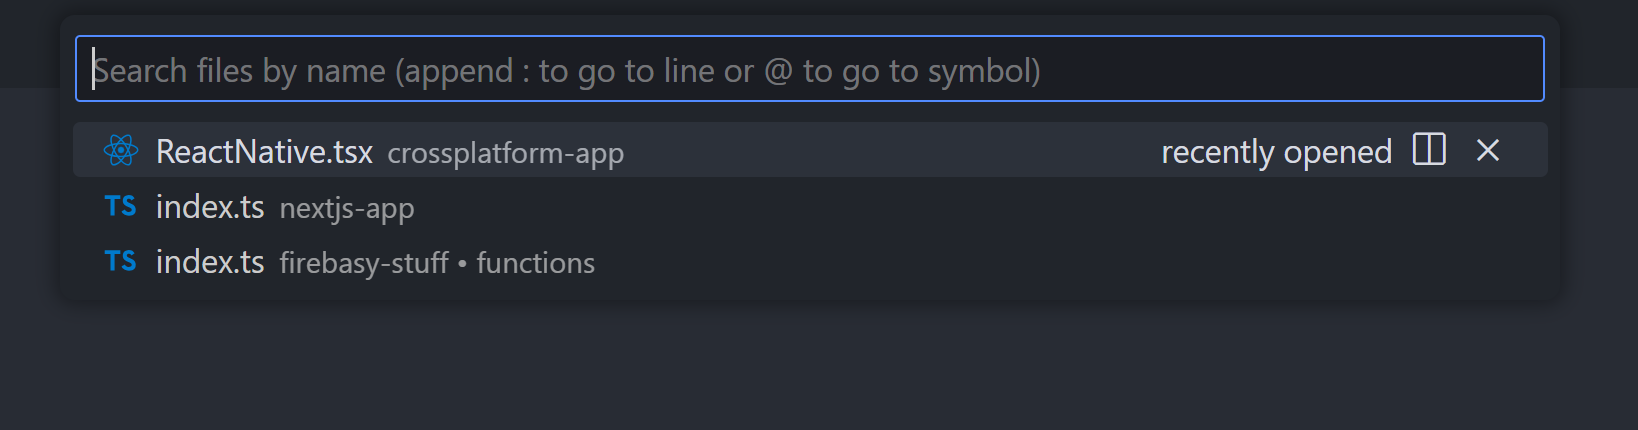
And when you search for files with Ctrl + P or Ctrl + Shift + F, it’ll apply to every file in all the folders:

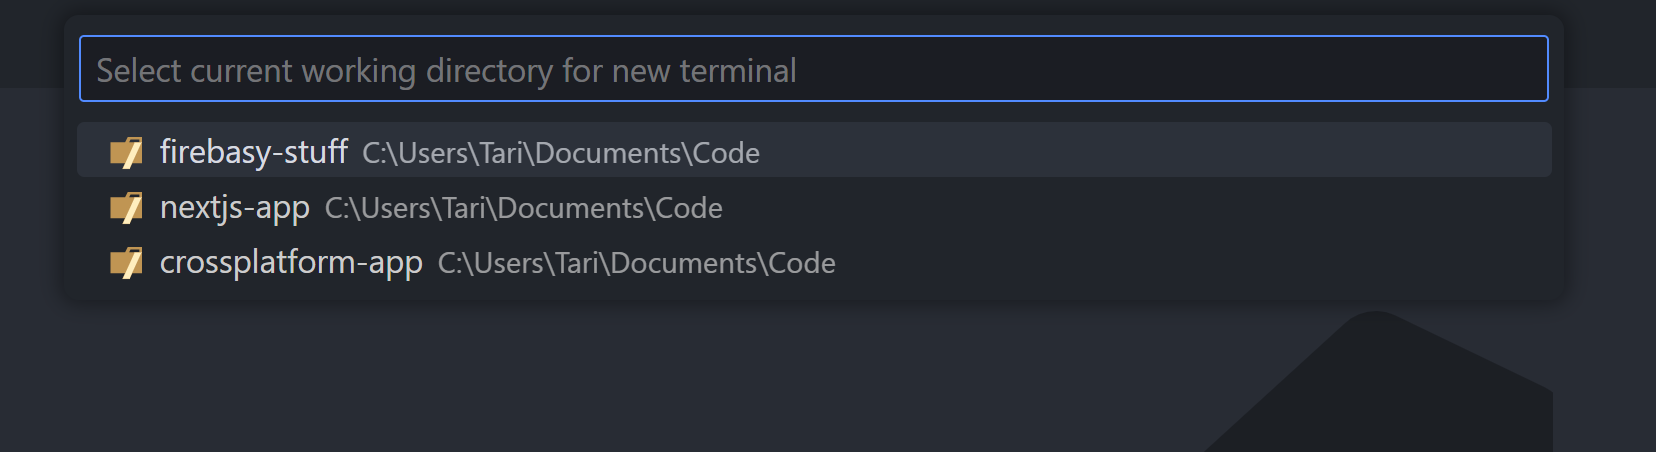
You can also rapidly create new terminals with any of the folders as the working directory.

With this and Win 11 22H2 Tabs we’ve easily cut our open windows in half.

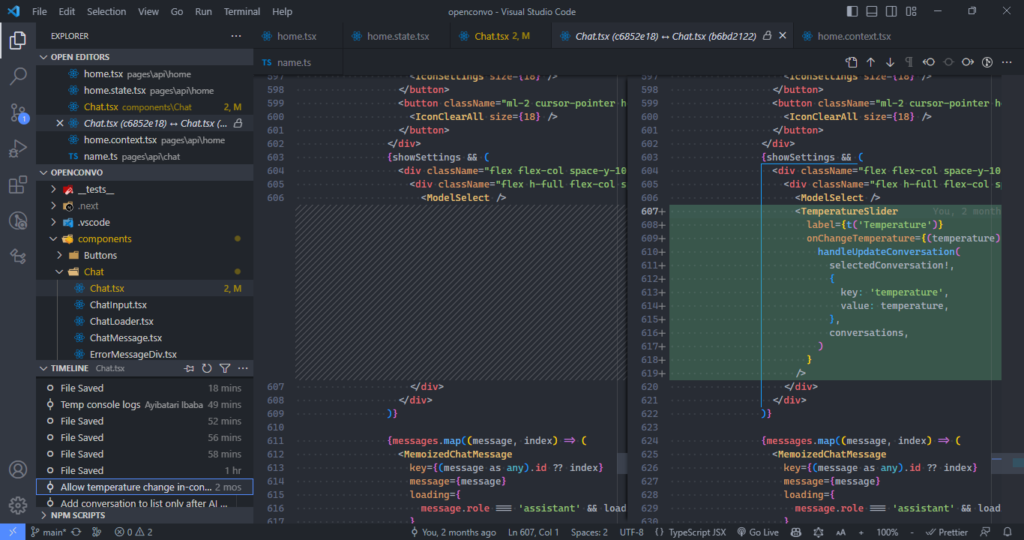
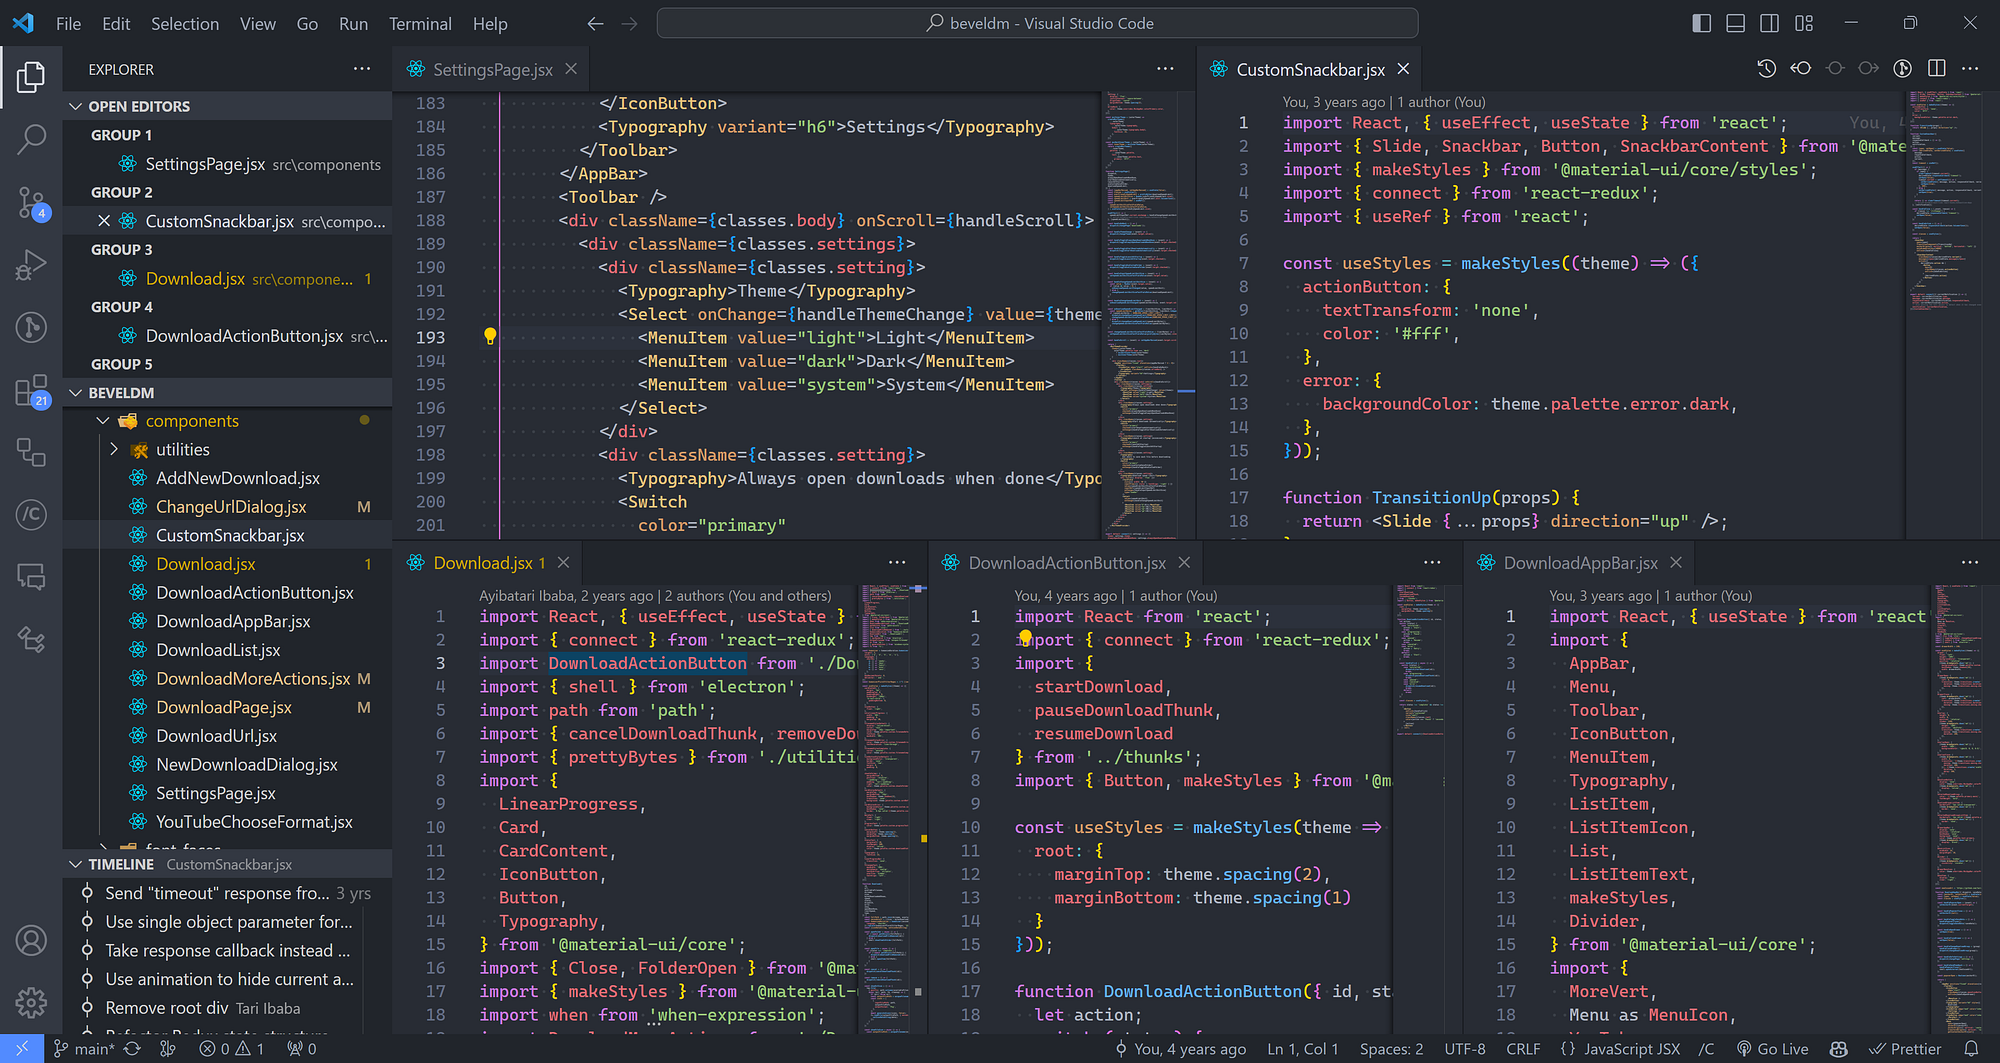
3. Power editing with side-by-side view

And when you need to work with multiple of those workspace files at once? Split mode has you covered.

I once ported a Flutter Dart class to its JavaScript equivalent and this feature made things much easier and faster.

You can also do this with one of the View: Split Editor... commands.

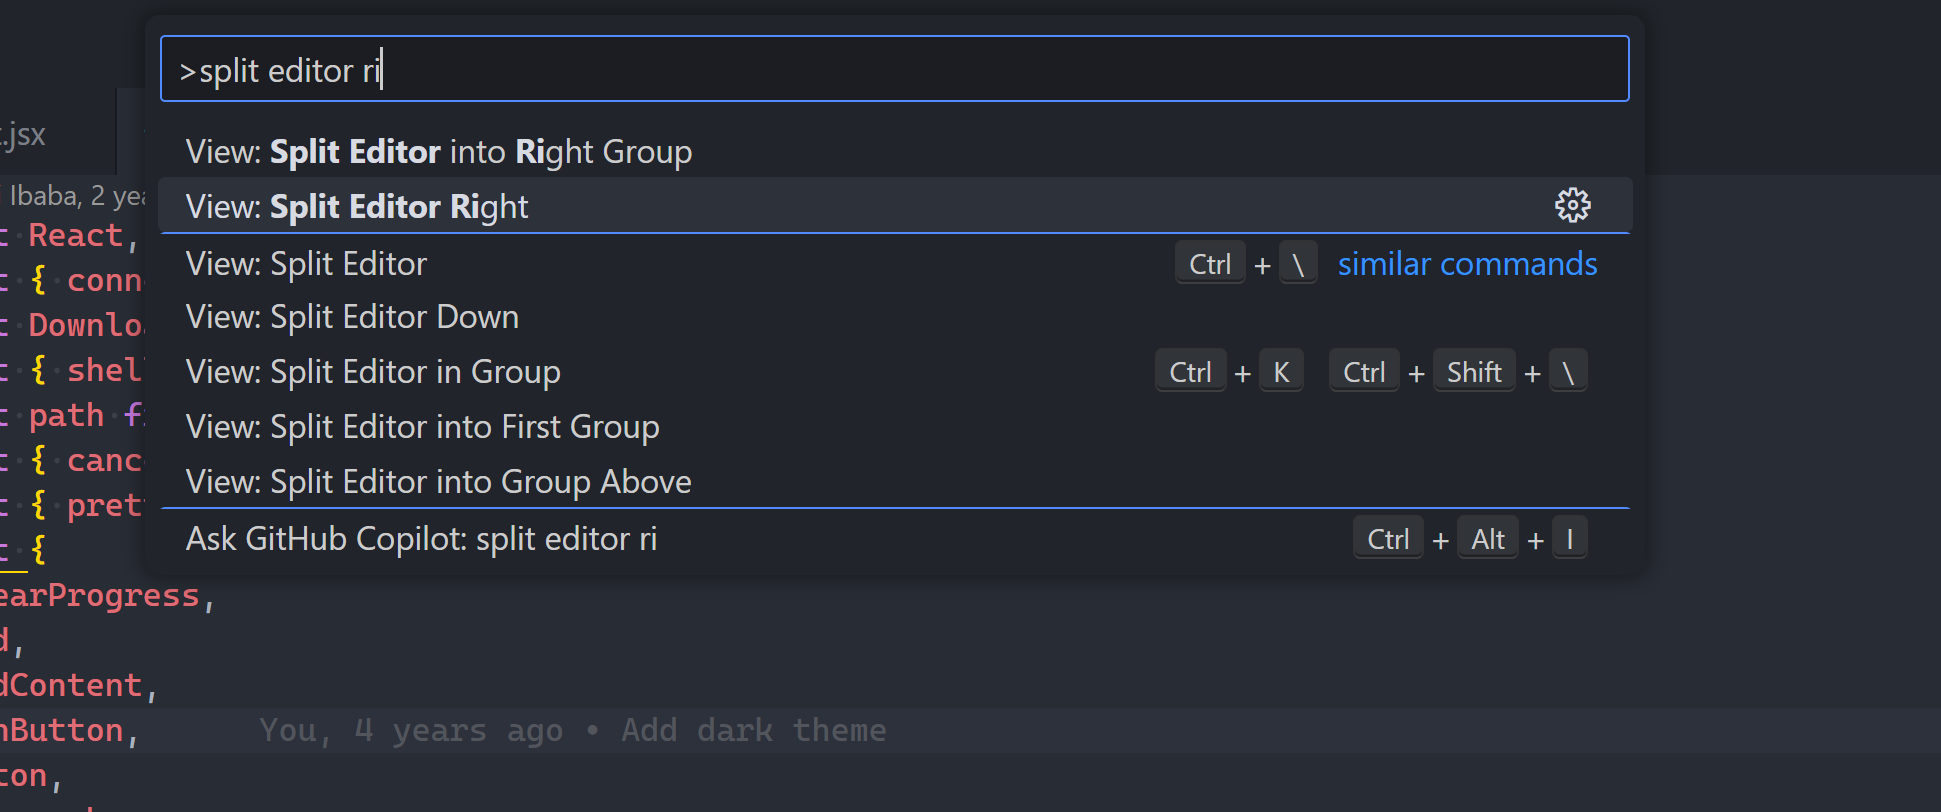
Split them down or split them right:

Master coder at work.

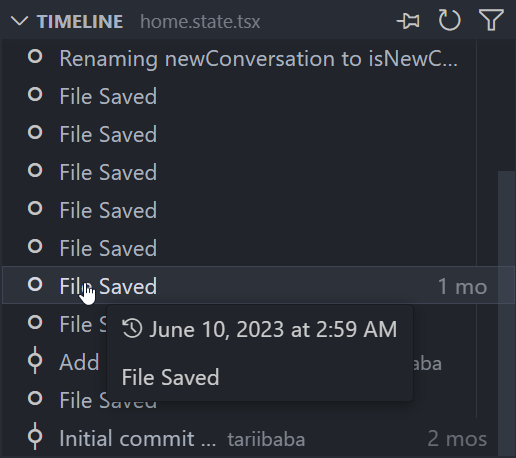
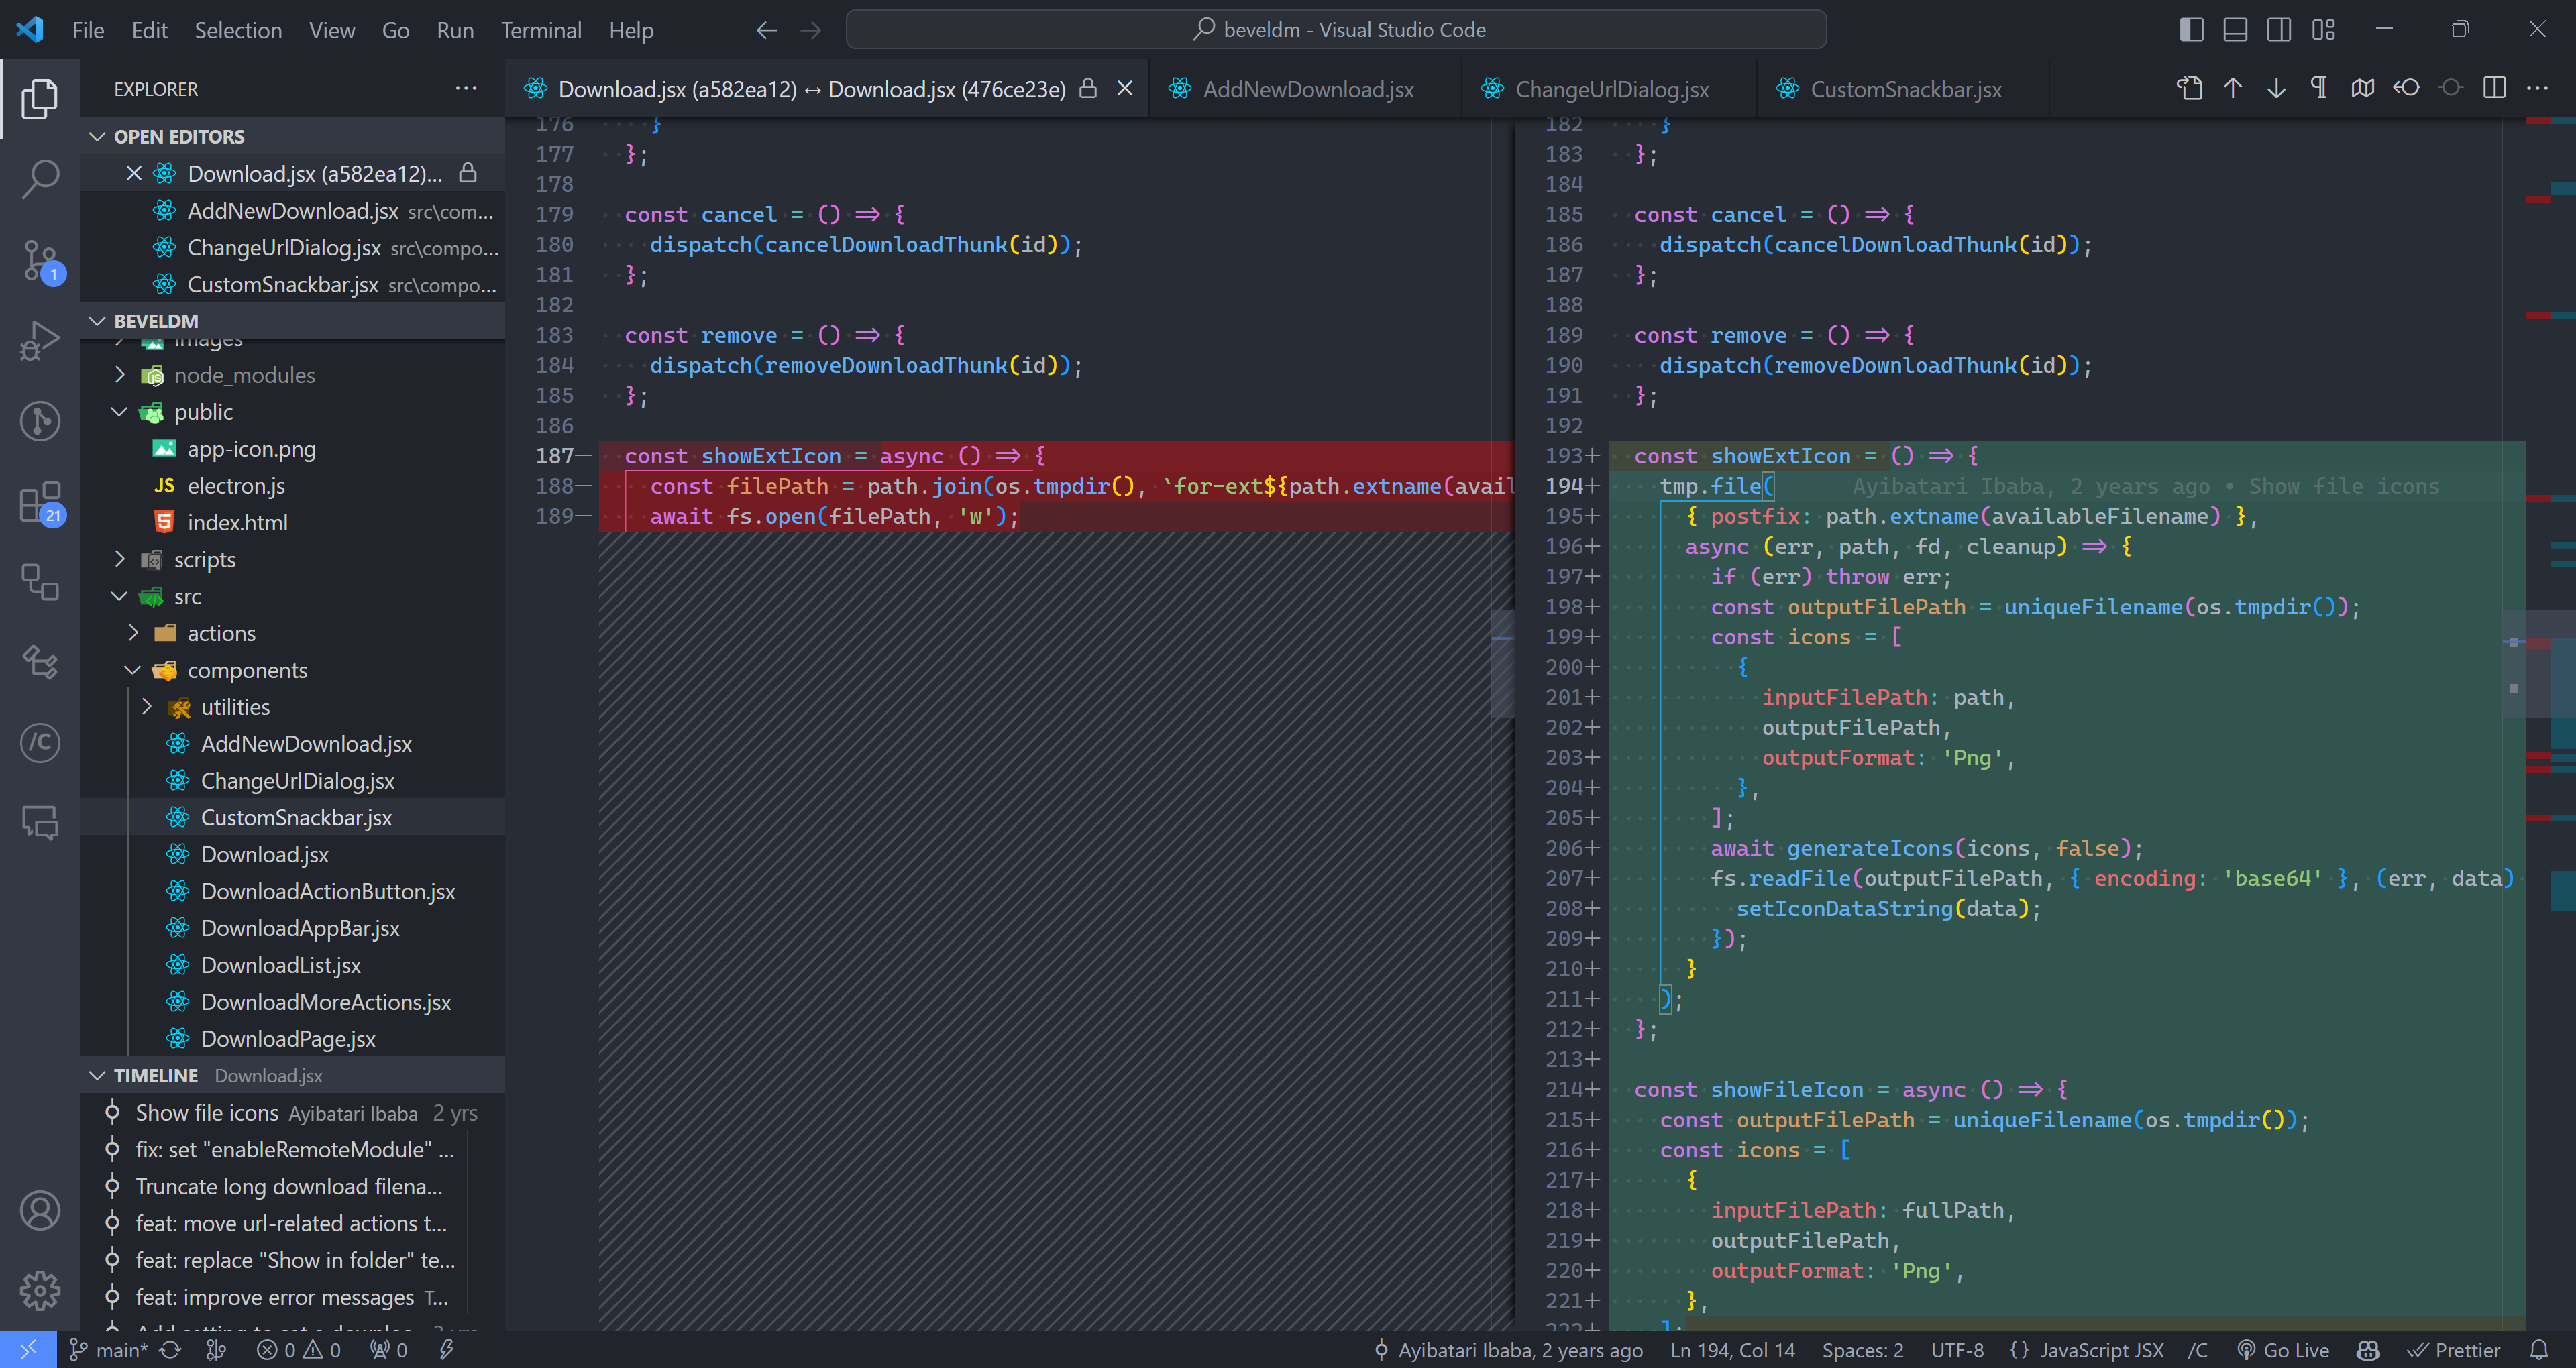
VS Code also uses this split view to show changes between different file versions saved in the Timeline view or source control.

4. Rapidly copy any line

Please don’t tell me you still drag your mouse over the line and Ctrl + C.

Look, copying a line is super easy in VS Code.

It’s not like most other text editors; it’s a clean productivity beast! It had to be to get a permanent spot on my taskbar.

Just put the cursor on the line — anywhere — and Ctrl + C.

Whenever you do need to highlight the line you can always use Ctrl + L:

Press it again to highlight more lines below.

And when you just want part of the line you can use Shift + Left / Right to highlight one way or the other.

You can also use Ctrl + X to quickly cut the line where the cursor is without any highlighting.

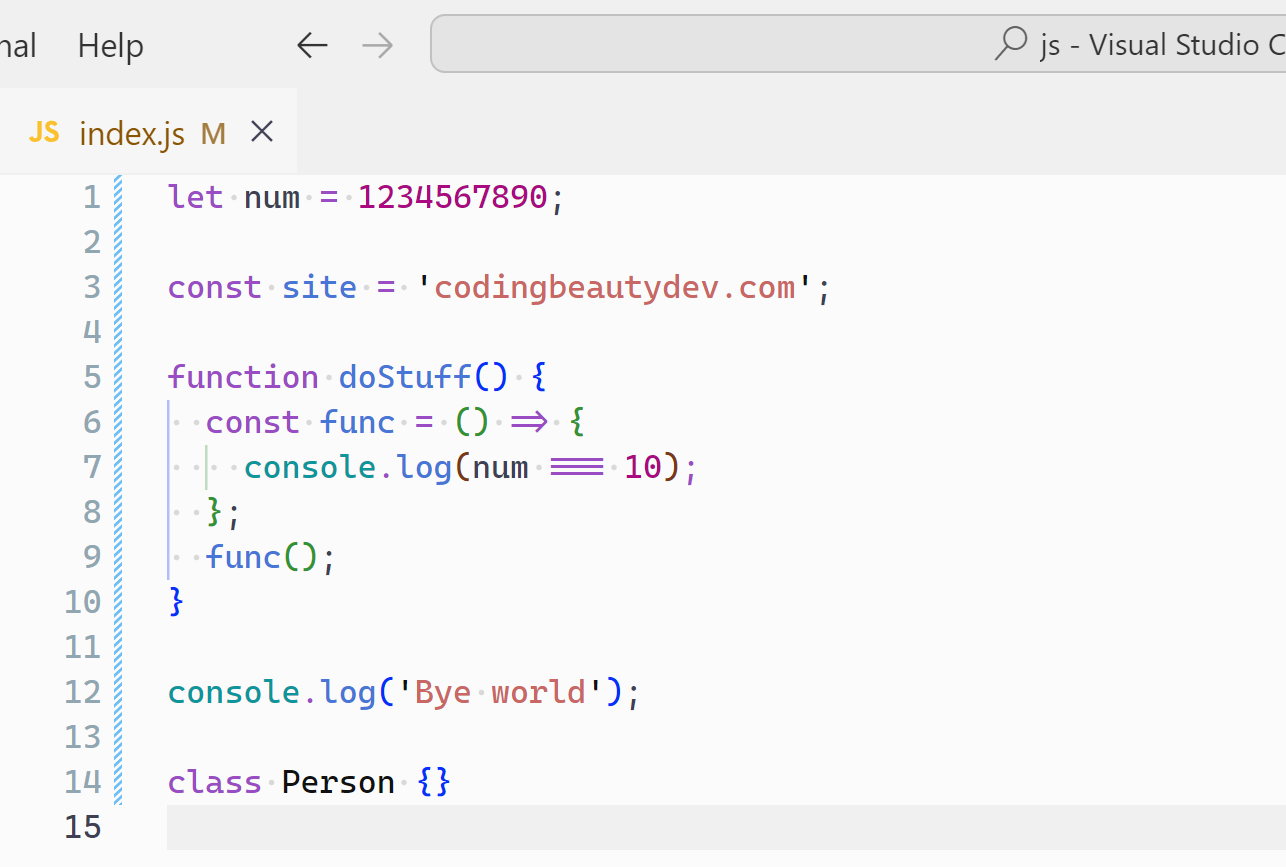
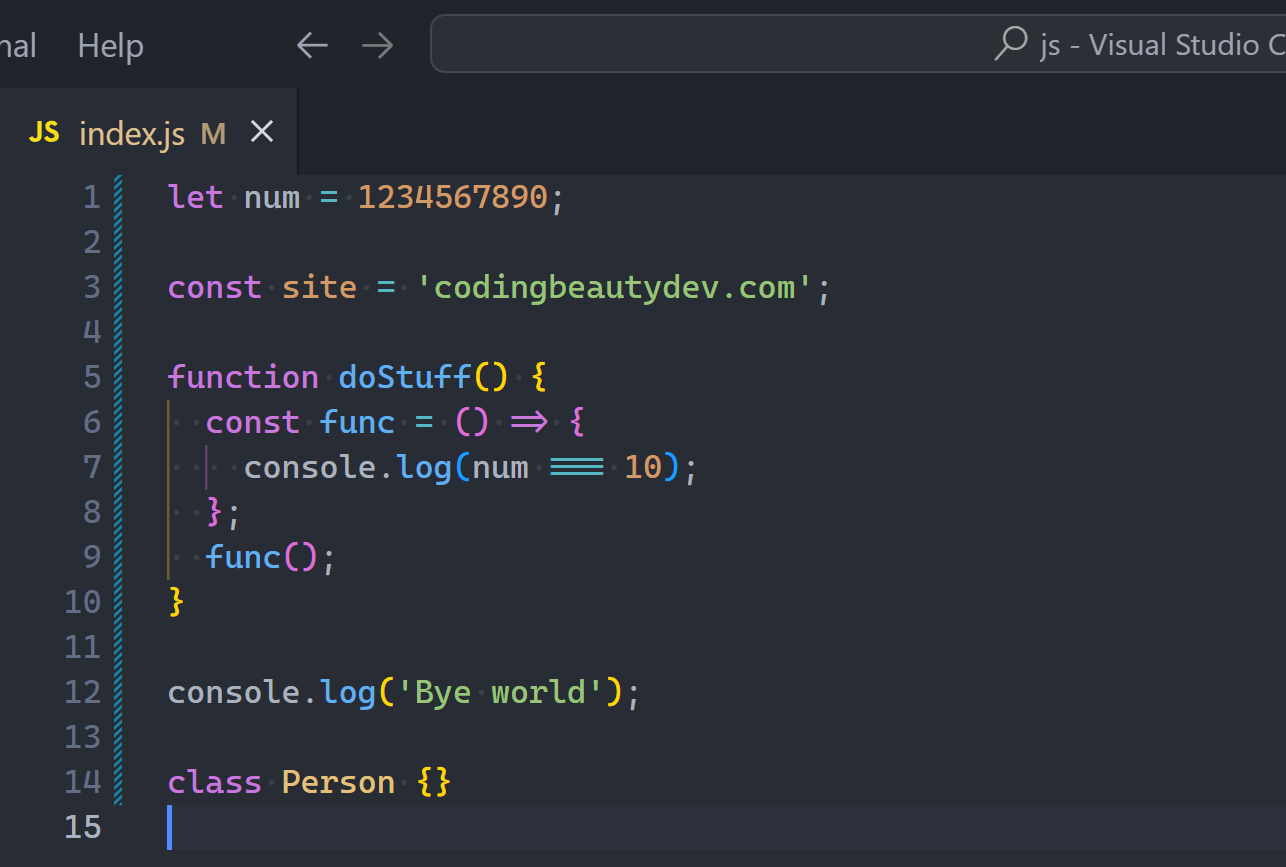
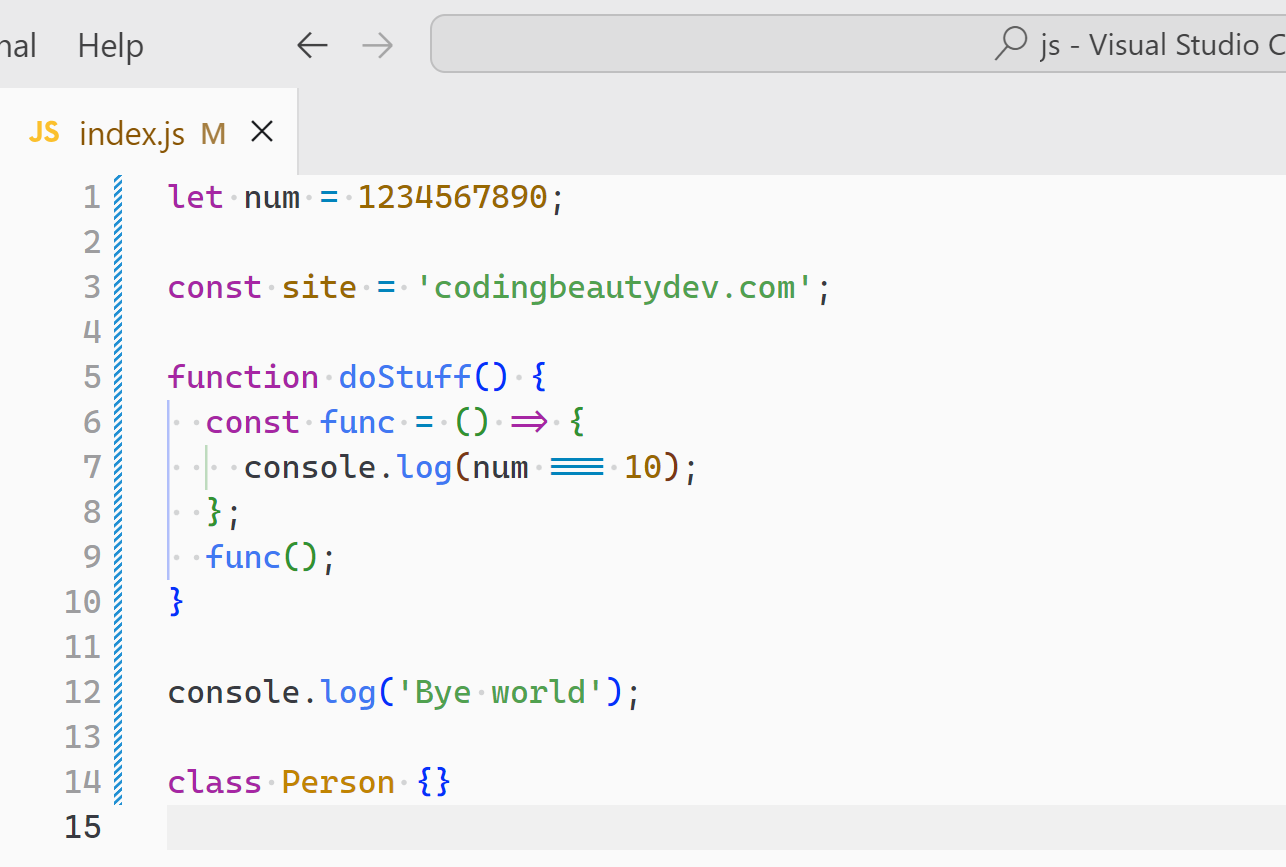
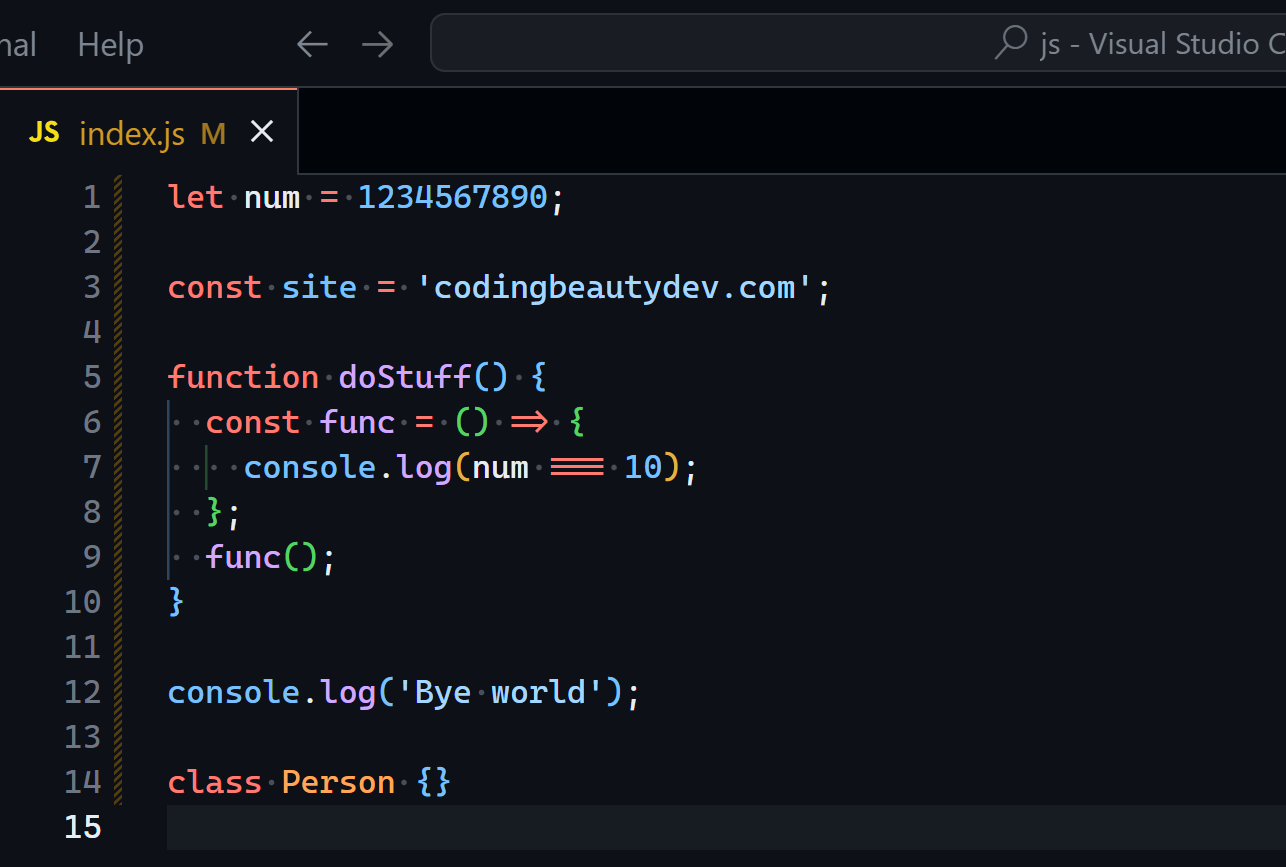
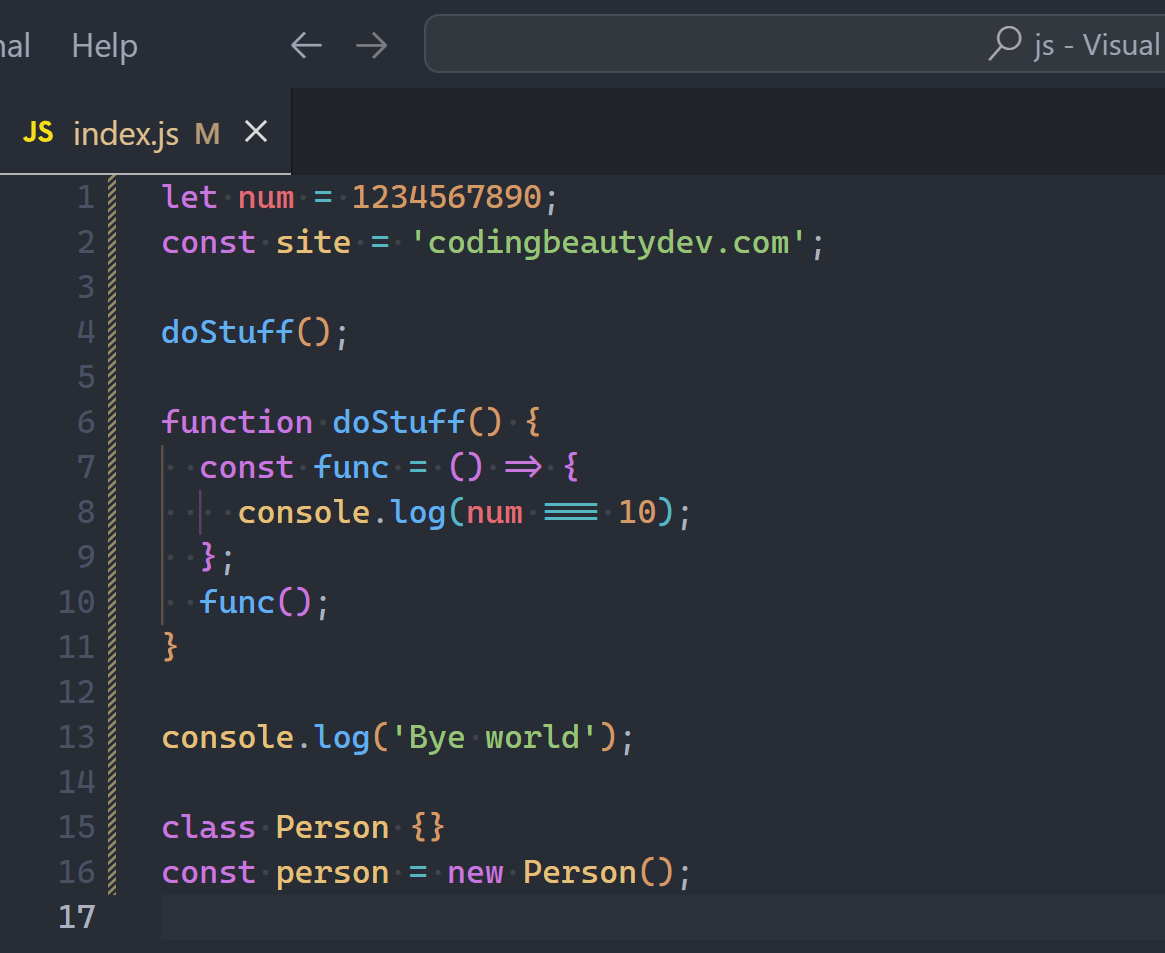
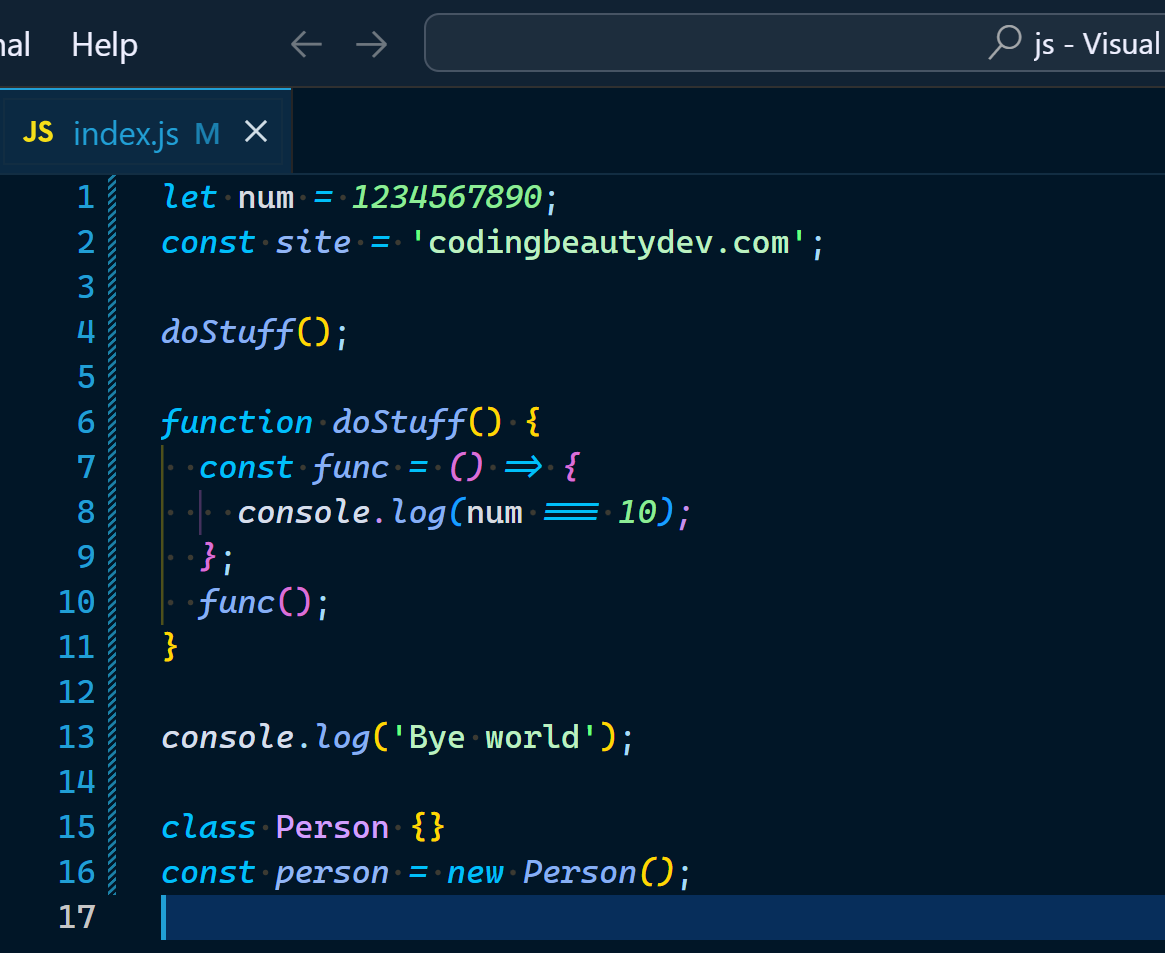
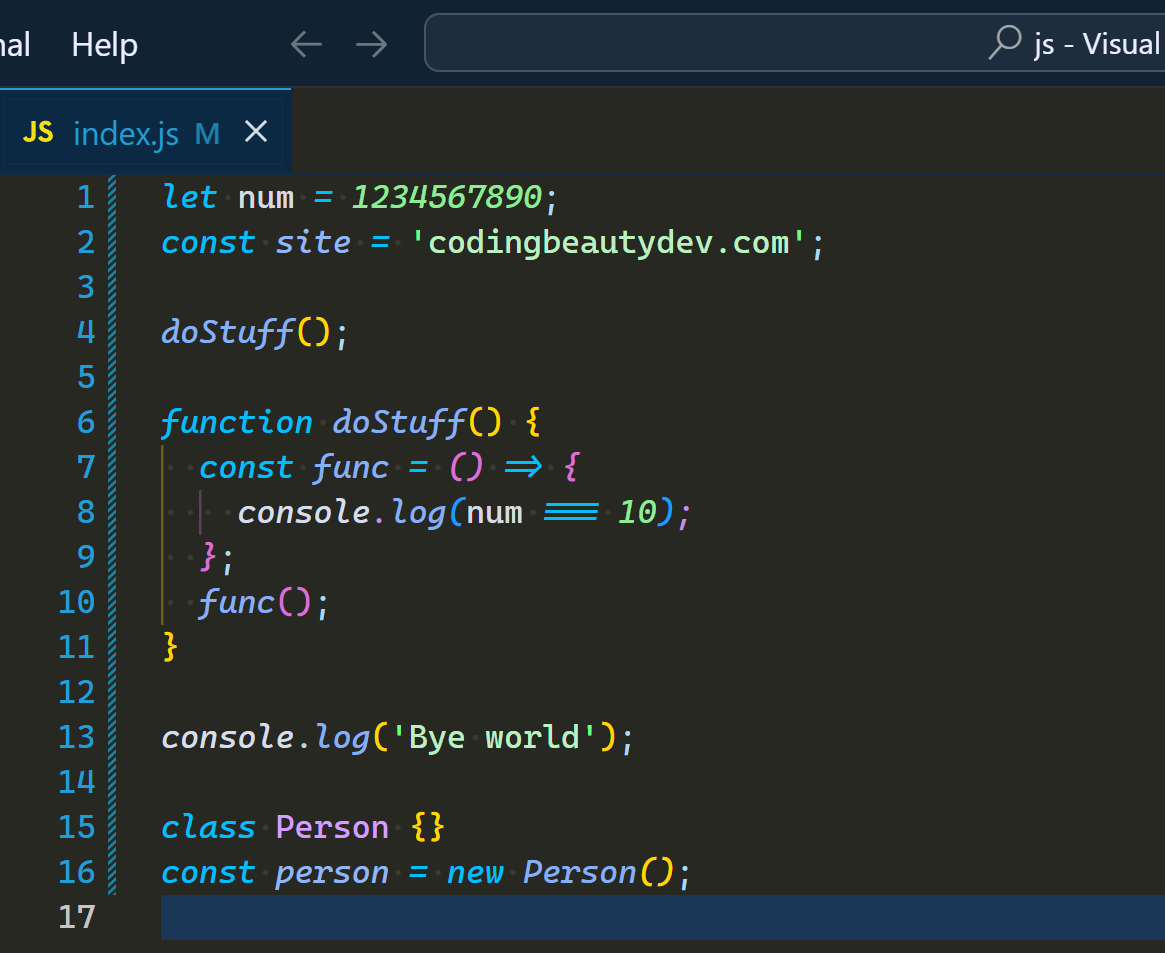
5. Move line up and down

But if you’re cutting just to paste somewhere else in the same file, then there’s no need to pollute the clipboard.

Simply use the Alt + Up/Down to move the line to wherever you want:

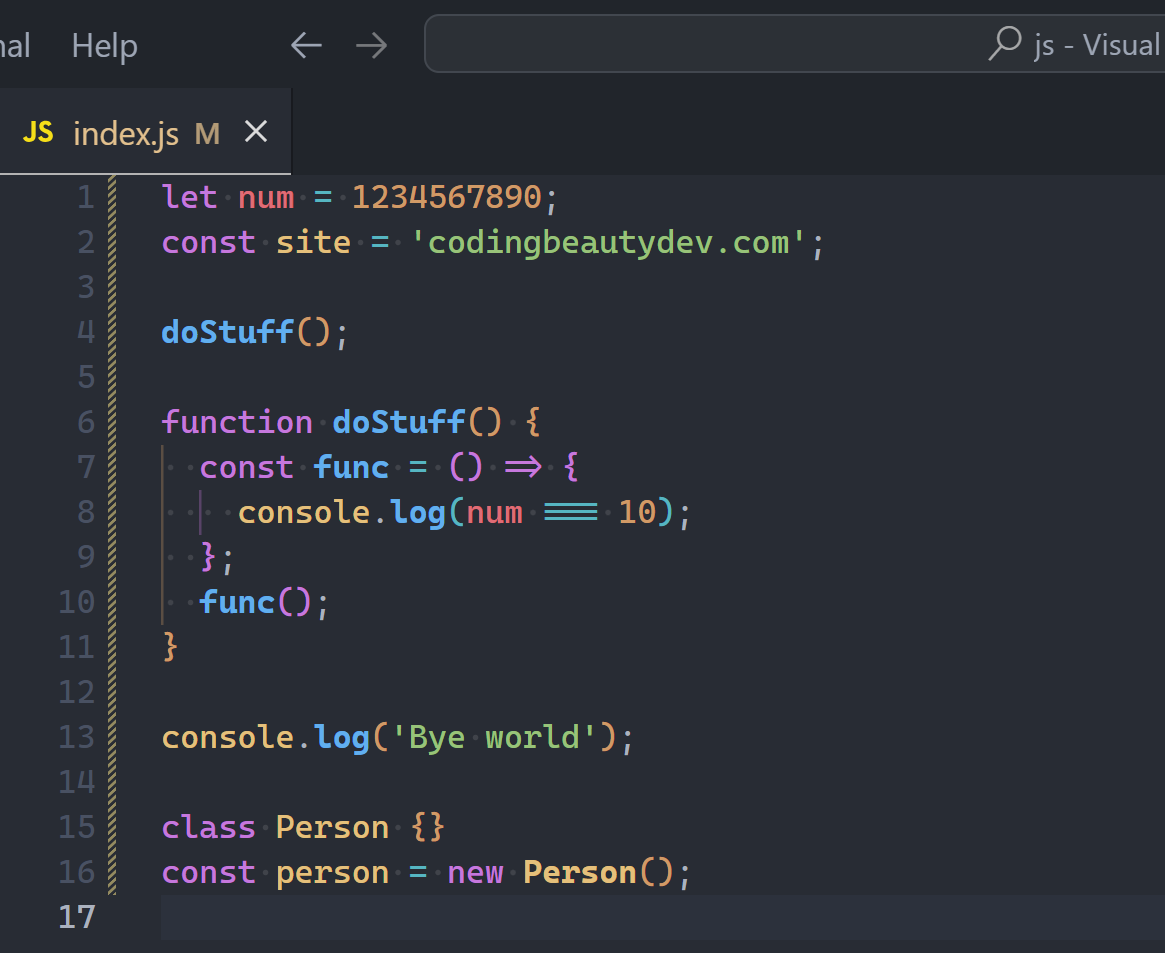
You can even move large selections of multiple lines up and down.

Including code folds:

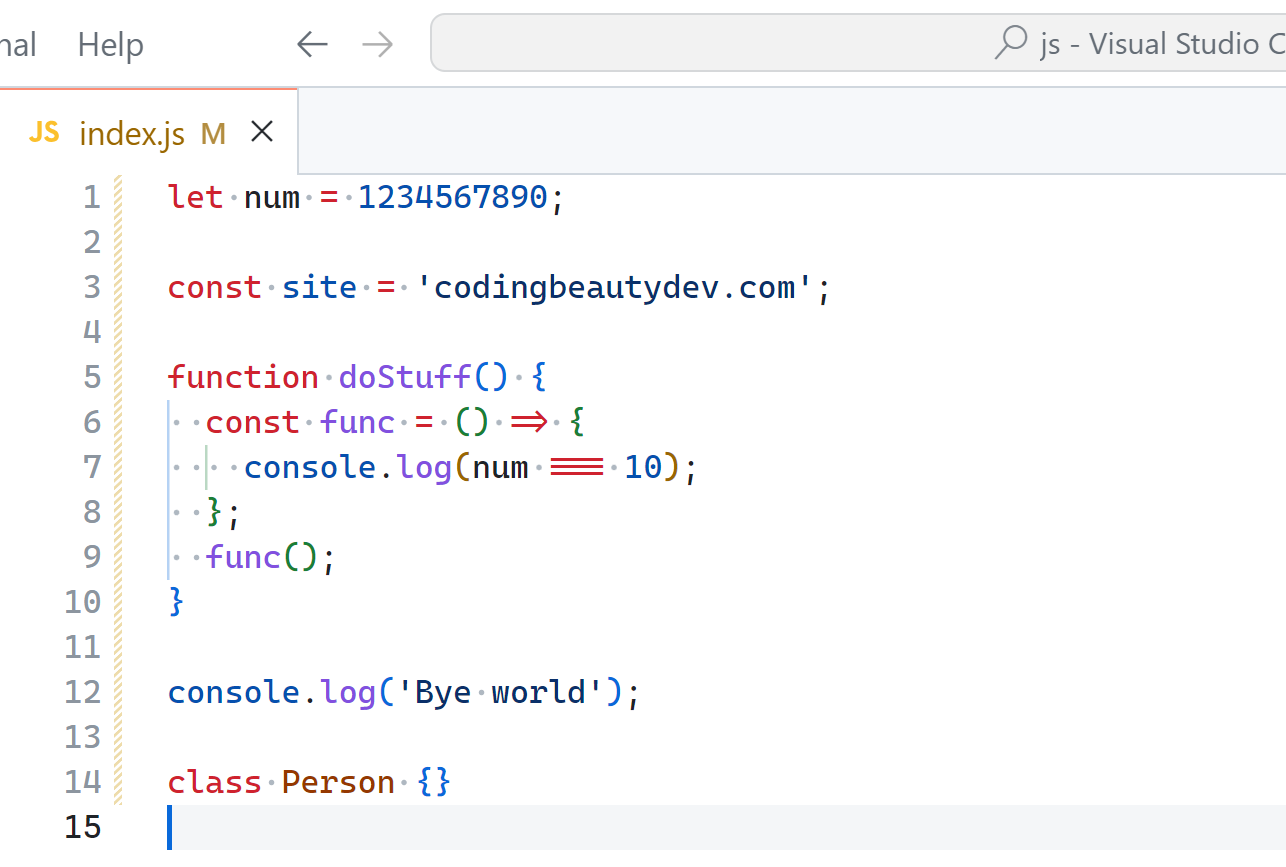
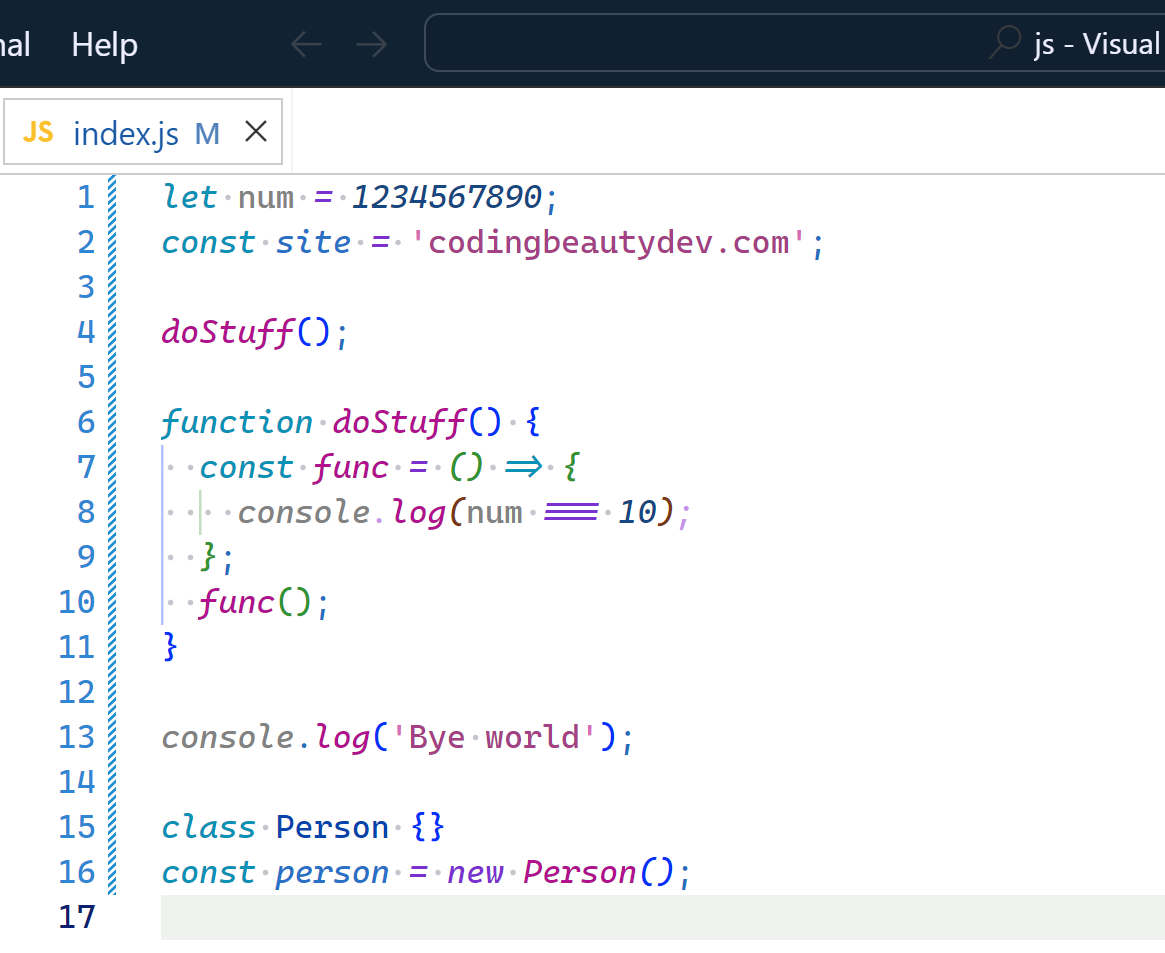
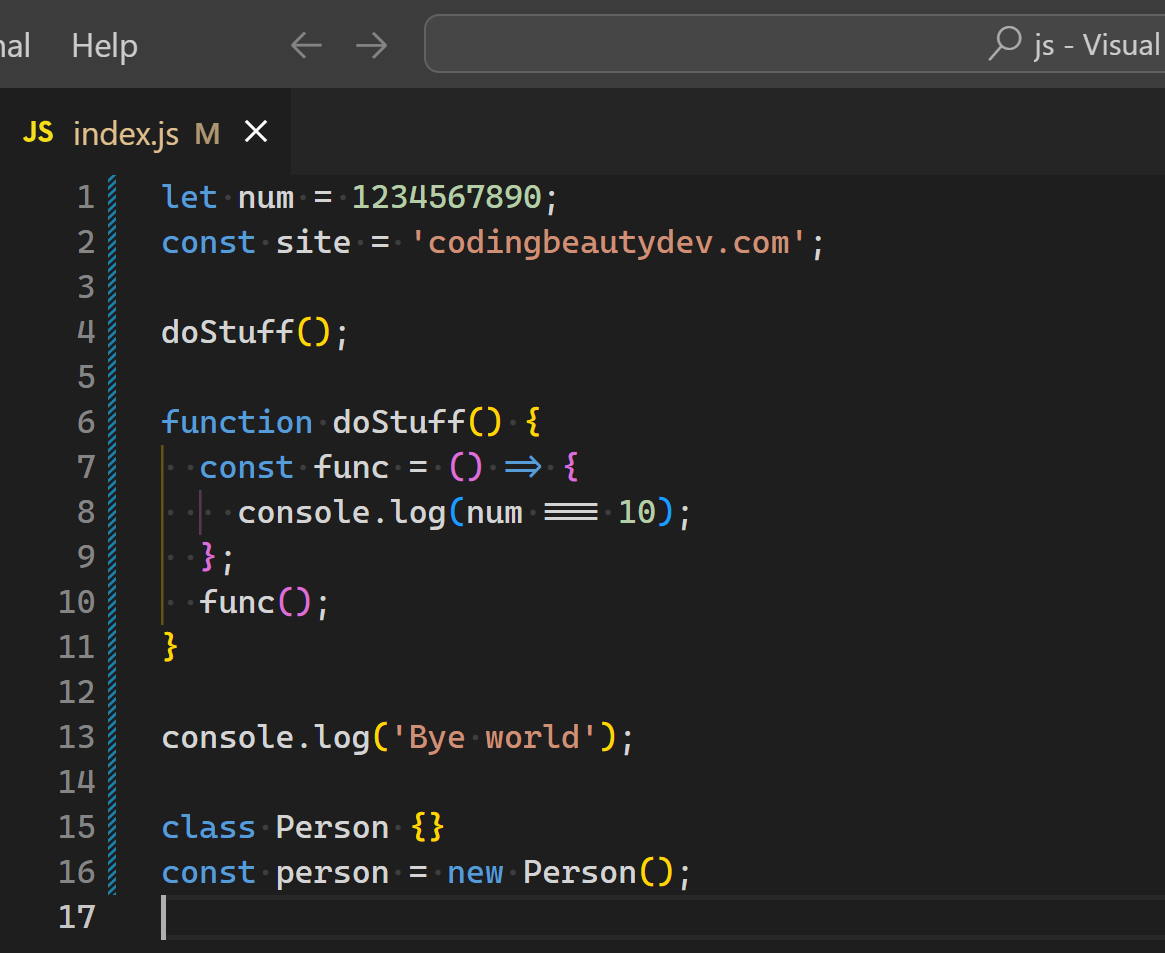
6. Code folding for monstrous files

I found this invaluable for those gigantic files with tons of functions and methods. Or a huge Flutter or JSX component with unbelievable amounts of deep nesting.

Why some people hate Flutter/Dart

By clicking those down-facing arrows you can easily collapse various segments of the code you’re not currently working with.

Better still the Ctrl + Shift + [ has us covered.

And Ctrl + Shift + [ has us uncovered.

7. Bird’s eye with Outline view

The Outline View is another brilliant way to keep track of large code files.

This feature gives a broad overview of all the symbols and nested symbols in the file: variables, classes, functions… you name it.

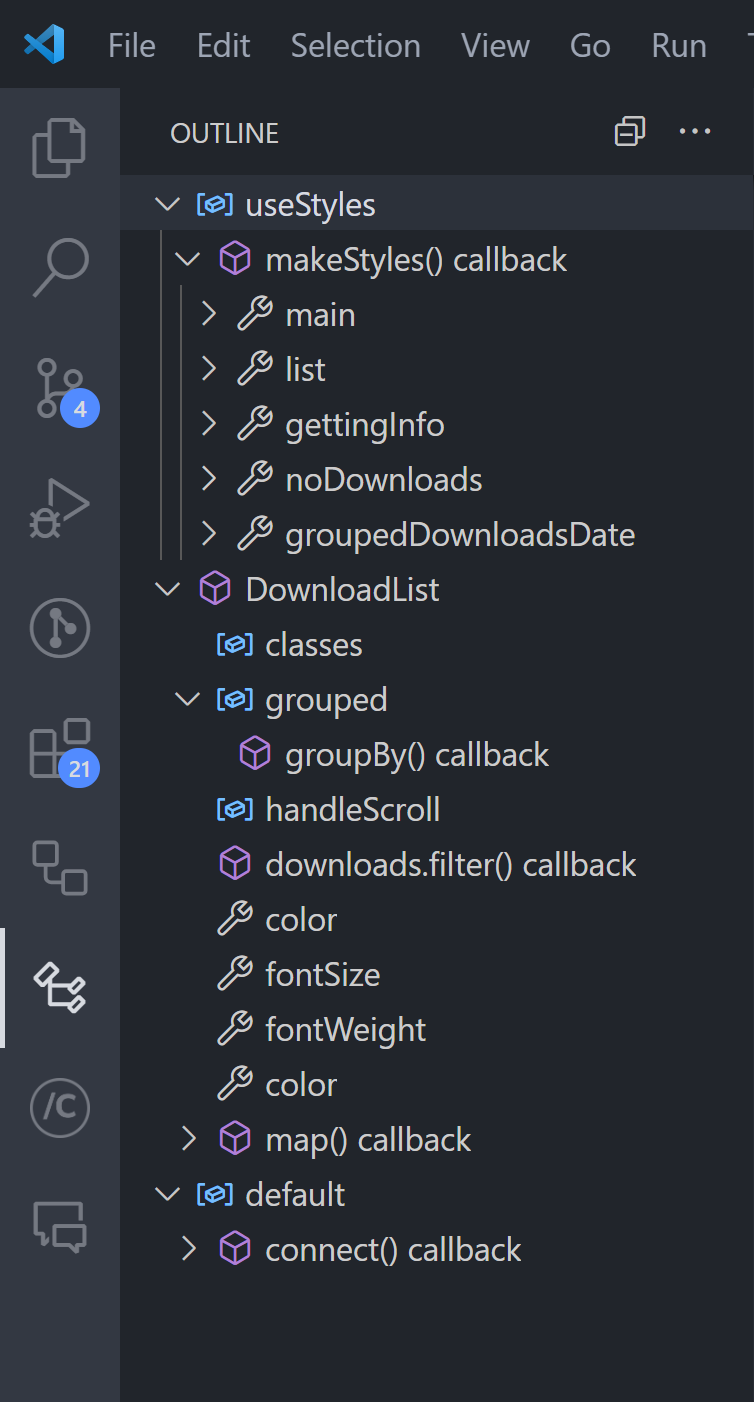
You can sort the top-level symbols shown by their position, name, or type.

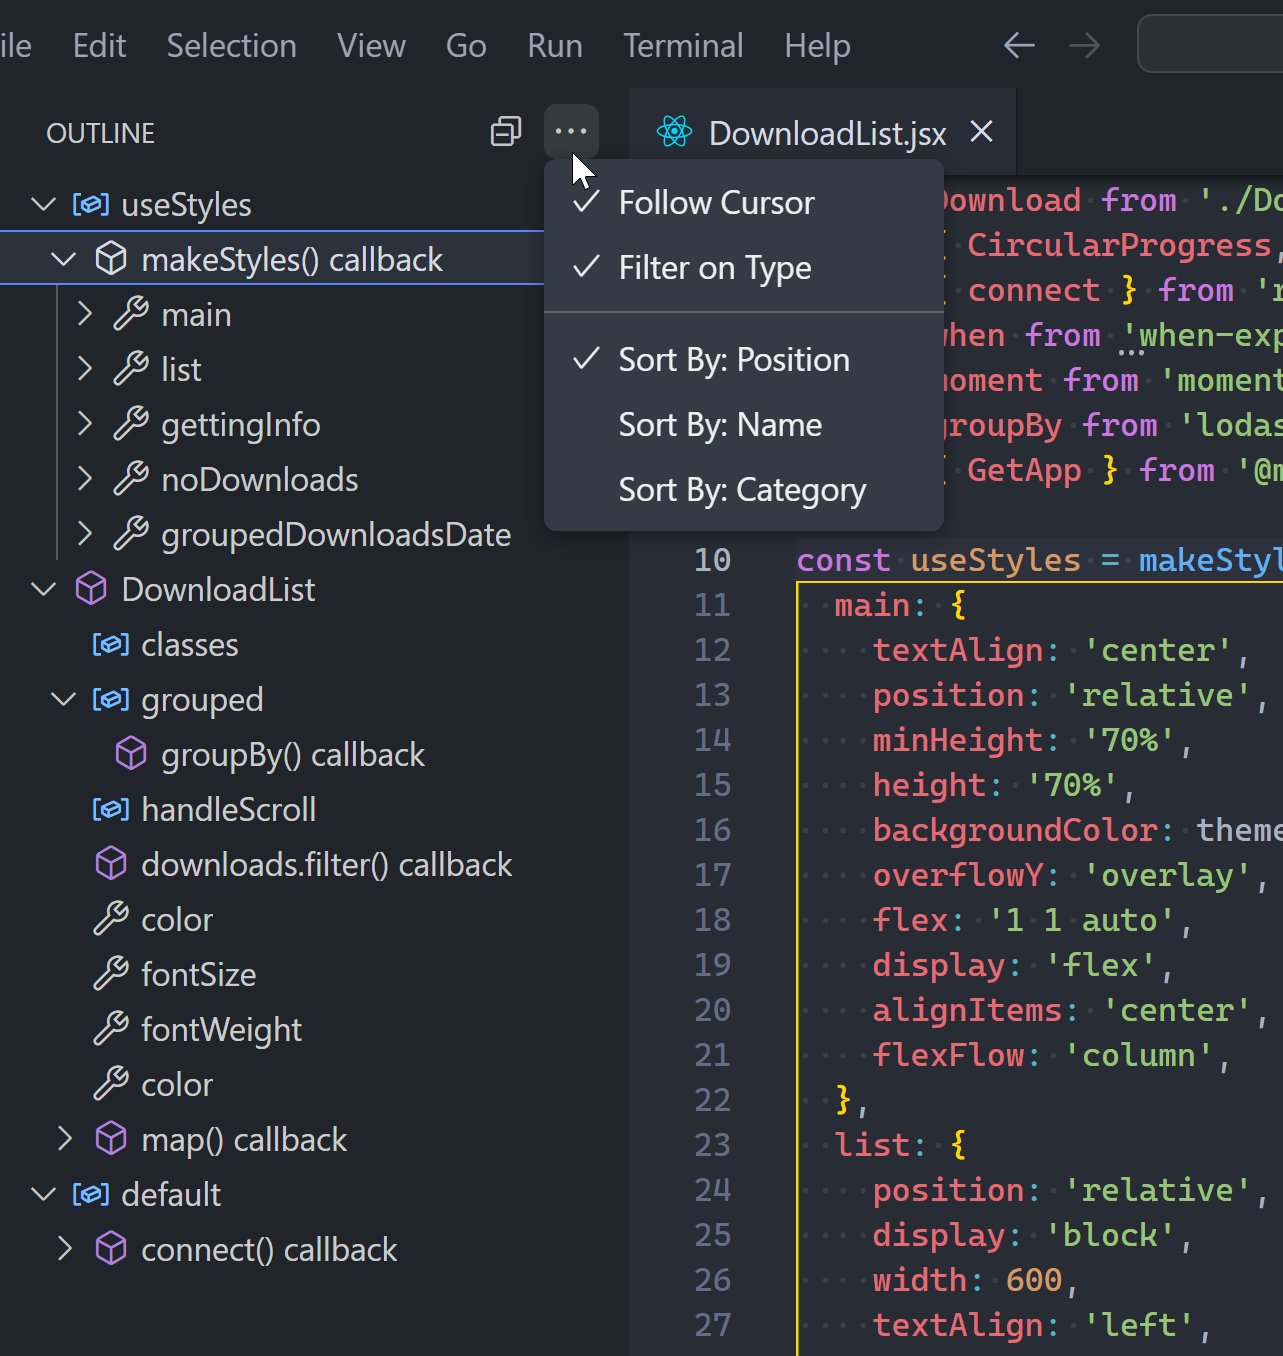
And when you’re moving around a lot you probably want to keep the Follow Cursor option turned on, to make the selected symbol in the outline match the selected symbol in the file:

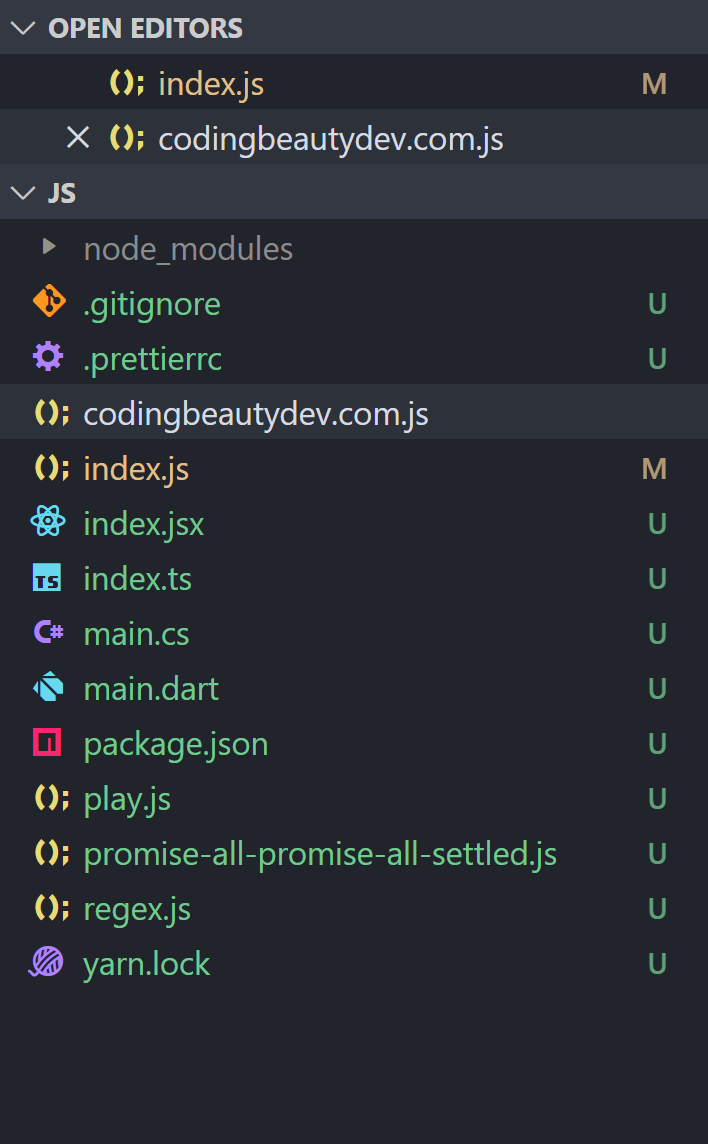
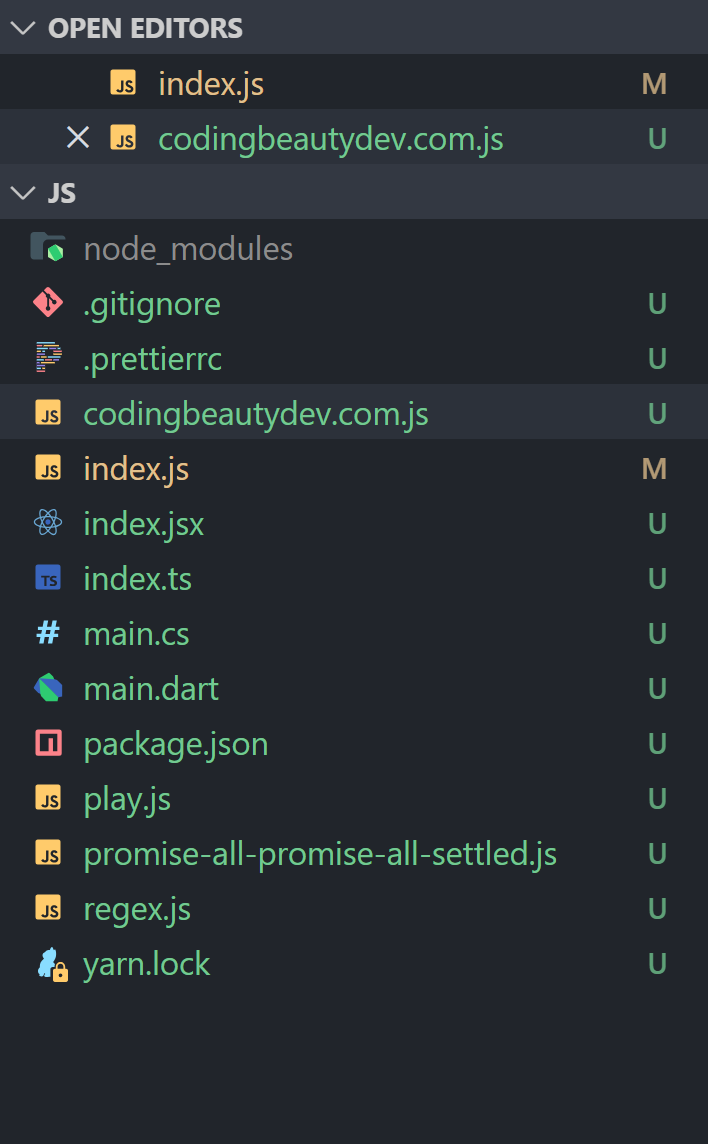
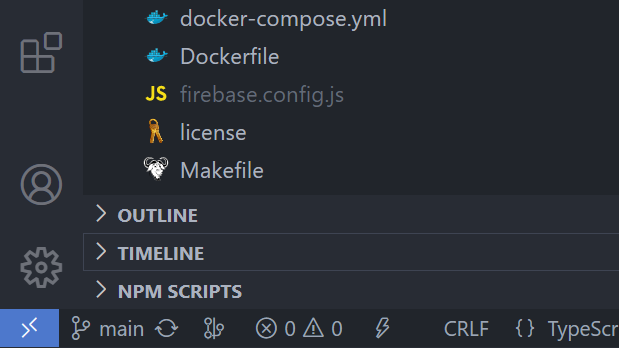
Normally you’ll find this view in the File Explorer pane along with Open Editors and Timeline, but as I started using them more often for my own monstrous files I moved it to a separate pane:

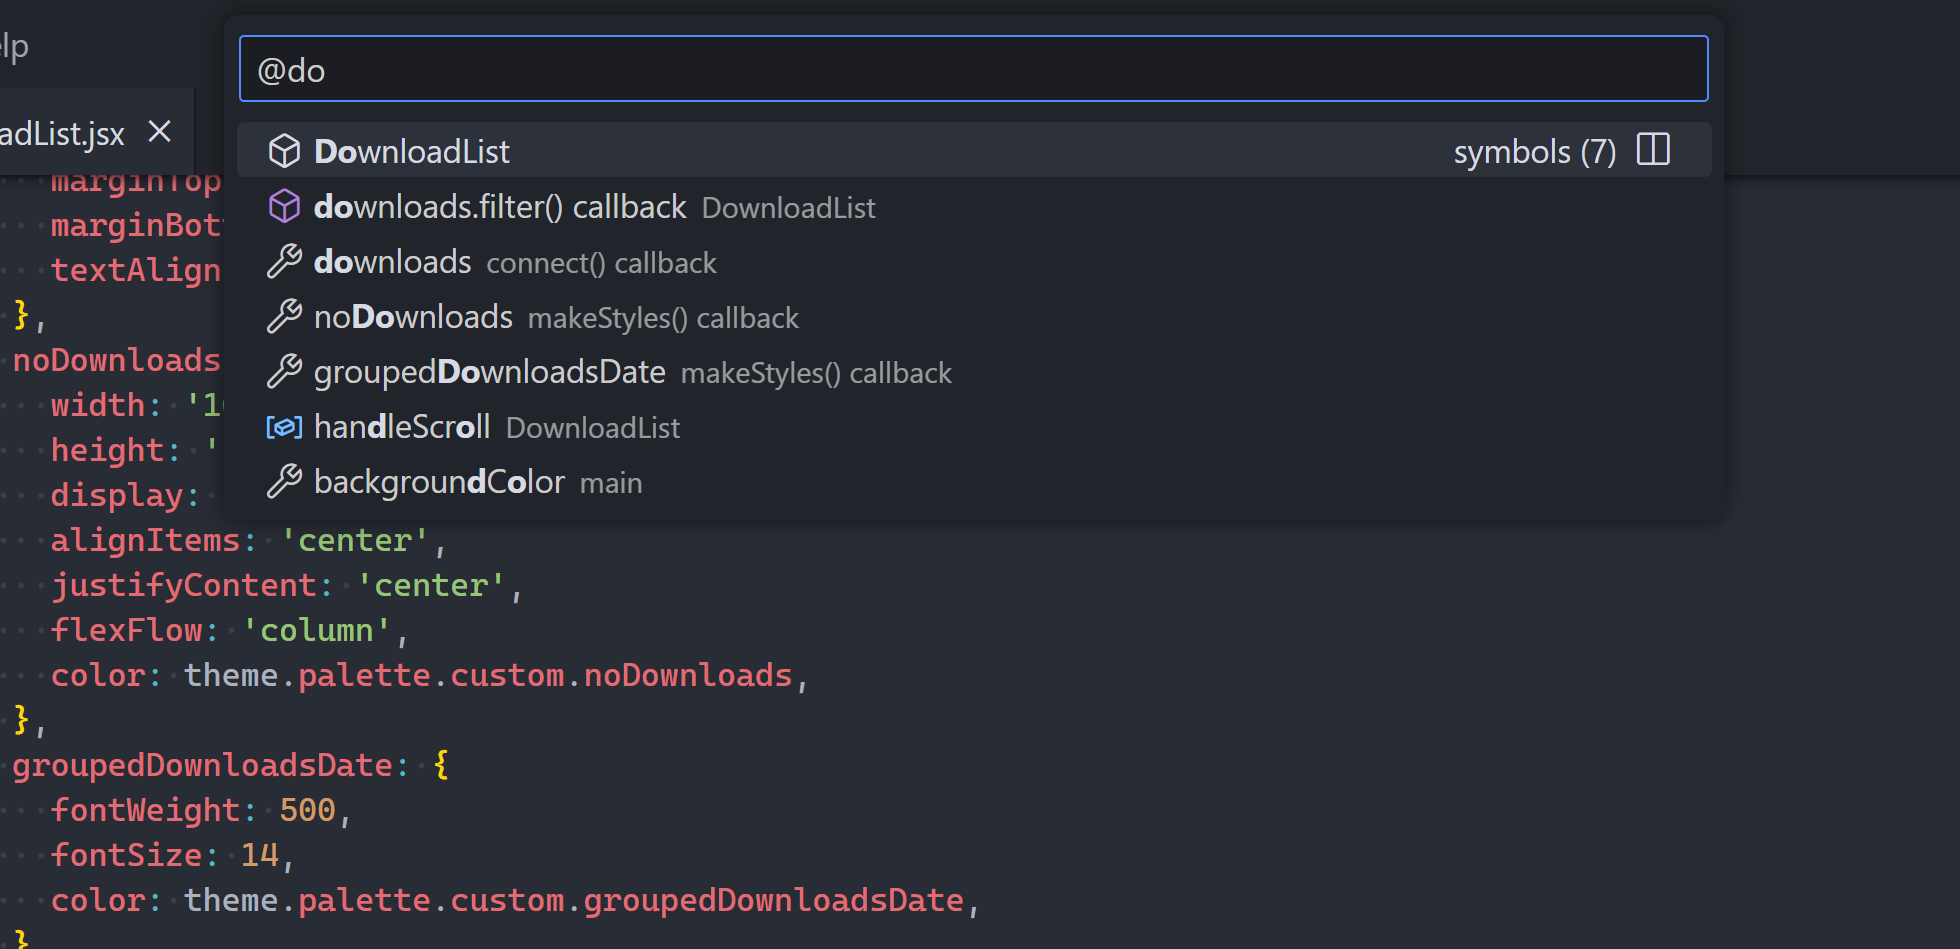
8. Go to symbol quickly

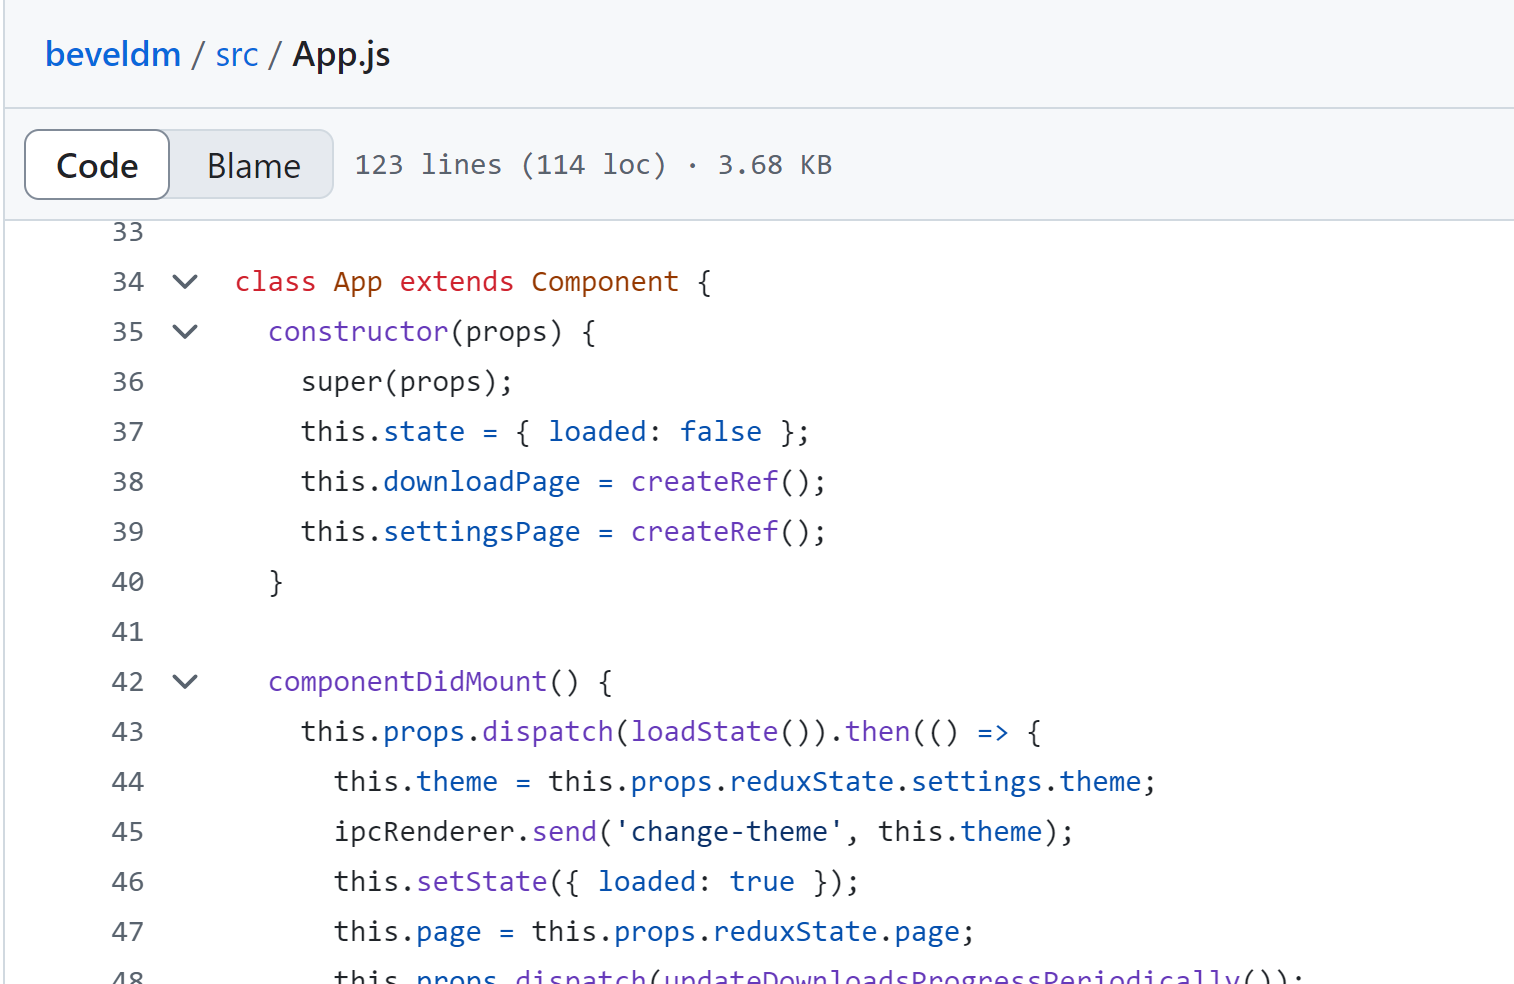
And when we stubbornly refuse to split up the file and it gets HUGE; so huge that navigating through the *outline* is becoming a chore, then it’s time to: Go To Symbol.

With the Ctrl + P, @ shortcuts.

And when we finally do the sensible thing and break up the file, we can still search across all those files and more, with Ctrl + T:
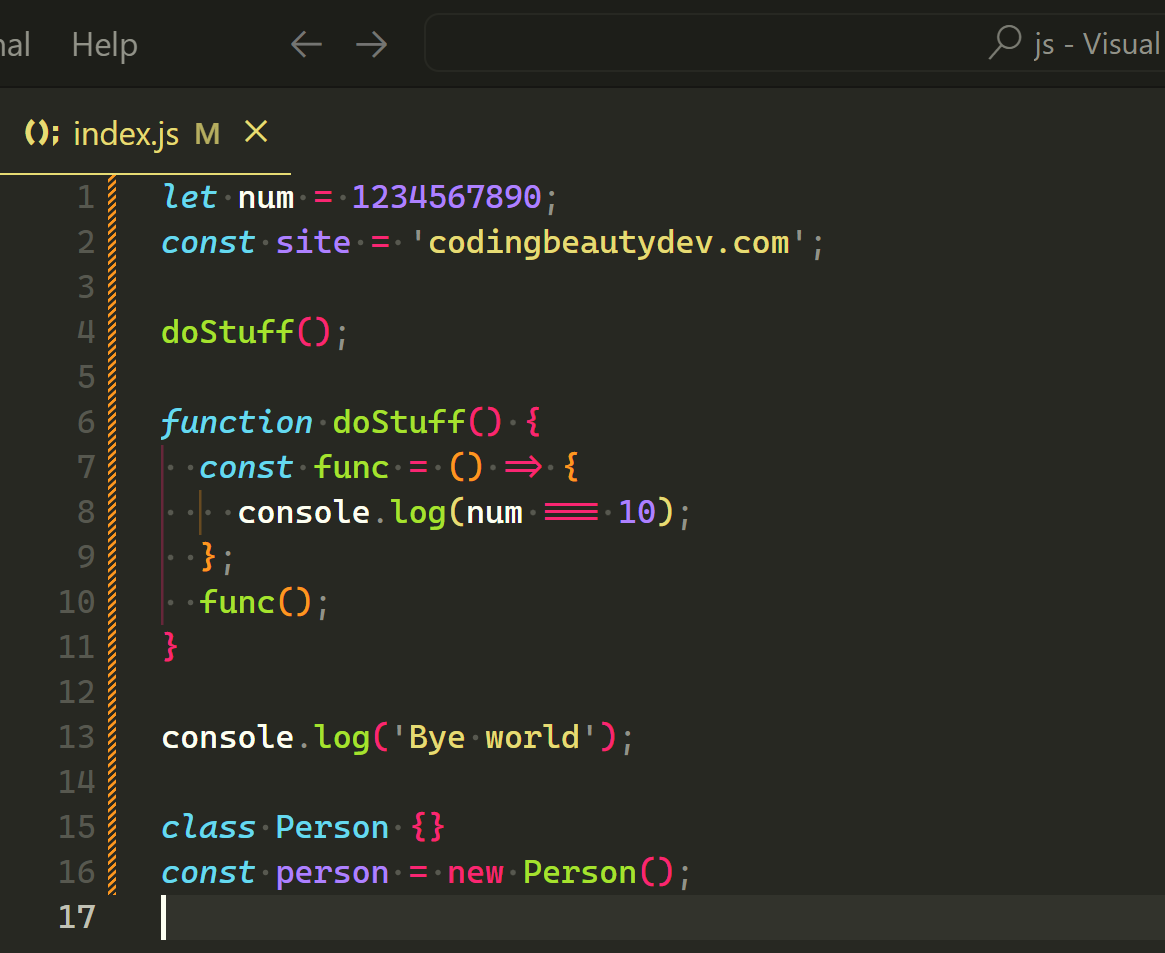
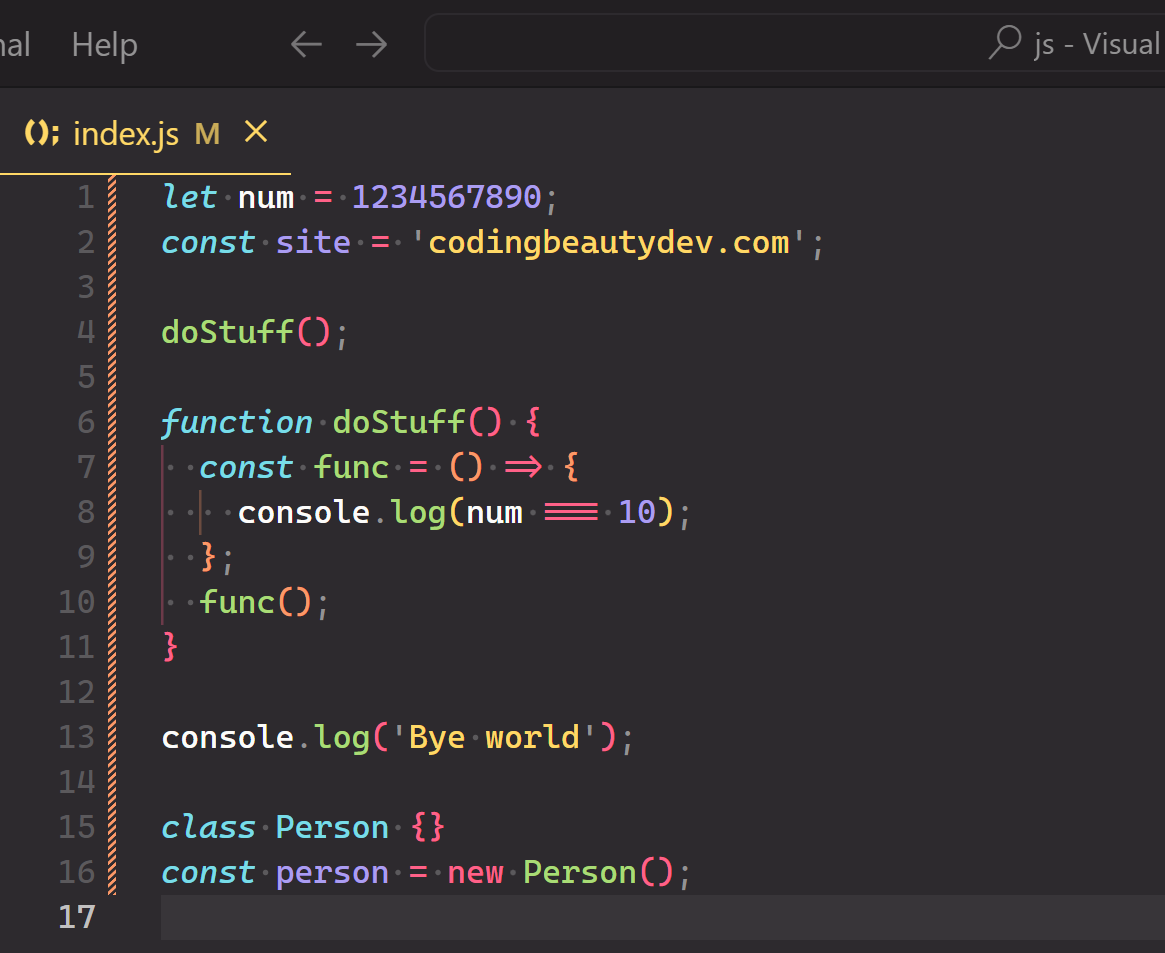
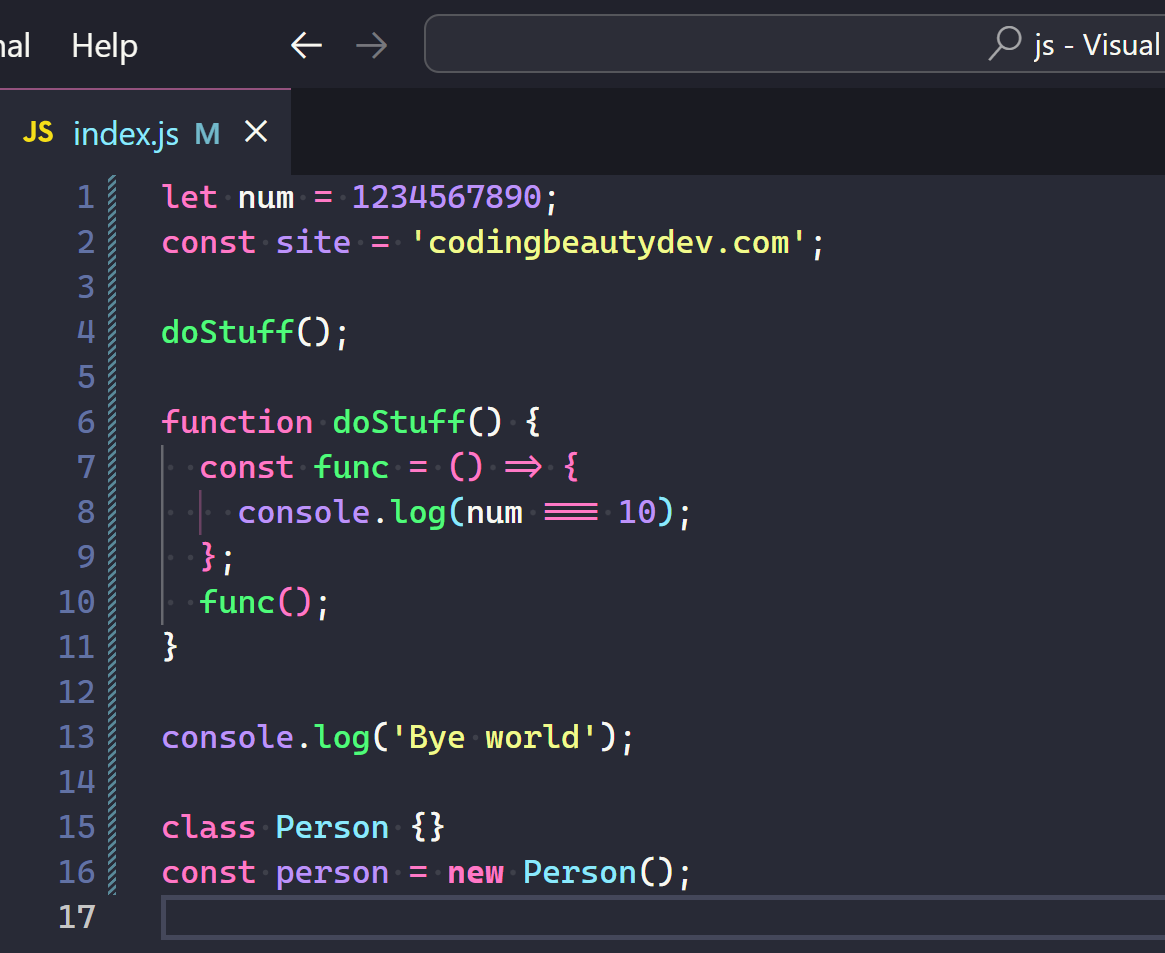
9. Go to definition

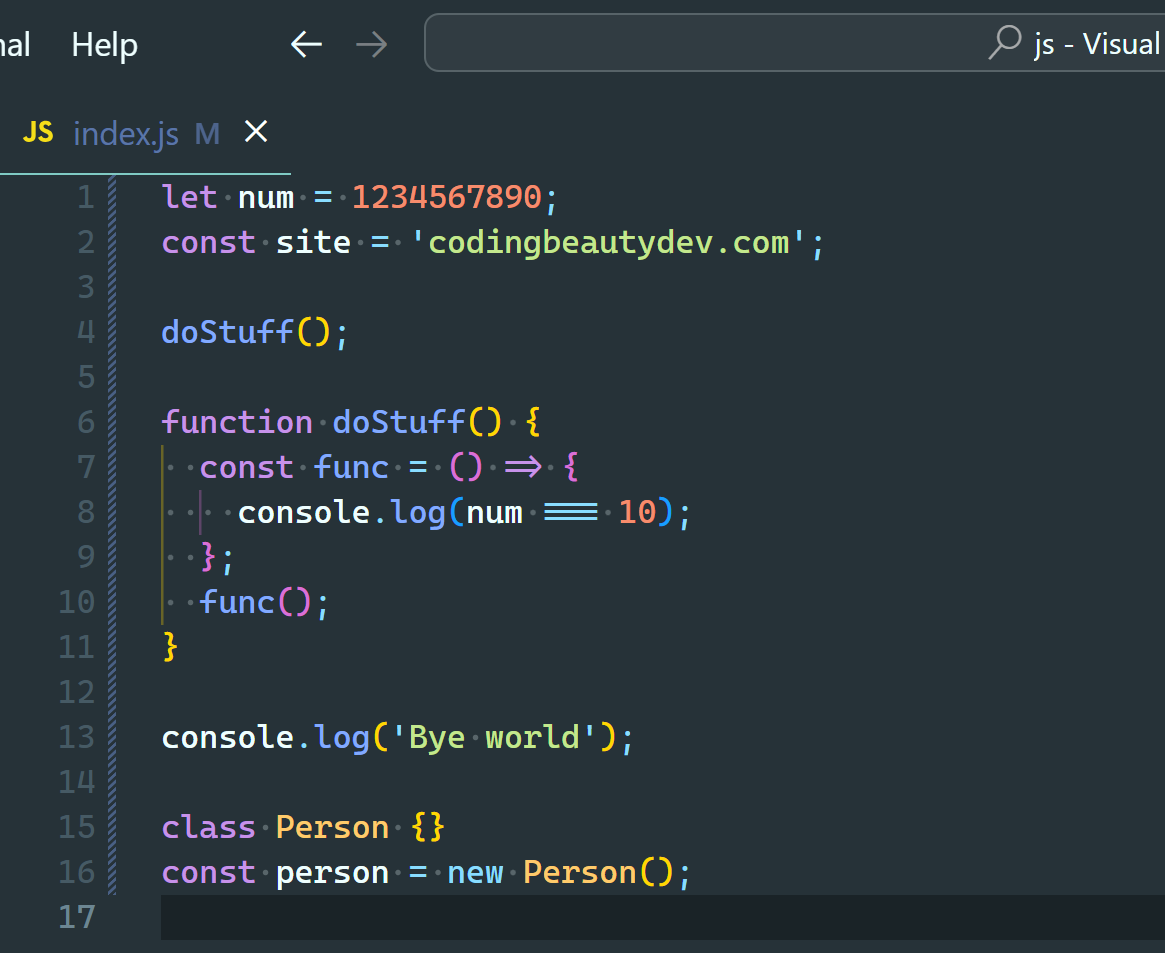
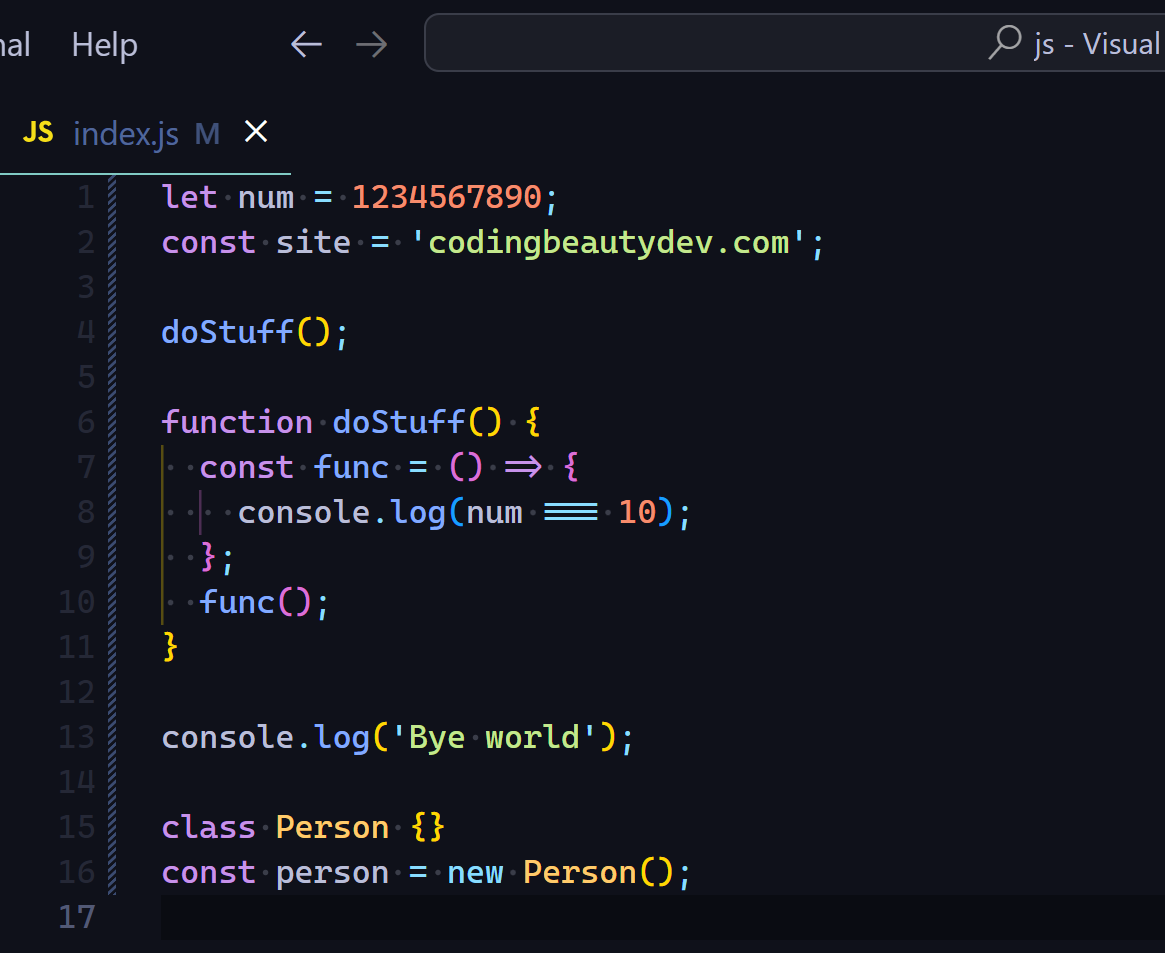
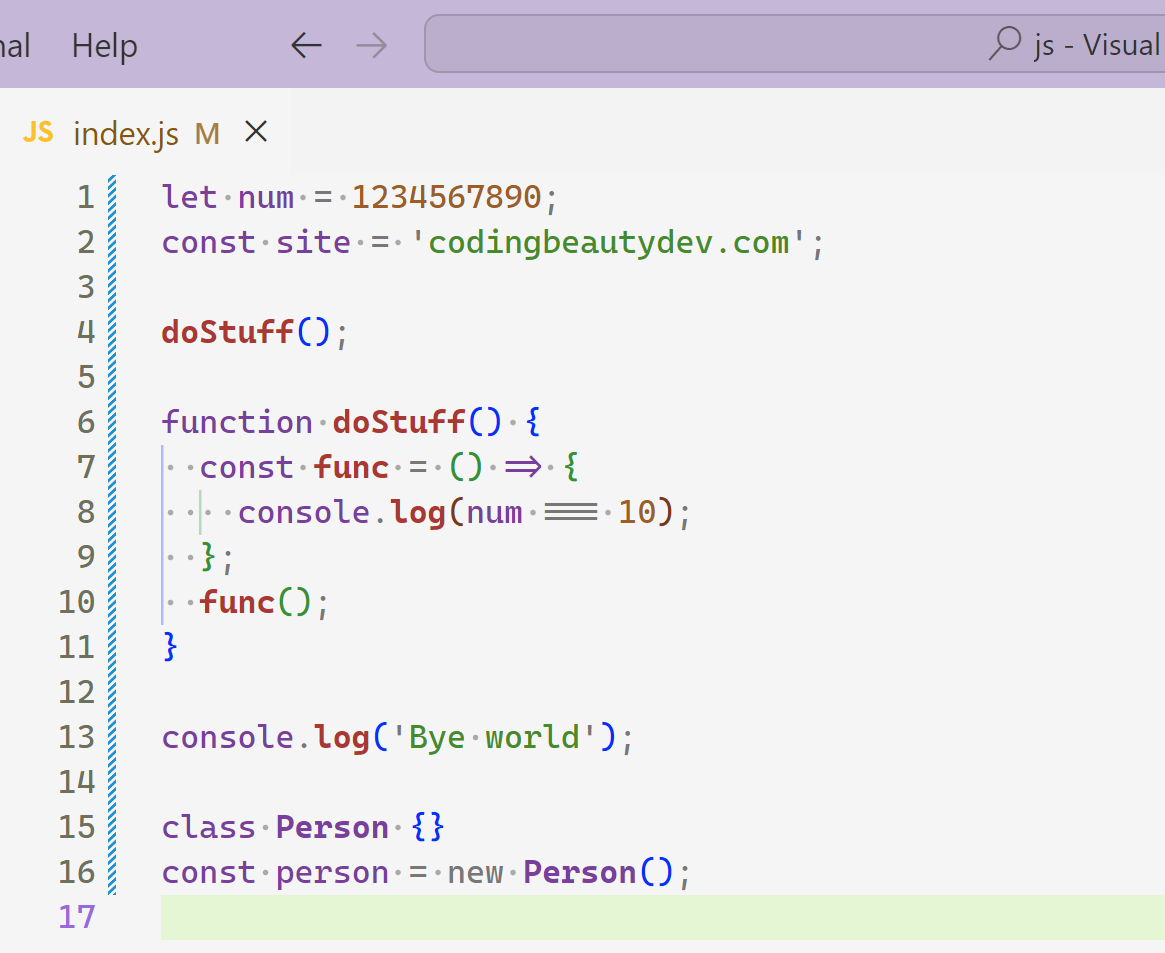
And once you get to a symbol, you can easily view the definition with Alt + Click or F12:

Double-click the definition popup to fully open the file:

10. Undo cursor quickly

After going to a symbol or viewing its definition we’ll probably want to return to where we were just a few moments prior.

Instead of wasting time relying on short-term memory, you can rest assured that the Ctrl + U keyboard will take you to exactly where you were before.

This is also essential when you go to a line by Ctrl + G.

These 10 powerful tips will elevate your efficiency and make day-to-day coding life easier and more enjoyable.

Key takeaways

  1. Create and publish a GitHub repo in seconds from the Source Control Panel (open with Ctrl + Shift + G G).
  2. Manage multiple folders in a workspace with File> Add Folder to Workspace....
  3. Code with multiple files at once with the View > Split Editor....
  4. Quickly copy a line with Ctrl + C.
  5. Move a line or up or down with Alt + Up / Down.
  6. Collapse code blocks and nested JSX with Ctrl + Shift [.
  7. View all symbols in a file at once with Outline View
  8. Search all symbols in the file with Ctrl + P, @, search in workspace with Ctrl + T
  9. Go to where a symbol was definite with Ctrl + Click or F12.
  10. Revert cursor to previous location with Ctrl + U.

These coding themes are incredible

10 breathtaking themes to upgrade your dev quality of life and coding enjoyment.

1. Night Owl

Night Owl is here for all your late-night coding drills.

Easy on the eyes with a cool color palette:

Sit in a dark room and code all night long.

And there’s a different variant, for those who hate the italics:

And when the morning comes around again:

No italics:

2. Atom One Theme

My absolute favorite.

The signature color scheme from the Atom editor that GitHub killed.

I find dark themes annoying in the day with bright light all around me — so thankfully this also has a light counterpart.

3. GitHub Theme

Speaking of GitHub: Their official theme for VS Code:

Look familiar? No? How about this:

Reduce the font size and change it to Consolas and you have a perfect replica of the theme at github.com.

4. One Dark Pro

The biggest difference from Atom One Dark is the variable color.

It’s got a vibrant yellow compared to the gray of the former.

Essentially all the rainbow colors now — can’t get much more colorful than that.

Especially when you sprinkle bracket pair colorization.

And One Dark Pro also has some nice variants you may want to try: Check out One Dark Pro Mix.

It’s got a slightly darker background with a pleasant bold color for the function blue.

No light theme though.

5. Monokai

A visually stunning theme with strikingly vibrant colors and excellent readability.

Look at the alluring contrast between the green and the pink, and the purple too. All with a nice brownish background.

There’s also Monokai Pro for a lesser contrast and a more sophisticated feel.

The extension also comes with a beautiful file icon theme with multiple variants:

6. Dracula Theme

Dark and dramatic — that’s Dracula.

It’s a purple-centric theme with a mysterious vibe.

Not surprising it doesn’t have a light theme — that’s Dracula.

7. Material Theme

A popular theme packed with sleek, modern colors.

Comes with gorgeous color variants, like Material Theme Ocean:

Material Theme also has its own icon set:

8. Quiet Light

Minimalistic theme with a clean interface:

Purple purple purple.

9. Winter Is Coming

Lovely night-friendly theme cool blue hues:

If you’re not a big fan of the dark blue background, then dark black should help.

And it’s only fitting for it to have a light counterpart — it’s Winter after all.

10. Visual Studio Theme

For those with Visual Studio nostalgia.

Instantly recognizable with the blue variables and red strings.

Final thoughts

There’s a theme here for every developer’s taste – all clear and breathtaking to upgrade your coding experience.

Whether you prefer dark modes for late-night coding or bright themes for daytime clarity, the right theme can make all the difference in how comfortable and productive you are as you work.

Explore these options, find the one that resonates with your style, and take your coding sessions to the next level.

These coding fonts are incredible

Why do many devs keep using that boring Consolas font?

VS Code thinks it’s the best but there are so many better font options out there for you.

Here are 10 stunning fonts to spice up your coding game and upgrade your developer quality of life.

1. Fira Code

It’s extremely popular and for good reason.

This was where I first discovered the magic of ligatures.

Ligatures — those gorgeous character combos that naturalize your code.

It’s legible, open source and free to use.

Made by Mozilla (but hosted in the GitHub repo of some “tonsky” guy?)

2. Fantasque Sans Mono

An elegant font to bring out the joy in your workspace.

We used to call it Comic Sans Neue Mono because of the similarity to Comic Sans and Helvetica Neue. 

3. Roboto Mono

100% chance you’ve seen a Roboto font somewhere.

YouTube, Android, Material Design… this is Google’s baby.

So this is Roboto for coding.

You’ll see it all over the place in Google Dev Docs too — Android Dev, Firebase, GCP…

4. Anonymous Pro

Made specifically for coding with excellent readability — thanks to consistent spacing and clear character descriptions.

It reminds me of the Monospace font in that Notepad++ editor I used in the past (underwhelming compared to VS Code ofc).

5. Cascadia Code

Fira Code was great but I found the characters too tall.

So I switched to this beauty that I’ve been with ever since.

Supports ligatures too:

6. Noto Sans Mono

Clean and modern font that renders perfectly across multiple screen sizes and languages.

Open-sourced and free to use.

7. JetBrains Mono

The lovely font you’ll find in WebStorm, IntelliJ and every other IDE from Jetbrains.

8. Comic Neue

It’s a comic-inspired coding font with an energetic appearance.

It may give you a certain feeling of casualness in your coding (for better or worse).

9. Pixelify Sans

The chunky, pixelated letter forms give you the nostalgia of all those old video games from the past.

10. Victor Mono

Clean and minimalist with excellent readability and gracefully cursive italics.

There’s a font here for every developer’s taste – all clear and breathtaking to upgrade your coding experience.

10 essential VS Code tips & tricks for greater productivity

73%.

Did you know that 73% of developers worldwide rely on the same code editor?

Yes, the 2023 Stack Overflow Developer Survey results are in, and yet again, Visual Studio Code was by far the most used development environment.

73% of
“Visual Studio Code remains the preferred IDE across all developers, increasing its use among those learning to code compared to professional developers”, survey.stackoverflow.co/2023

And we all know why: it’s awesome.

But are we fully exploring its potential? In this article, we unfold some compelling VS Code features that enhance productivity with local source control, animated typing, and rapid line deletion, amongst others. Let us start using them to achieve our coding goals faster than ever.

1. Timeline view: local source control

The Timeline view gives us local source control.

Many of us know how useful Git and other source control tools are, helping us easily track file changes and revert back to a previous point when needed.

So the Timeline view in VS Code provides an automatically updated timeline of important events related to a file, such as Git commits, file saves, and test runs.

The Visual Studio Code Timeline view is available by default in the Explorer pane.

Expand this view to see a list of snapshot of events related to the current file. Here it’s file saves, but also Git commits where the file was staged.

The Timeline view shows a list of snapshot of events related to the current file.

Hover over the snapshot item to view the date and time when VS Code made the snapshot.

Hover over the snapshot item to view the date and time when VS Code made the snapshot.

Select a snapshot item to see a diff view showing the changes between the file at the snapshot time and the file presently.

Select a snapshot item to see a diff view showing the changes between the file at the snapshot time and the file presently.

2. Autosave: no more Ctrl + S

Can you count how many times you’ve used this shortcut? You probably do it unconsciously now.

The Autosave feature automatically saves files as we work on them, removing the need for manual saving. With autosave, we eliminate Ctrl + S fatigue, save time, and gain certainty of always working with the latest changes to the files.

It’s not perfect though, and it’s up to you to weigh the pros and cons – which we comprehensively cover here.

Visual Studio Code without autosave.
No autosave.
Visual Studio Code with autosave.
Autosave enabled – the unsaved indicator no longer shows.

Use File > Auto Save to enable the feature easily.

File > Autosave enables autosave in VS Code.

3. Do anything with Command Palette

Almost anything you do in VS Code apart from typing is a “Command”.

Commands let us accomplish tasks within the editor, and they include file-related commands, navigation commands, editing commands, and terminal commands, each optimally designed to enhance different aspects of your editing experience.

So with Command Palette we simply search for a command and select to perform the associated action.

To open the Command Palette, use this keyboard shortcut:

  • Windows/Linux: Ctrl + Shift + P
  • Mac: Shift + Command+ P
The VS Code Command Palette.

As you guessed correctly, those keyboard shortcuts to the right are a faster way to run the commands with the keyboard.

The key benefit of the Command Palette over shortcuts is when there’s a command without a shortcut, or you’re looking for a command you’re not sure exists.

4. Go to file quickly

The mouse is too slow.

Yes, you can click on the file in the Explorer pane, but for a much faster alternative use Ctrl + P to search for and open a specific file in your project.

Use Ctrl + P to search for an open a specific file in a VS Code project.

Hold Ctrl and press Tab to cycle through the list of files currently open in an editor instance.

Hold Ctrl and press Tab to cycle through the list of files currently open in an editor instance.

You can even use Alt + Left and Alt + Right to quickly navigate between these open files.

All these are much faster ways to get to a file than using the cursor.

5. Go to line quickly

Jump, don’t scroll.

Quickly navigating to a line is invaluable during debugging when you need to encounter errors at specific line numbers. By jumping to those lines, you can examine the code in that particular context, evaluate variables, and troubleshoot the issue.

Use the Ctrl + G keyboard shortcut for this.

Use the Ctrl + G keyboard shortcut to quickly navigate to a particular line in Visual Studio Code.

6. Delete line quickly

You’ve got to the line now, what if you want to delete it?

Will you drag and drag to highlight and then press Delete? Will you tirelessly press Backspace until every character is gone?

Or, will you use the Ctrl + Shift + K shortcut to rapidly delete that and dozens more lines in a matter of seconds?

Use the Ctrl + Shift + K keyboard shortcut to quickly delete a line.

7. Enjoy typing with smooth cursor

VS Code has this smooth cursor feature that animates the cursor as it moves, like in MS Word. This makes typing feel more fluid and polished, as well as giving us a smoother and more natural feel as we navigate through the lines of code and place the cursor at different points.

Smooth scrolling in Visual Studio Code.

To turn it on, opens Settings UI in the Command Palette and search for “smoot caret”.

We are looking for Editor: Cursor Smooth Caret Animation setting, which has 3 possible options:

The "Editor: Cursor Smooth Caret Animation" setting enables smooth caret animation in Visual Studio Code.
  1. off: No smooth cursor animation
  2. explicit: Only animates the cursor when we explicitly place it somewhere in the code.
  3. on: Smooth cursor animation is always enabled – including when typing.

Set it to on to get the full visual experience.

8. Format code rapidly

Formatting is all about improving code readability by organizing it in a structured and consistent manner.

And if you’ve been doing this manually, you need to know that there’s a better way.

Yes, you need to start formatting code automatically with the Format Document command, easily accessible in the Command Palette. Depending on the current file’s language, a particular “default” formatter will be used to format the code using various rules of indentation, line length, braces and brackets, etc.

The "Format Document" command in the VS Code Command Palette.

While there’s a pretty decent built-in JS/TS formatter, for a more robust solution, I highly recommend the Prettier extension.

Format On Save in action in Visual Studio Code.
The Prettier formatter for VS Code.

After installing, you’ll set it as your default formatter.

When you use manual over autosave, there’s a feature you should enable to make formatting a bit easier:

Enabling the "Editor: Format On Save" setting in VS Code.
  • Editor: Format On Save: “Format a file on save. A formatter must be available, the file must not be saved after delay, and the editor must be shutting down”. It is disabled by default.

So with this setting on, VS Code will automatically format your code with the current default formatter when you save the file with Ctrl + S, as you saw in the above demo.

Format On Save in action in Visual Studio Code.

When you do autosave, it can get tedious to continuously open the Command Palette when you’re formatting every now and then. And that’s what keyboard shortcuts are for:

  • Windows: Shift + Alt + F
  • Mac: Shift + Option + F
  • Linux: Ctrl + Shift + I

I’m on Windows and personally, I don’t like this default keyboard shortcut; autosave makes me format every now and then, and Shift + Alt + F got agonizing after a while.

So I changed it to Ctrl + D, Ctrl + D – a keyboard shortcut chord that’s much easier to press and remember, and has no conflicting keybinding. I recommend you do the same.

9. Save time with multi-cursor editing

One of the wow moments in my earliest VS Code days, the multi-cursor editing lets you place multiple cursors at different points, and delete or insert the same text multiple times. This speeds up editing time and boosts productivity greatly, as we get repetitive tasks done efficiently with rapid code creation.

Of course, when editing, there’s always at least one cursor. Use Alt + Click to add more.

Add multiple cursors with Alt + Click in VS Code.

You can also easily add a cursor directly above or below the current line, with Ctrl + Alt + Down or Ctrl + Alt + Up.

Add a cursor below in Visual Studio Code with the Ctrl + Alt + Down keyboard shortcut.

These shortcuts call the Add Cursor Below and Add Cursor Above commands respectively.

10. Create new folder / file quickly

There’s no serious project where we don’t create new folders and files, and if there was a way to accelerate file/folder creation, all the time saved would add up to give us a significant productivity enhancement.

If you’ve been creating new files and folders in VS Code with the new file and new folder button, then yes, there is a way.

Creating a new file/folder in VS Code with the buttons take time.
Yeah, don’t do this.

Instead of constantly moving your mouse to locate those small buttons, did you know you can just double-click on the Explorer panel to create a new file?

Double-clicking to create a new file in Visual Studio Code.

How about a new folder? Well, folders are nothing without files, and when you’re creating a new file, you can easily use the / character to indicate a hierarchy and create new folders and sub-folders to contain that file.

Using the forward-slash (/) to indicate a hierarchy and create new folders and sub-folders to contain that file
The utils folder is created to contain index.js.

It would be even more efficient to use keyboard shortcuts, which is what I did.

As a former Atom fan, I had quickly gotten used to the A and Shift + A shortcuts for creating new files and folder respectively; I knew what I had to do.

Creating a new file/folder in VS Code with keyboard shortcuts.
Create shortcuts to create a new file/folder in VS Code.

Since A and Shift + A are obviously keys used to code, I included the when values here to make sure they only create a new file/folder when the Explorer pane has focus and there’s no active cursor in the current editor.

So to use these shortcuts when typing, you’ll have to focus on the explorer pane first; click on it, or use Ctrl/Command + Shift + E.

Key takeaways

  • Enable local source control with Timeline view; available in Explorer pane by default.
  • Autosave files with File > Autosave.
  • Run commands in Command Palette with Ctrl + Shift + P or Shift + Command + P.
  • Go to a file with Ctrl + P, navigate between open files with Alt + Left/Right or Ctrl + Tab.
  • Go to a line with Ctrl + G.
  • Delete a line with Ctrl + Shift + K
  • Enable smooth typing with Editor: Cursor Smooth Caret Animation setting.
  • Format code with Format Document command, use Prettier, change shortcut to Ctrl + D, Ctrl + D
  • Use multiple cursors at once with Alt + Click, Ctrl + Alt + Up/Down adds one above/below
  • Move a line up or down with Alt/Option + Up/Down in Windows/Mac
  • Create a new file by double-clicking the Explorer pane or set a custom keyboard shortcut. Create a new file in a new folder with “folder/file.ext

Check out the VS Code Key Bindings docs to learn more about keyboard shortcuts and how to customize them. It includes a complete list of all the default VS Code shortcuts in your operating system.

Final thoughts

Visual Studio Code is more than just a text editor—it’s a powerful tool that, when mastered, can significantly boost your productivity and streamline your coding workflow. The ten tips and tricks we’ve explored are just the tip of the iceberg. As you continue to navigate through VS Code, you will discover a myriad of other features and shortcuts that will further enhance your coding experience. So, keep exploring, keep learning, and remember: the key to efficient coding lies not just in the code itself, but also in the tools you use to write it.

Emmet is amazing

If you’re not using Emmet you’re missing out and wasting a lot of valuable time.

It is a powerful shorthand syntax for writing large swaths of HTML and JSX code with as little effort as possible:

Use these 10 solid tips to maximize Emmet to its fullest potential and spend much less time writing repetitive HTML.

The syntax is quite similar to CSS and easy to understand.

1. Nest tags with >

Emmet makes creating a hierarchy of tags easier than ever with the > symbol:

From this:

Plain text
body>main>div>ul>li

To this:

HTML
<body> <main> <div> <ul> <li></li> </ul> </div> </main> </body>

2. Create siblings with +

Just like the + CSS selector, this lets you create elements that are siblings in the DOM hierarchy.

From this:

Plain text
header + main + aside + footer

To this:

HTML
<header></header> <main></main> <aside></aside> <footer></footer>

3. Climb up with ^

> is for drilling down and ^ is for climbing back up.

Here we create a child p in div and jump out to create a sibling ul:

So from:

Plain text
main>div>p^ul>li

To:

HTML
<main> <div> <p></p> </div> <ul> <li></li> </ul> </main>

4. Add id

Use # to create an element with an id:

Another CSS similarity.

So from:

Plain text
div#hero>p#intro+section#body

To:

HTML
<div id="hero"> <p id="intro"></p> <section id="body"></section> </div>

5. Add class

Use . to add one or more classes to the element expansion.

It uses div by default if you don’t specify an element.

Great for using all those Tailwind CSS classes:

From this:

Plain text
.container>.flex.justify-center>h1.title

To this:

HTML
<div class="container"> <div class="flex justify-center"> <h1 class="title"></h1> </div> </div>

6. Add attribute

Add one or more attributes to the element expansion with [name=value]:

From this:

Plain text
body>form>input[type="text"]+button[type="submit"]

To this:

HTML
<body> <form action=""> <input type="text" /><button type="submit"></button> </form> </body>

7. Common HTML element shorthands

Emmet is packed with helpful shorthands for common combinations of elements and their attributes:

For example:

  • input:t input[type="text"]
  • button:s button[type="submit"]
  • link:css <link rel="stylesheet" href="style.css">

So we could have written the last syntax like this:

Plain text
body>form>input:t+button:s

8. Grouping

You can create separate groups of element hierarchies like this:

From this:

Plain text
.container>(header>nav.fixed+h1)+(aside>.sidebar)+a

To this:

HTML
<div class="container"> <header> <nav class="fixed"></nav> <h1></h1> </header> <aside> <div class="sidebar"></div> </aside> <a href=""></a> </div>

9. Multiplication

This is one of the coolest Emmet features.

el*n to create n <el>‘s in the expansion:

From this:

Plain text
div>ul>li*5

To this:

HTML
<div> <ul> <li></li> <li></li> <li></li> <li></li> <li></li> </ul> </div>

VS Code’s multi-cursor editing feature makes this even more powerful — with Ctrl + Alt + Down I easily select all the new elements to add text to all of them at the same time:

10. Lorem Ipsum

Lorem Ipsum is the standard placeholder text for designing UIs, and Emmet makes it effortless to add it for visual testing.

Just type lorem in VS Code and you’ll instantly a full paragraph of the stuff:

Type lorem again to expand the text — it intelligently continues from where it stopped:

Final thoughts

Use these 10 powerful Emmet syntax tips to write HTML and JSX faster than ever.

10 must-have VS Code extensions for web development

Visual Studio Code has thousands of extensions you can install to ramp up your developer productivity and save you from mundane tasks.

They are all available in the Visual Studio marketplace and the vast majority of them are completely free.

Let’s have a detailed look at 10 powerful extensions that significantly improve the web development experience.

1. TODO Tree

Powerful extension for creating location-specific reminders of JavaScript code tasks you’ll need to get back to later:

Just use // TODO:

2. Prettier

Prettier is a pretty😏 useful tool that automatically formats your code using opinionated and customizable rules.

It ensures that all your code has a consistent format and can help enforce a specific styling convention in a collaborative project involving multiple developers.

The Prettier extension for Visual Studio Code.

The Prettier extension for Visual Studio Code brings about a seamless integration between the code editor and Prettier, allowing you to easily format code using a keyboard shortcut, or immediately after saving the file.

Watch Prettier in action:

Pretter instantly formats the code after the file is saved.

3. ESLint

ESLint is a tool that finds and fixes problems in your JavaScript code.

It deals with both code quality and coding style issues, helping to identify programming patterns that are likely to produce tricky bugs.

The ESLint extension for Visual Studio Code.

The ESLint extension for Visual Studio Code enables integration between ESLint and the code editor. This integration allows ESLint to notify you of problems right in the editor.

For instance, it can use a red wavy line to notify of errors:

ESLint uses a red wavy line to notify of errors.

We can view details on the error by hovering over the red line:

Viewing error details by hovering over the red wavy line.

We can also use the Problems tab to view all errors in every file in the current VS Code workspace.

Using the "Problems" tab to view all errors in every file in the VS Code workspace.

4. GitLens

GitLens is another powerful extension that helps you take full advantage of Git source control in Visual Studio Code.

GitLens displays views containing essential repository data and information on the current file, such as file history, commits, branches and remotes.

The GitLens extension displaying essential repository data.

Place the cursor on any line in the editor and GitLens will display info on the latest commit where the line was changed:

5. Live Server

The Live Server extension for VS Code starts a local server that serves pages using the contents of files in the workspace. The server will automatically reload when an associated file is changed.

The Live Server extension for Visual Studio Code.

In the demo below, a new server is launched quickly to display the contents of the index.html file. Modifying index.html and saving the file reloads the server instantly. This saves you from having to manually reload the page in the browser every time you make a change.

A demo of how to use the Live Server Extension for Visual Studio Code

As you saw in the demo, you can easily launch a new server using the Open with Live Server item in the right-click context menu for a file in the VS Code Explorer.

Launcing a new server with the "Open with Live Server" item in the right-click context menu for a file in the VS Code Explorer.

6. AI assistant extensions

GenAI has booming recently and now we have extensions that give you intelligent AI code completions as you type.

And IDE-integration chatbots, some of which use context from your codebase.

Great ones you can try:

  1. GitHub Copilot: paid, $10/month
  2. Coding Beauty Assistant: free, $10 per month for more features
  3. Tabnine: has free version, $12 per month

7. CSS classname intellisense extensions

Powerful bunch of extensions for working with CSS classes.

CSS Peek lets you quickly view the CSS style definitions for various class names and IDs assigned in HTML.

The CSS Peek extension for Visual Studio Code.

Just hold down Ctrl and hover over a class name or ID to quickly peek at its definition:

A demo of the three ways to use CSS Peek.

Intellisense for CSS Class Names in HTML works hand-in-hand with CSS Peek.

To provide code completion for the HTML class attribute from existing CSS definitions found in the current workspace.

You’ll appreciate the benefits of this extension when using third-party CSS libraries containing hundreds of classes.

And when you install Tailwind CSS IntelliSense, you get the power of CSS classname peek and auto-completion in Tailwind:

8. JavaScript (ES6) Code Snippets

As the name suggests, this is an extension that comes fully loaded with heaps of time-saving code snippets for JavaScript, in ES6 syntax.

JavaScript (ES6) Code Snippets Extension for Visual Studio Code.

Here’s a demo where the imp and imd snippets from this extension are used to quickly import two modules with ES6 syntax.

A demo of how to use the JavaScript (ES6) Code Snippets extension.

9. Visual Studio Intellicode

IntelliCode is another powerful AI tool that produces smart code completion recommendations that make sense in the current code context.

It does this using an AI model that has been trained on thousands of popular open-source projects on GitHub.

The Visual Studio Intellicode extension for Visual Studio Code.

When you type the . character to access an object method or fields, IntelliCode will suggest a list of members that are likely to be used in the present scenario. The items in the list are denoted using a star symbol, as shown in the following demo.

IntelliCode is available for JavaScript, TypeScript, Python, and several other languages.

10. VSCode Icons

Icon packs are available to customize the look of files of different types in Visual Studio Code. They enhance the look of the application and make it easier to identify and distinguish files of various sorts.

VSCode Icons is one the most popular icon pack extensions, boasting a highly comprehensive set of icons and over 11 million downloads.

vscode-icons extension for Visual Studio Code.

It goes beyond file extension differentiation, to provide distinct icons for files and folders with specific names, including package.json, node_modules and .prettierrc.

A select list of the icons provided by vscode-icons.

Final thoughts

These are 10 essential extensions that aid web development in Visual Studio Code. Install them now to boost your developer productivity and raise your quality of life as a web developer.

10 tips to supercharge VS Code and code 10x faster (0 to 100)

95% of developers are just wasting the potential of VS Code.

It has so many hidden gems that upgrade your productivity and quality of life — but they’re not using them.

Use these 10 solid tips to gradually supercharge VS Code and code faster: with powerful extensions, little-known keyboard shortcuts, beautiful fonts & colors, and so much more.

1. First things first

Starting with the essentials.

Learn important keyboard shortcuts

You will code so much faster once you learn these

  • Copy line with Ctrl + C
  • Highlight code left & right with Shift + Left / Right
  • Move line up / down with Alt + Up / Down
  • Delete line with Ctrl + K
  • Close file with Ctrl + W
  • Close all files with Ctrl + K, W

Enable autosave

To save your files automatically.

I’ve talked about why I dislike autosave before, but it’s a great feature to stop the constant Ctrl + S’s.

Set up outline view

The Outline View gives you a quick overview of all the symbols in your active file from the File Explorer Pane:

But I recommend you move to a separate pane to have more space:

2. Set up source control

You need to set up integrations for Git to easily track your changes.

Init repo with VS Code

Use the Source Control Pane to initialize a new local repo.

Commit changes

You can quickly stage your files and press Ctrl + Enter anytime you need to commit:

Install this extension

Now install the GitLens extension for even better integration:

GitLens will show you essential repo data and info on your current file — file history, commits, branches, and more.

Place the cursor on any line in the editor and GitLens will display info on the latest commit where the line was changed:

3. Code faster with AI

GenAI has booming recently and now we have extensions that give you intelligent AI code completions as you type.

And IDE-integration chatbots, some of which use context from your codebase.

Great ones you can try:

  1. GitHub Copilot: paid, $10/month
  2. Coding Beauty Assistant: free, $10 per month for more features
  3. Tabnine: has free version, $12 per month

4. Learn snippets to code faster

Emmet

With this I type much faster when working with JSX, CSS, HTML, and more.

One thing you’ll notice is how similar the abbreviations are to CSS selectors.

This is by design: Emmet syntax is inspired by CSS selectors.

Install this extension

JavaScript (ES6) code snippets: fully loaded with heaps of time-saving code snippets for JavaScript.

See how the imp and imd snippets quickly import the modules with the ES6 syntax:

5. Install keymaps and feel at home

Priceless if you’re used to another code editor.

So if you’re coming from:

  1. Vim: Install this extension
  2. Atom: Install this extension
  3. Visual Studio: Install this extension

For example in Atom, you could easily press A and Shift + A to create a new file or a new folder.

Installing the Atom keymap instantly brings this shortcut to VS Code — no need to manually edit hotkeys:

6. Start auto-linting code

You should install a linter to avoid errors and enforce style.

Use ESLint to quickly find and fix problems in your JS code and easily avoid poor coding practices — like unused vars:

7. Enable auto-formatting

Install Prettier to automatically format your code with consistent formatting.

With Format On Save, Prettier instantly formats your code when you press Ctrl + S.

You can enable it in Settings:

8. Set up debugging and testing

So VS Code already gives you fantastic debugging features.

Set breakpoints, inspect the call stack, watch variables and more.

Testing

These extensions will make testing much easier:

Clicking Run runs the particular test case with no need for the terminal.

9. Use a more code-friendly font

If you look closely you’ll see that I’m NOT using the default Consolas font.

I’m using Cascadia Code — a beautiful font from Microsoft with aesthetically pleasing code ligatures.

Ligatures:

Fira Code is another great one I’ve used:

You can easily change your font in settings:

10. Beautify your editor with colorful themes

Color themes

Set up a beautiful theme to easily modify the colors of all the aspects of the UI.

Including your code’s highlighting:

Some great themes I’ve used:

You can change themes with the Settings icon:

Icon themes

The way VS Code displays icons in the File Explorer Pane is pretty underwhelming:

That’s why you should install VS Code Icons and spice things up:

The distinct icons make it much easier to understand every file and the purpose they play in the codebase.

Go from 0 to 100 in VS Code

Final thoughts

With all these new settings & extensions, you’re all set up to build rapidly and achieve your dev goals much faster.

5 unnecessary VS Code extensions you should uninstall now (#2)

EVERY new extension you add to VS Code increases the memory and CPU power it gobbles up:

We need to keep this number as low as possible to minimize this resource usage — and stop these extensions from clashing with one another or with native functionality.

And you know, there’s a significant number of extensions in the Marketplace that provide functionality VSCode already has built-in.

Usually they were made when the feature wasn’t added yet; but once that happened they became largely redundant additions.

So below, I cover a list of these integrated VSCode features and extensions that provide them. Uninstalling these now dispensable extensions will increase your editor’s performance and efficiency.

1. HTML tag auto-renaming

A powerful feature I didn’t discover for months after I started using VS Code!

You just start editing the starting tag and the ending tag auto-updates to match:

Extensions for this

  • Auto Rename Tag (17.7M downloads): “Automatically rename paired HTML/XML tag, same as Visual Studio IDE does”.

But feature already built-in

I use this setting to easily get tag auto-rename without installing anything:

  • Editor: Linked Editing: “Controls whether the editor has linked editing enabled. Depending on the language, related symbols e.g. HTML tags, are updated while editing.” Default is false

2. Auto-trim trailing spaces

This handy feature removes ending whitespace from all the lines of your file to maintain consistent formatting.

Extensions for this

  • Trailing Spaces (2.0M downloads): “Highlight trailing spaces and delete them in a flash!”.
  • AutoTrim (35.4K downloads): “Trailing whitespace often exists after editing lines of code, deleting trailing words, and so forth. This extension tracks the line numbers where a cursor is active, and removes trailing tabs and spaces from those lines when they no longer have an active cursor”.

But feature already built-in

VSCode has a built-in setting that can automatically remove trailing spaces from a file.

It automatically trims the file when it is saved, making it a background operation you no longer have to think about.

Trailing spaces are removed from the file on save.

Here’s the setting:

  • Files: Trim Trailing Whitespace: “When enabled, will trim trailing whitespace when saving a file”. It’s false by default.
The auto trimming setting in the VSCode Settings UI.
The auto trimming setting in the Settings UI.

Add this to your settings.json file to enable auto trimming:

settings.json

JavaScript
{ "files.trimTrailingWhitespace": true, }

You might want to turn this setting off for Markdown files since you have to put two or more spaces at the end of a line to create a hard line break in the output, as stated in the CommonMark specification. Add this to your settings.json file to do so.

settings.json

JavaScript
{ "[markdown]": { "files.trimTrailingWhitespace": false } }

Alternatively, you can simply use a backslash (\) instead of spaces to create a hard line break.

3. HTML tag auto-wrapping

I can’t count how many times I’ve needed to wrap one HTML element in a new one — usually a div.

With this feature I can instantly wrap the <p> tag in a <div> without painfully inserting one <div> above and one </div> below.

Extensions for this

  • htmltagwrap (674K downloads): “Wraps selected code with HTML tags”.
  • html tag wrapper (458K downloads): “wrap selected html tag by press ctrl+i, you can change the wrapper tag name simply too”.

But feature already built-in

Thanks to the built-in Wrap with Abbreviation command I can rapidly wrap a tag in any tag type.

Did you see how the new wrapper’s name changed according to your input?

4. Colorful indentation

Indentation guides make it much easier for you to trace out the different indentation levels in your code.

Extensions for this

  • Indent Rainbow: “This extension colorizes the indentation in front of your text, alternating four different colors on each step”

But feature already built-in

So yeah, once again VS Code has this as a built-in feature.

We just change the Editor > Guides: Bracket Pairs setting from active to always show the colorful indents.

To go from this:

To this✅:

Beautiful.

5. NPM integration

In every serious project you’ll probably have tools to automate testing, linting, building, and other tasks.

So this feature makes it easier to start those tasks with as little as the click of a button. No need to switch context whatsoever.

Extensions for this

  • NPM (6.8M installs): “This extension supports running npm scripts defined in the package.json file”. I always saw this as a recommended extension after opening any project with package.json

But feature already built-in

With the built-in NPM scripts view I can easily see all the scripts in my project’s package.json and run any I want:

Ugh, but now you have to drag your mouse all the way over there just to run a simple task.

So much better to go with the Tasks: Run Task command:

“Tari it’s still too slow!!”

Alright fine, if you know the exact script you want, then just Ctrl + ` to open the built-in terminal and feed your CLI desires:

Final thoughts

These extensions might have served a crucial purpose in the past, but not anymore for the most part, as much of the functionality they provide have been added as built-in VSCode features. Remove them to reduce the bloat and increase the efficiency of Visual Studio Code.

5 unnecessary VS Code extensions you should uninstall now

Can you count how many VS Code extensions you have right now?

Me: A whooping 56.

If you’re finding VS Code getting slower and more power-hungry with time, this number could well be the reason.

Because EVERY new extension added increases the app’s memory and CPU usage.

Coding is already challenging enough; Nobody need contend with this:

Maybe I should just give up music instead.

So we need to keep this number as low as possible to minimize this resource usage; ad also stopping these extensions from clashing with one another or with native functionality.

And you know, there’s a significant number of extensions in the Marketplace that provide functionality VSCode already has built-in.

Usually they were made when the feature wasn’t added yet; but once that happened they became largely redundant additions.

So below, I cover a list of these integrated VSCode features and extensions that provide them. Uninstalling these now dispensable extensions will increase your editor’s performance and efficiency.

I’ll be listing settings that control the behavior of these features. If you don’t know how to change settings, this guide will help.

Related: 10 Must-Have VSCode Extensions for Web Development

1. Auto closing of HTML tags

When you add a new HTML tag, this feature automatically adds the corresponding closing tag.

The closing tag for the div is automatically added.

Extensions for this

These extensions add the auto-closing feature to VSCode:

  • Auto Close Tag (12.3M+ downloads): “Automatically add HTML/XML close tag, same as Visual Studio IDE or Sublime Text”.
  • Close HTML/XML Tag (344K downloads): “Quickly close last opened HTML/XML tag”.

But feature already built in

I use these settings to enable/disable the auto-closing of tags in VSCode:

  • HTML: Auto Closing Tags: “Enable/disable autoclosing of HTML tags”. It is true by default.
  • JavaScript: Auto Closing Tags: “Enable/disable automatic closing of JSX tags”. It is true by default.
  • TypeScript: Auto Closing Tags: “Enable/disable automatic closing of JSX tags”. It is true by default.
Settings for auto closing in the VSCode Settings UI.
Settings for auto-closing in the Settings UI.

Add the following to your settings.json file to turn them on:

settings.json

{
  "html.autoClosingTags": true,
  "javascript.autoClosingTags": true,
  "typescript.autoClosingTags": true
}

2. Path autocompletion

The path autocompletion feature provides a list of files in your project to choose from when importing a module or linking a resource in HTML.

Extensions for this

These extensions add the path autocompletion feature to VSCode:

  1. Path IntelliSense (12.5M+ downloads): “Visual Studio Code Plugin that autocompletes filenames”.
  2. Path Autocomplete (1.7M+ downloads): “Provides path completion for Visual Studio Code and VS Code for the web”.

But feature already built in

VS Code already has native path autocompletion.

When I type in a filename to import (typically when the opening quote is typed), a list suggested project files shows up for me to quickly choose from.

3. Snippets for HTML and CSS

These extensions help you save time by adding common HTML and CSS snippets using abbreviations you can easily recall.

Extensions for this

These extensions bring convenient HTML and/or CSS snippets to VSCode:

  • HTML Snippets (10.1M+ downloads): “Full HTML tags including HTML5 snippets”.
  • HTML Boilerplate (3.2M+ downloads): “A basic HTML5 boilerplate snippet generator”.
  • CSS Snippets (225K+ downloads): “Shorthand snippets for CSS”.

But feature already built-in

Emmet is a built-in VSCode feature that provides HTML and CSS snippets like these extensions. As you’ll see in the official VSCode Emmet guide, it’s enabled by default in html, haml, pug, slim, jsx, xml, xsl, css, scss, sass, less, and stylus files.

Comprehensive to say the least.

When you start typing an Emmet abbreviation, a suggestion will pop up with auto-completion options; You’ll also see a preview of the expansion as you type in the VSCode’s suggestion documentation fly-out (if it is open).

Using Emmet in VSCode.

As you saw in the demo, this:

ol>li*3>p.rule$

turns into this:

<ol>
  <li>
    <p class="rule1">r</p>
  </li>
  <li>
    <p class="rule2"></p>
  </li>
  <li>
    <p class="rule3"></p>
  </li>
</ol>

Notice how similar the abbreviations are to CSS selectors. It’s by design; as stated on the official website, Emmet syntax is inspired by CSS selectors.

4. Bracket pair colorization

Bracket pair coloring is a popular syntax highlighting feature that colors brackets differently based on their order.

It makes it easier to identify scope and helps in writing expressions that involve many parentheses, such as single-statement function composition.

Extensions for this

Until VSCode had it built-in, these extensions helped enable the feature in the editor:

  1. Bracket Pair Colorizer 2 (6.1M+ downloads): “A customizable extension for colorizing matching brackets”. It has now been deprecated.
  2. Rainbow Brackets: (1.9M downloads): “A rainbow brackets extension for VS Code”.

I noticed Colorizer 2 has actually been deprecated since 2021 — wasn’t enough to stop millions from installing it every single year till date.

But feature already built in

After seeing the demand for bracket pair coloring and the performance issues involved in adding the feature as an extension, the VSCode team decided to integrate it into the editor.

In this blog, they say that the native bracket pair coloring feature is more than 10,000 times faster than Bracket Pair Colorizer 2.

Here’s the setting to enable/disable bracket pair colorization.

  • Editor > Bracket Pair Colorization: “Controls whether bracket pair colorization is enabled or not”. It is true by default, there’s been some debate about whether this should be the case here.
The bracket pair colorization option in the VSCode Settings UI.
The bracket pair colorization option in the Settings UI.

You can enable this by adding the following to your settings.json

settings.json

{
  "editor.bracketPairColorization.enabled": true
}

There is a maximum of 6 colors that can be used for successive nesting levels. Although each theme will have its maximum. For example, the Dracula theme has 6 colors by default, but the One Dark Pro theme has only 3.

Left: bracket pair colors in One Dark Pro theme. Right: bracket pair in Dracula theme.

Nevertheless, you can customize the bracket colors for any theme with the workbench.colorCustomizations setting.

  "workbench.colorCustomizations": {
    "[One Dark Pro]": {
      "editorBracketHighlight.foreground1": "#e78009",
      "editorBracketHighlight.foreground2": "#22990a",
      "editorBracketHighlight.foreground3": "#1411c4",
      "editorBracketHighlight.foreground4": "#ddcf11",
      "editorBracketHighlight.foreground5": "#9c15c5",
      "editorBracketHighlight.foreground6": "#ffffff",
      "editorBracketHighlight.unexpectedBracket.foreground": "#FF2C6D"
    }
  },

We specify the name of the theme in square brackets ([ ]), then we assign values to the relevant properties. The editorBracketHighlight.foregroundN property sets the color of the Nth set of brackets, and 6 is the maximum.

Now this will be the bracket pair colorization for One Dark Pro:

Customized bracket pair colorization for One Dark Pro theme.

5. Auto importing of modules

With an auto-importing feature, when a function, variable, or some other member of a module is referenced in a file, the module is automatically imported into the file, saving time and effort.

The function is automatically imported from the file when referenced.

If the module files are moved, the feature will help automatically update them.

Imports for a file are automatically updated on move.

Extensions for this

Here are some of the most popular extensions providing the feature for VSCode users:

  • Auto Import (3.8M downloads): “Automatically finds, parses, and provides code actions and code completion for all available imports. Works with Typescript and TSX”.
  • Move TS (810K downloads): “extension for moving typescript files and folders and updating relative imports in your workspace”.

But feature already built in

You can enable or disable auto-importing modules in VSCode with the following settings.

  • JavaScript > Suggest: Auto Imports: “Enable/disable auto import suggestions”. It is true by default.
  • TypeScript > Suggest: Auto Imports: “Enable/disable auto import suggestions”. It is true by default.
  • JavaScript > Update Imports on File Move: “Enable/disable automatic updating of import paths when you rename or move a file in VS Code”. The default value is prompt, meaning that a dialog is shown to you, asking if you want to update the imports of the moved file. Setting it to alwayswill cause the dialog to be skipped, and never will turn off the feature entirely.
  • TypeScript > Update Imports on File Move: “Enable/disable automatic updating of import paths when you rename or move a file in VS Code”. Like the previous setting, it has possible values of prompt, always, and never, and the default is prompt.
One of the auto import settings in the Settings UI.

You can control these settings with these settings.json properties:

{
  "javascript.suggest.autoImports": true,
  "typescript.suggest.autoImports": true,
  "javascript.updateImportsOnFileMove.enabled": "prompt",
  "typescript.updateImportsOnFileMove.enabled": "prompt"
}

You can also add this setting if you want your imports to be organized any time the file is saved.

"editor.codeActionsOnSave": {
    "source.organizeImports": true
}

This will remove unused import statements and arrange import statements with absolute paths on top, providing a hands-off way to clean up your code.

Final thoughts

These extensions might have served a crucial purpose in the past, but not anymore for the most part, as much of the functionality they provide has been added as built-in VSCode features. Remove them to reduce the bloat and increase the efficiency of Visual Studio Code.

VS Code: 5 rapid file creation tips for greater productivity

From painfully slow to lightning-fast, let’s look at all the 5 ways to create a file in VS Code.

And fastest way adds new files without having to use your mouse at all! We’ll see…

5. File > New File…

I’m pretty sure very few people use this apart from those who are new to text editors.

You move your mouse all the way up to File then click New File…

Then you’ve still got to enter the filename:

THEN, a file picker dialog for you to choose the folder – never mind VS Code having its own built-in file manager.

Before finally:

Create: New File

This is almost like the first, except you use the Create: New File from the Command Palette.

4. Double-click tab bar

Not many know about this method… double-clicking the file tab bar:

Ctrl + N

Or use the faster Ctrl + N keyboard shortcut.

So after Ctrl + N you either manually select a language:

Or you just start typing and wait for language auto-detection:

It’s useful when you don’t have any open project and you just want a quick file to work on.

You’re still got to save it though:

3. New File… icon button

This is one of the more popular ways; clicking the New File... icon button in the File Explorer Pane:

2. Double-click file explorer pane

This works great for top-level files.

1. A

Opening keyboard shortcuts like this:

And editing it like this:

To create files faster than ever at the single press of a key:

They all have different speeds but they’re all useful. VS Code’s vast versatility is unmatched.