html

Nobody wants to use these HTML tags 😭

Trust me, you can do MUCH better than <div> <a> and <p>.

Living images, built-in dialogs, a href hacking…

There’s a whole lot of sophisticated tags to discover.

1. progress and meter

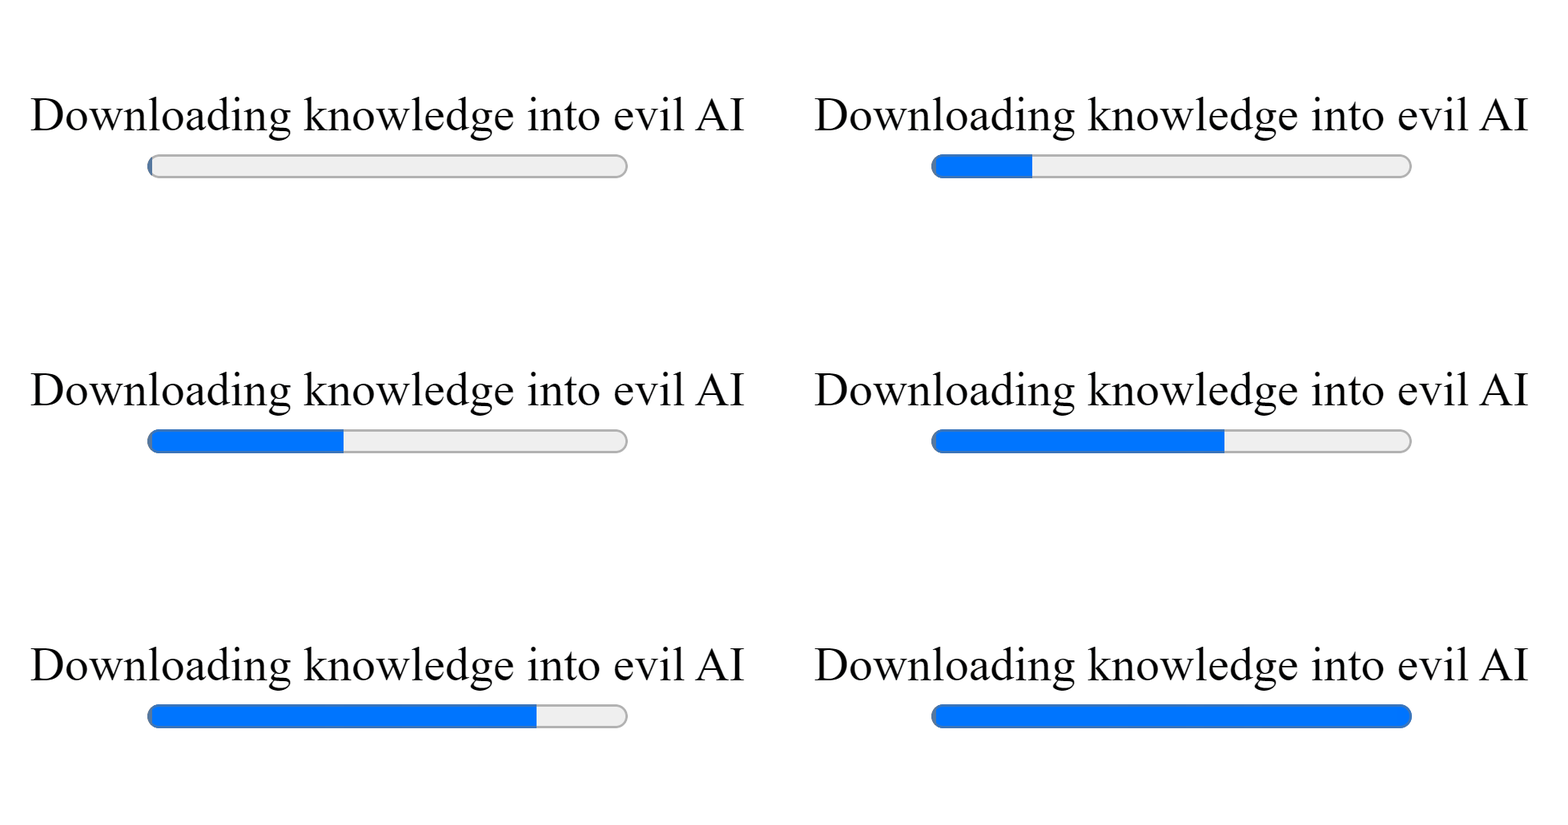
So first there’s progress – your typical drama-free progress bar.

You set a value and max for gradation — pretty straightforward.

HTML
<label for="file" >Downloading knowledge into evil AI</label > <progress id="file" value="0" max="100">32%</progress>
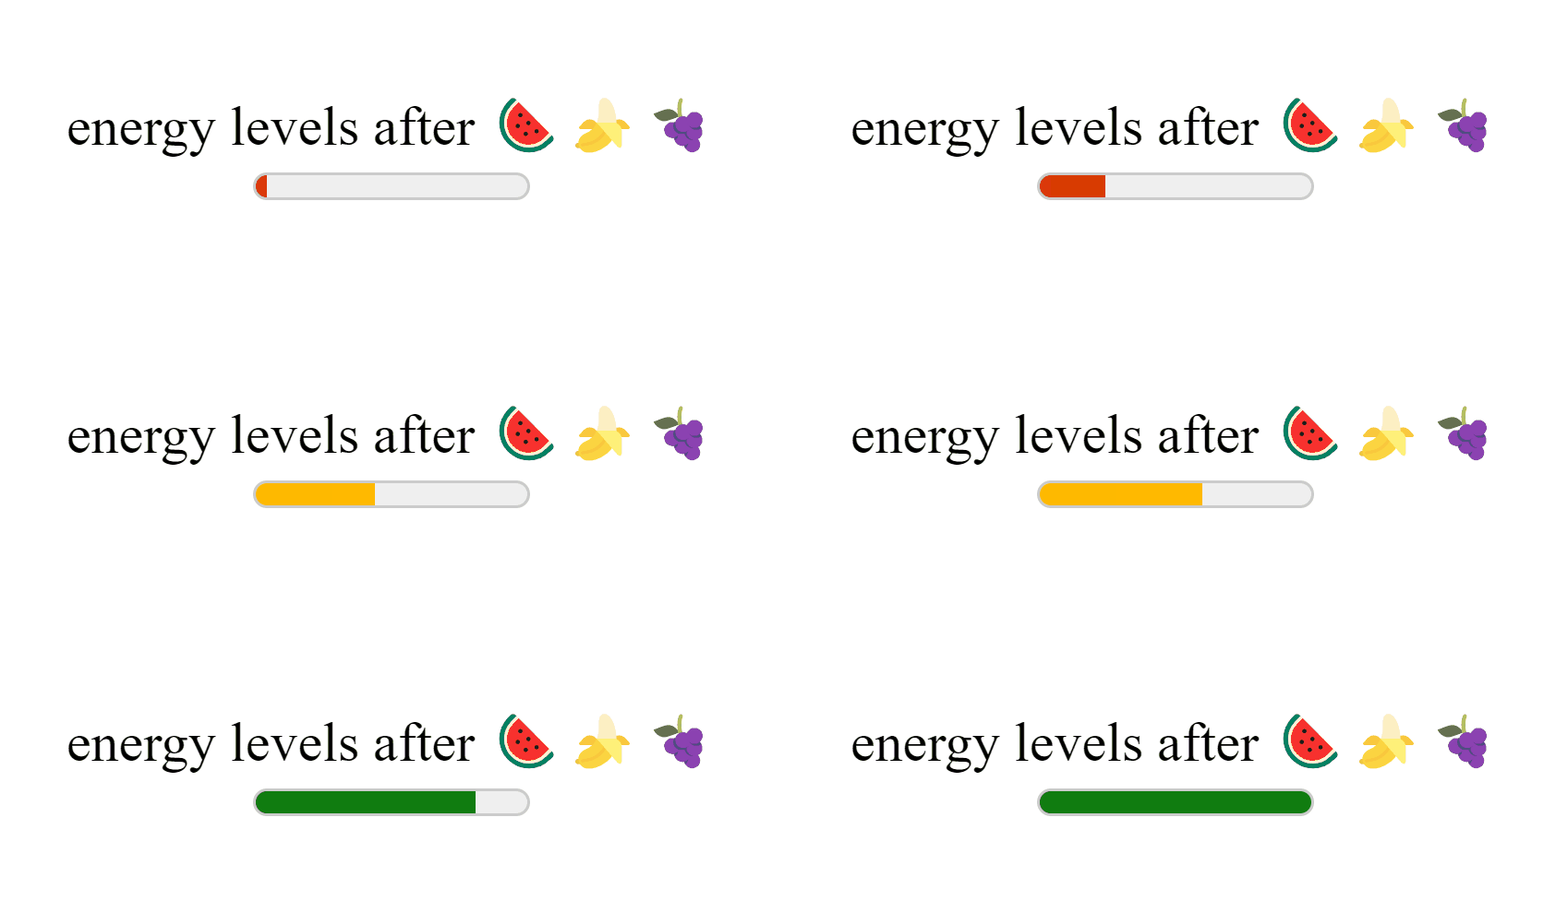
But then there’s meter — also known as progress on a rampage:

HTML
<label for="energy">energy levels after 🍉🍌🍇</label> <meter id="energy" min="0" max="100" low="25" high="75" optimum="80" value="50" />
2. dfn

dfn — for anything we’re gonna define in the page:

HTML
<div> <dfn>Mellifluous</dfn> sounds are smooth, musical🎶, and pleasant to hear </div>

And the definition must be inside the dfn‘s parent tag, or else…

Or else nothing — just a semantic rule you can happily disregard.

3. dialog

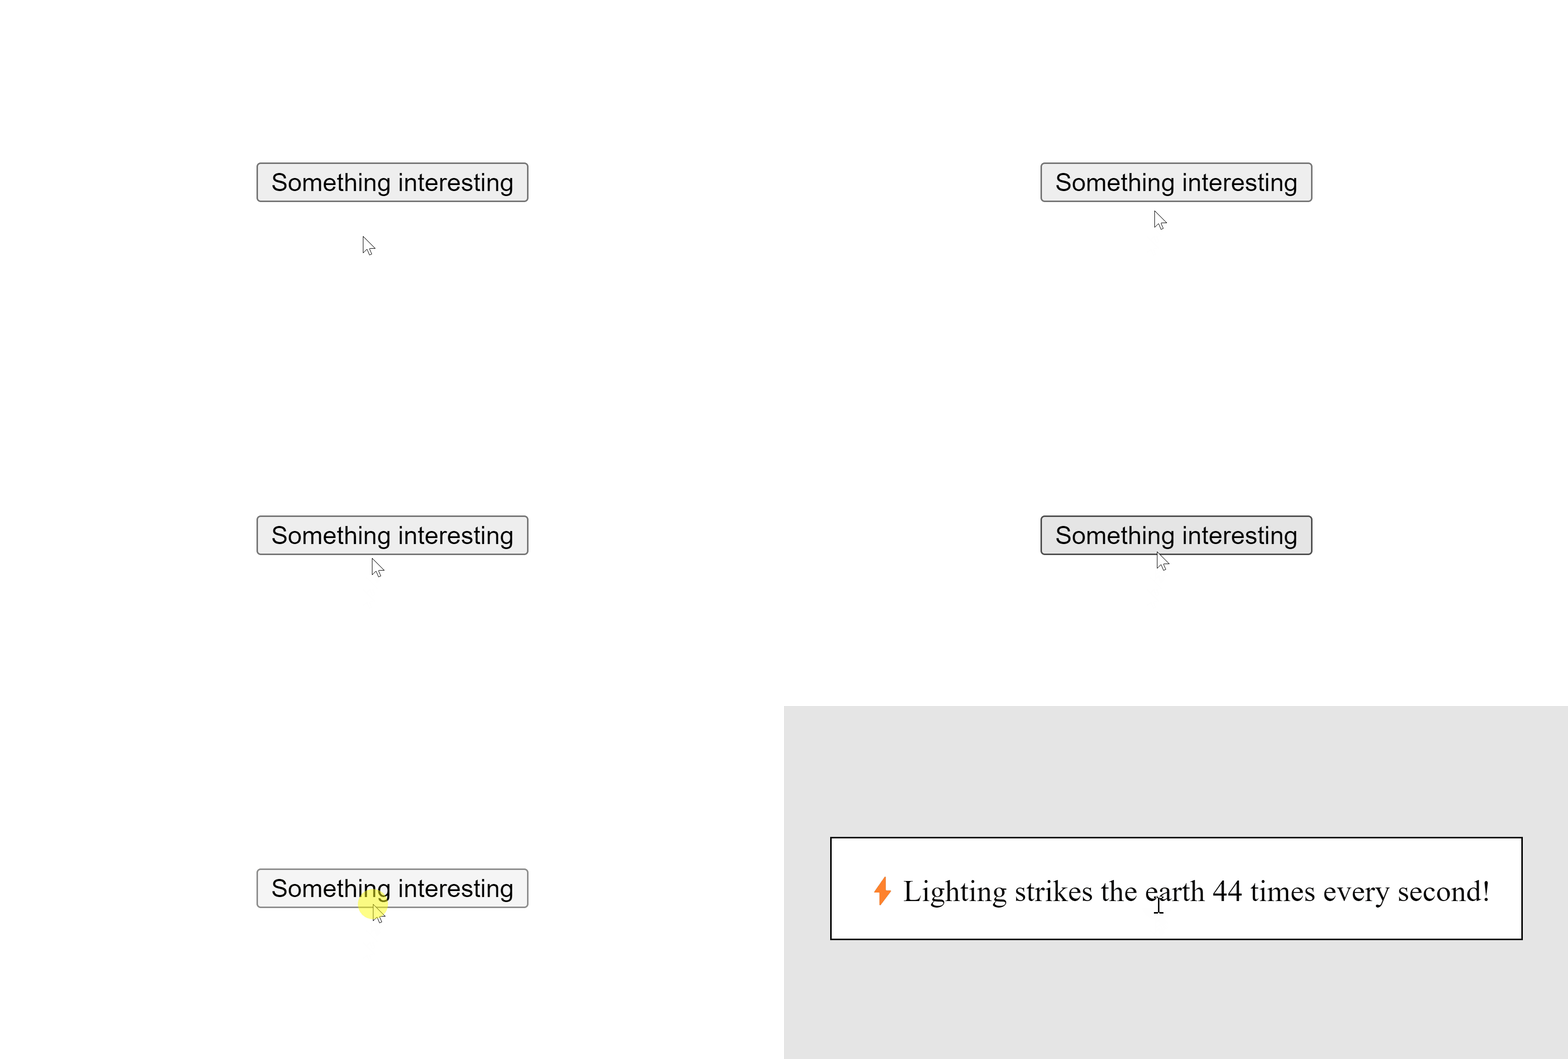
New native HTML dialogs!

HTML
<dialog id="dialog"> ⚡Lighting strikes the earth 44 times every second! </dialog> <button>Something interesting</button>
JavaScript
const dialog = document.getElementById('dialog'); const button = document.querySelector('button'); button.addEventListener('click', () => { dialog.showModal(); });
Stay open from the get-go:

HTML
<!-- btw setting open to "false" won't do anything --> <dialog id="dialog" open> 😻 Cats have over 30 different muscles just in their ears, allowing them to swivel them in all directions. </dialog>

Built-in support for closing:

HTML
<dialog id="dialog" open> Your free trial is over! Subscribe for as low as $5 billion per month <form method="dialog"> <button>Get lost</button> </form> </dialog>
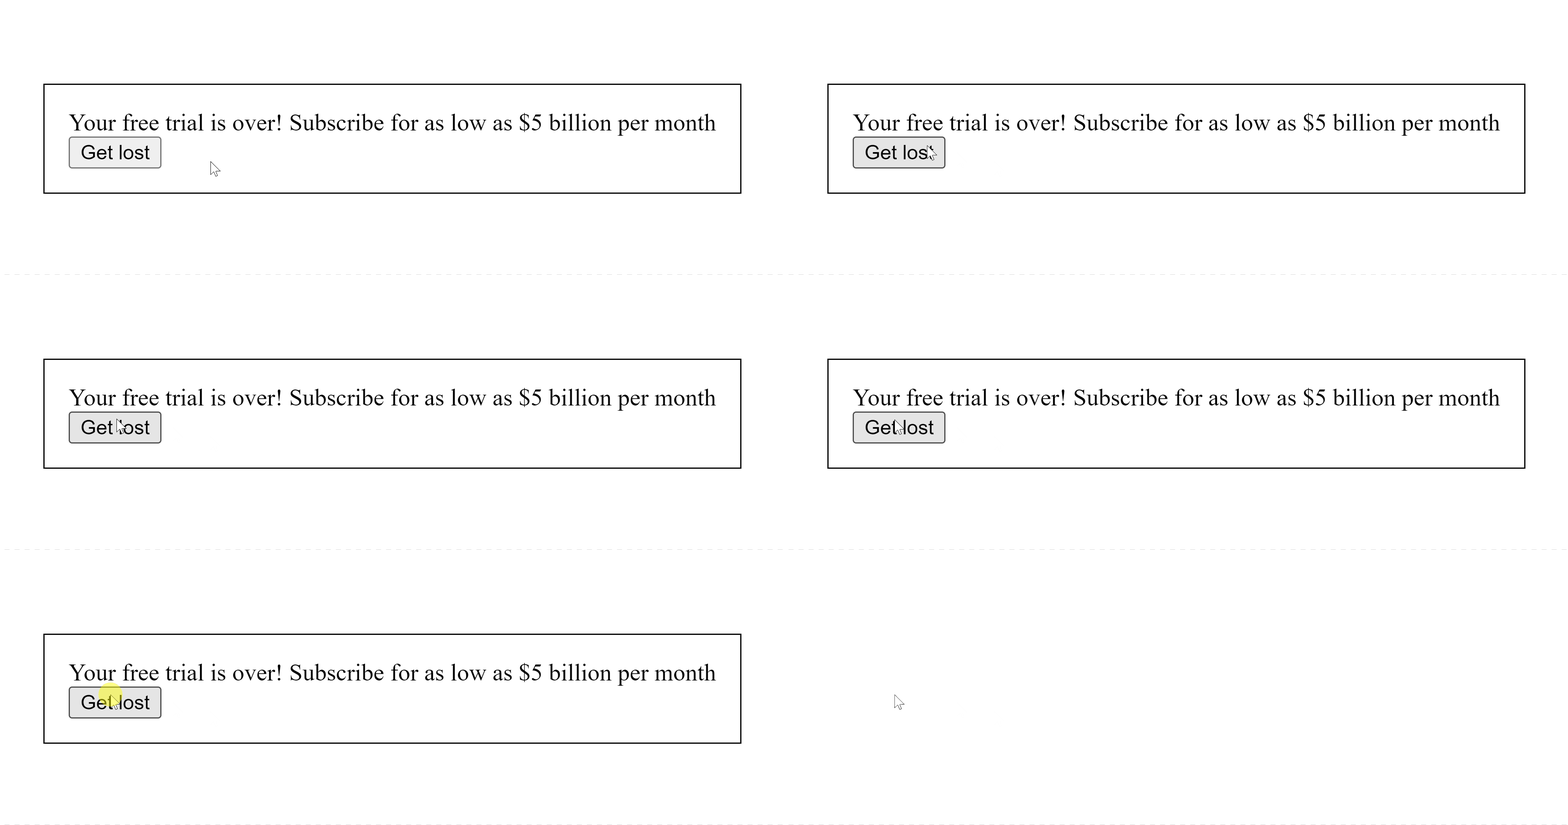
And powerful, flexible customization letting you create wonderful UIs like this:

4. map and area

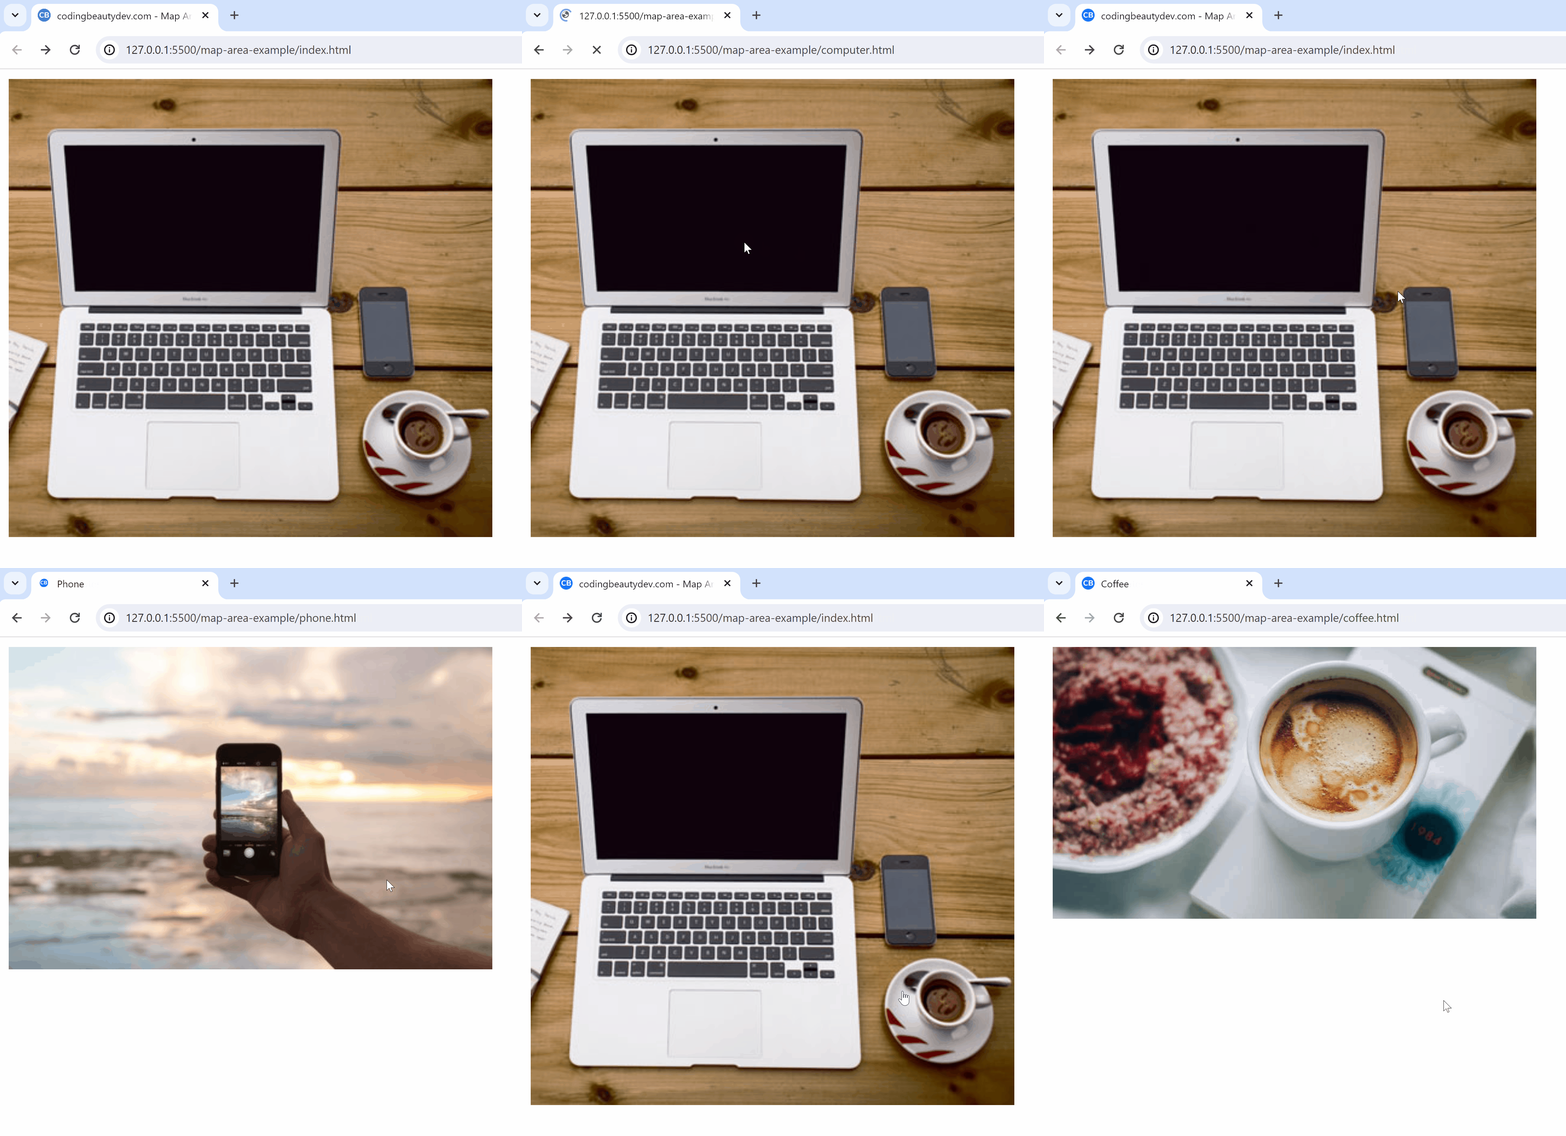
<map> and <area> — powerful combo to create clickable areas in images:

HTML
<img src="workplace.jpg" alt="Workplace" usemap="#workmap" width="400" height="379" /> <map name="workmap"> <area shape="rect" coords="34,44,270,350" alt="Computer" href="computer.html" /> <area shape="rect" coords="290,172,333,250" alt="Phone" href="phone.html" /> <area shape="circle" coords="337,300,44" alt="Cup of coffee" href="coffee.html" /> </map>

We call clickable images like these image maps.
5. bdo

Super cryptic acronym here, what does it do?

This 👇

JavaScript
<!-- dir = direction --> <!-- rtl = right-to-left --> <bdo dir="rtl"> 🥺🥰but when I saw you I felt something I never felt... </bdo>

That’s why it stands for: bi-directional override.

6. base

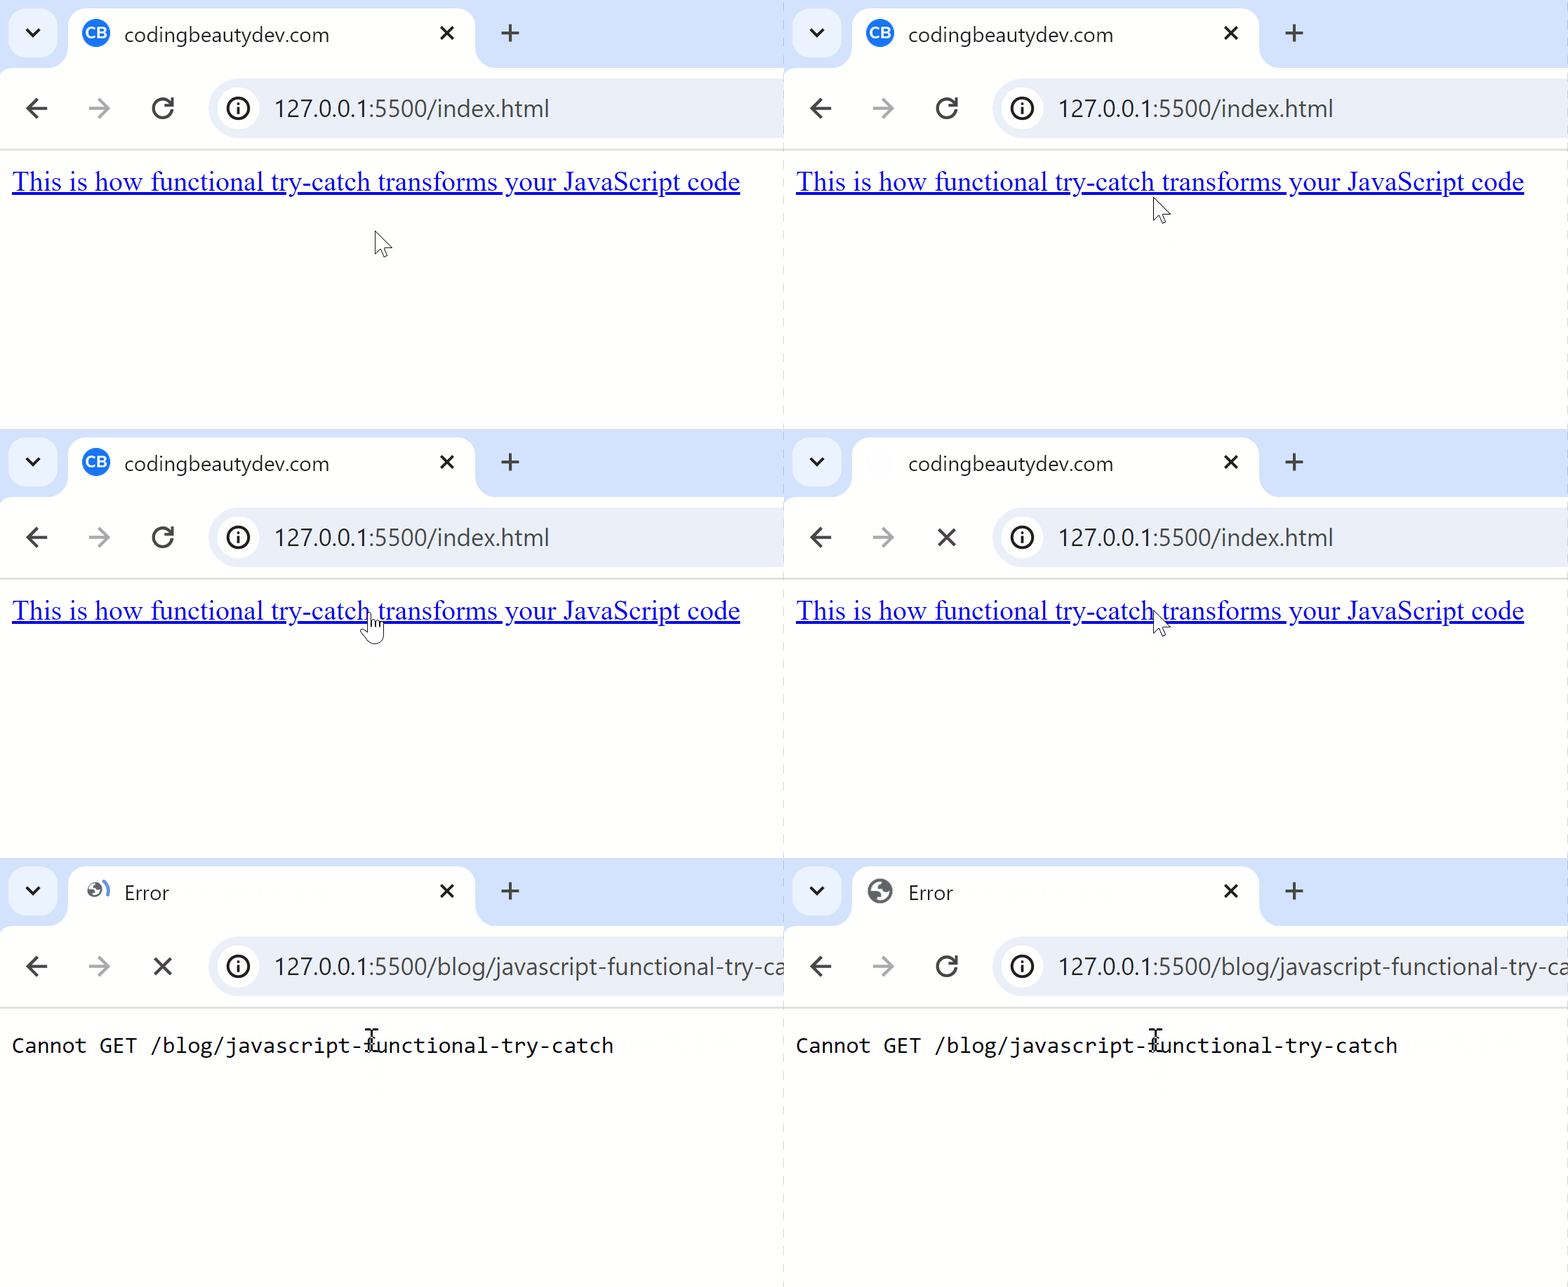
So you know how relative URLs normally work right? 👇

HTML
<body> <a href="/blog/javascript-functional-try-catch" >This is how functional try-catch transforms your JavaScript code </a> </body>

The <a>‘s use the page’s domain to get the full URL they’ll navigate you to:
But what happens when you create a foundational <base> in the HTML?

HTML
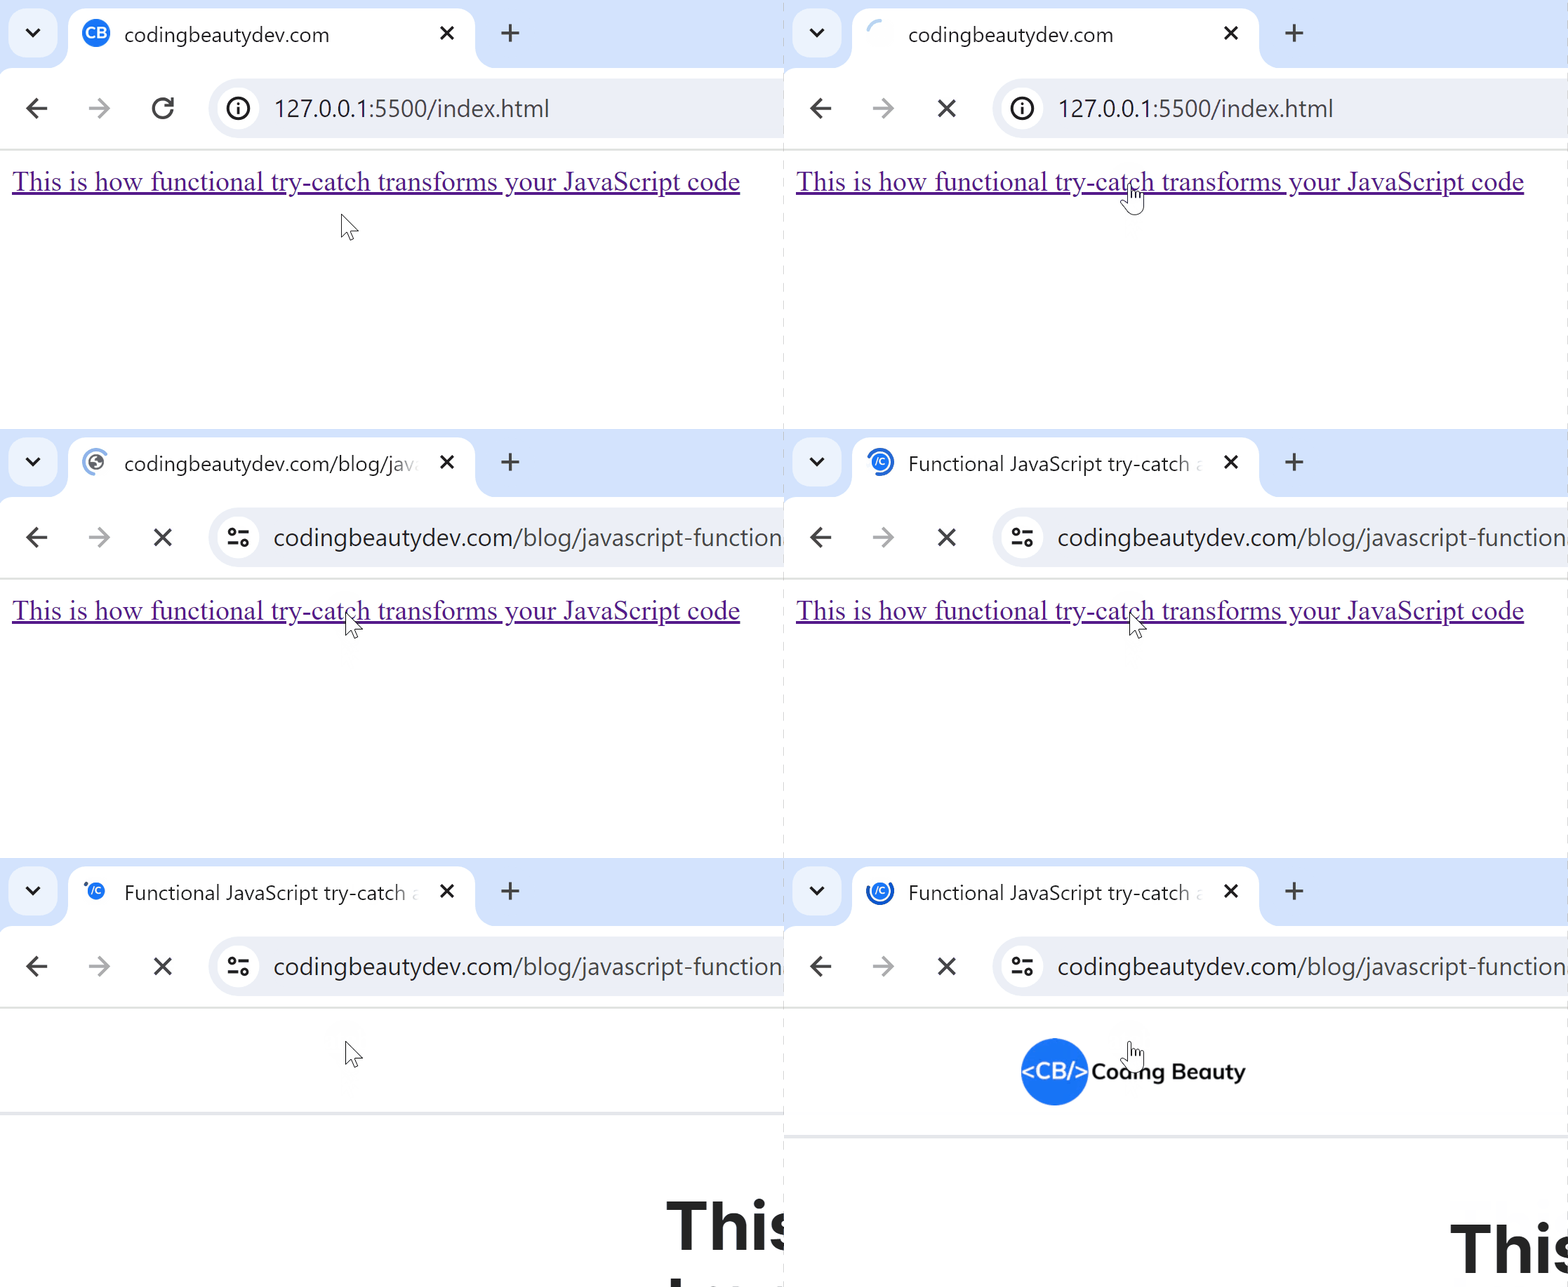
<head> <!-- ✅ <base> tag --> <base href="https://www.codingbeautydev.com" /> <title>codingbeautydev.com</title> </head> <body> <a href="/blog/javascript-functional-try-catch" >This is how functional try-catch transforms your JavaScript code </a> </body>

Now they all use the hardcoded value in the <base>‘s href to get the full URL:
Frameworks like Angular and Flutter Web use it too:

7. time

For dates and times:

HTML
My Journal <br/><br/> <time>2:36pm</time> -- I asked her if she wanted to grab a cup of coffee with me <br /> <time>3:50pm</time> -- Still dealing with the brutal rejection

No fancy visuals but it means a lot to search engines.

With time they better understand the dates in your page and produce smarter results.

Especially with the datetime attribute:

JavaScript
<time datetime="2025-01-07">AI singularity</time> is coming sooner than you think!

8. hgroup

<hgroup> is all about family.

It tells the entire world that a heading tag and some content below are related:

HTML
<hgroup> <h1>Maybe this is the end, but if we go out...</h1> <p>We go out together</p> </hgroup>

Family sticks together:

9. kbd

Represents keyboard inputs:

HTML
Over 30 years professional experience with StackOverflow specializing in <kbd>Ctrl + C</kbd> and <kbd>Ctrl + V</kbd>

And speaking of StackOverflow, <kbd> has a nice styling there and other StackExchange sites.

10. cite

Indicates the title of a book, song, movie, or some other creative work:

HTML
One thing I love about <cite>Wednesday</cite> is how Wednesday doesn't care about fitting in

Final thoughts

So these are 10 of the least known and utilized tags in HTML.

Quite useful in various situations despite their low usage.

Emmet is amazing

If you’re not using Emmet you’re missing out and wasting a lot of valuable time.

It is a powerful shorthand syntax for writing large swaths of HTML and JSX code with as little effort as possible:

Use these 10 solid tips to maximize Emmet to its fullest potential and spend much less time writing repetitive HTML.

The syntax is quite similar to CSS and easy to understand.

1. Nest tags with >

Emmet makes creating a hierarchy of tags easier than ever with the > symbol:

From this:

Plain text
body>main>div>ul>li

To this:

HTML
<body> <main> <div> <ul> <li></li> </ul> </div> </main> </body>

2. Create siblings with +

Just like the + CSS selector, this lets you create elements that are siblings in the DOM hierarchy.

From this:

Plain text
header + main + aside + footer

To this:

HTML
<header></header> <main></main> <aside></aside> <footer></footer>

3. Climb up with ^

> is for drilling down and ^ is for climbing back up.

Here we create a child p in div and jump out to create a sibling ul:

So from:

Plain text
main>div>p^ul>li

To:

HTML
<main> <div> <p></p> </div> <ul> <li></li> </ul> </main>

4. Add id

Use # to create an element with an id:

Another CSS similarity.

So from:

Plain text
div#hero>p#intro+section#body

To:

HTML
<div id="hero"> <p id="intro"></p> <section id="body"></section> </div>

5. Add class

Use . to add one or more classes to the element expansion.

It uses div by default if you don’t specify an element.

Great for using all those Tailwind CSS classes:

From this:

Plain text
.container>.flex.justify-center>h1.title

To this:

HTML
<div class="container"> <div class="flex justify-center"> <h1 class="title"></h1> </div> </div>

6. Add attribute

Add one or more attributes to the element expansion with [name=value]:

From this:

Plain text
body>form>input[type="text"]+button[type="submit"]

To this:

HTML
<body> <form action=""> <input type="text" /><button type="submit"></button> </form> </body>

7. Common HTML element shorthands

Emmet is packed with helpful shorthands for common combinations of elements and their attributes:

For example:

  • input:t input[type="text"]
  • button:s button[type="submit"]
  • link:css <link rel="stylesheet" href="style.css">

So we could have written the last syntax like this:

Plain text
body>form>input:t+button:s

8. Grouping

You can create separate groups of element hierarchies like this:

From this:

Plain text
.container>(header>nav.fixed+h1)+(aside>.sidebar)+a

To this:

HTML
<div class="container"> <header> <nav class="fixed"></nav> <h1></h1> </header> <aside> <div class="sidebar"></div> </aside> <a href=""></a> </div>

9. Multiplication

This is one of the coolest Emmet features.

el*n to create n <el>‘s in the expansion:

From this:

Plain text
div>ul>li*5

To this:

HTML
<div> <ul> <li></li> <li></li> <li></li> <li></li> <li></li> </ul> </div>

VS Code’s multi-cursor editing feature makes this even more powerful — with Ctrl + Alt + Down I easily select all the new elements to add text to all of them at the same time:

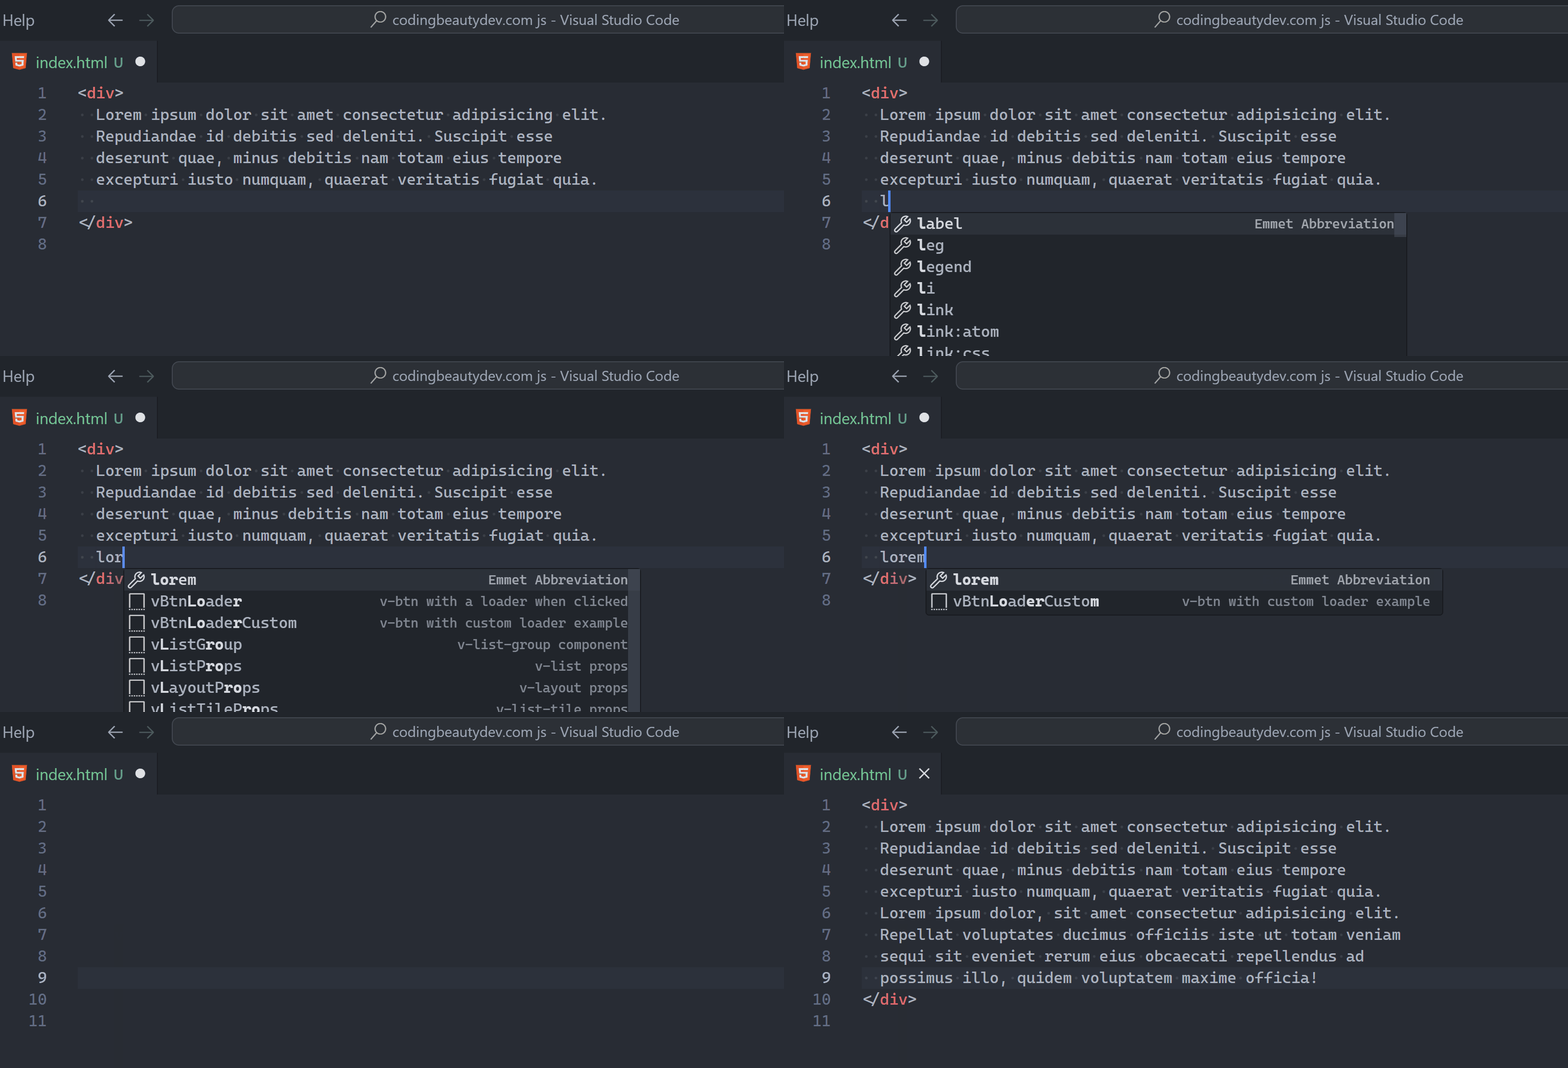
10. Lorem Ipsum

Lorem Ipsum is the standard placeholder text for designing UIs, and Emmet makes it effortless to add it for visual testing.

Just type lorem in VS Code and you’ll instantly a full paragraph of the stuff:

Type lorem again to expand the text — it intelligently continues from where it stopped:

Final thoughts

Use these 10 powerful Emmet syntax tips to write HTML and JSX faster than ever.

Recreate the Material Design text field with HTML, CSS, and JavaScript

No doubt you’ve seen the beautiful text field if you’re one of Gmail’s 2 billion active users:

It’s fluid, it’s intuitive, it’s colorful 🎨.

It’s Material Design: the wildly popular UI design system powering YouTube, WhatsApp, and many other apps with billions of users.

Let’s embark on a journey of recreating it from scratch with pure vanilla HTML, CSS, and JavaScript.

1. Start: Create basic input and label

As always we start with the critical HTML foundation, the skeleton:

The text input, a label, and a wrapper for both:

HTML
<!-- For text animation -- soon --> <div class="input-container"> <input type="text" id="fname" name="fname" value="" aria-labelledby="label-fname" /> <label class="label" for="fname" id="label-fname"> <div class="text">First Name</div> </label> </div>

2. Style input and label

I find it pretty satisfying: using CSS to gradually flesh out a stunning UI on the backs of a solid HTML foundation.

Let’s start:

Firs the <input> and its container:

CSS
.input-container { position: relative; /* parent of .label */ } input { height: 48px; width: 280px; border: 1px solid #c0c0c0; border-radius: 4px; box-sizing: border-box; padding: 16px; } .label { /* to stack on input */ position: absolute; top: 0; bottom: 0; left: 16px; /* match input padding */ /* center in .input-container */ display: flex; align-items: center; } .label .text { position: absolute; width: max-content; }

3. Remove pointer events

It resembles a text field now, but look what happens when I try focusing:

The label is part of the text field and the cursor should reflect that:

Solution? cursor: text

CSS
.label { ... cursor: text; /* Prevent blocking <input> focus */ pointer-events: none; }

4. Style input font

Now it’s time to customize font settings:

If you know Material Design well, you know Roboto is at the center of everything — much to the annoyance of some.

We’ll grab the embed code from Google Fonts:

Embed:

Use:

CSS
input, .label .text { font-family: 'Roboto'; font-size: 16px; }

5. Style input on focus

You’ll do this with the :focus selector:

CSS

input:focus {
  outline: none;
  border: 2px solid blue;
}

6. Fluidity magic: Style label on input focus

On focus the label does 3 things:

  1. Shrinks
  2. Move to top input border
  3. Match input border color

Of course we can do all these with CSS:

CSS
input:focus + .label .text { /* 1. Shrinks */ font-size: 12px; /* 2. Move to top input border */ transform: translate(0, -100%); top: 15%; padding-left: 4px; padding-right: 4px; /* 3. Match input border color */ background-color: white; color: #0b57d0; }

All we need to complete the fluidity is CSS transition:

CSS
label .text { transition: all 0.15s ease-out; }

7. One more thing

Small issue: The label always goes to the original position after the input loses focus:

Because it depends on CSS :focus which goes away on focus lost.

But this should only happen when there’s no input yet.

CSS can’t fix this alone, we’re going to deploy the entire 3-tiered army of web dev.

HTML: input value to zero.

HTML
<input type="text" id="fname" name="fname" value="" aria-labelledby="label-fname" />

CSS: :not selector to give unfocused input label same position and size when not empty:

JavaScript
input:focus + .label .text, /* ✅ no input yet */ :not(input[value='']) + .label .text { /* 1. Shrink */ font-size: 12px; transform: translate(0, -100%); /* 2. Move to top */ top: 15%; padding-left: 4px; padding-right: 4px; /* 3. Active color */ background-color: white; color: #0b57d0; }

And JavaScript: Sync initial input value attribute with user input

JavaScript
const input = document.getElementById('fname'); input.addEventListener('input', () => { input.setAttribute('value', input.value); });
JavaScript
const input = document.getElementById('fname'); input.addEventListener('input', () => { input.setAttribute('value', input.value); });

That’s it! We’ve successfully created an outlined Material Design text field.

With React or Vue it’ll be pretty easy to abstract everything we’ve done into a reusable component.

Here’s the link to the full demo: CodePen

10 rare HTML tags that nobody ever uses

There’s way more to HTML than <div>, <a>, and <p>.

So much more sophisticated and powerful tags that you’ve probably never used.

From modern list visualization to 🎨 colorful highlights, let’s look at 10 little-known but capable HTML tags.

1. abbr

The <abbr> tag defines an abbreviation or acronym, like HTML, CSS, and JS.

And LOL too – though that’s more of a standalone word these days.

I'm reading about
<abbr title="Hypertext Markup Language">HTML</abbr>
tags at
<abbr title="Coding Beauty">CB</abbr>
The abbreviation is indicated with a dotted line by default.
Dotted line for abbreviation.

We use the title attribute of the <abbr> tag to show the description of the abbreviation/acronym when you hover over the element:

Hover over <abbr> to show the full form:

Hovering over the <abbr> element.

2. q

The <q> tag indicates that the text inside of it is a short inline quotation.

<q>Coding creates informative tutorials on Web Development technologies</q>

Modern browsers typically implement this tag by wrapping the enclosed text in quotation marks:

The text in the <q> tag is wrapped with quotation marks.

3. s

<s> strikes through.

To correct without destroying the change history.

Buy for <s>$200</s> $100
Indicating price change with the <s> tag.

The <del> and <ins> pair are similar but semantically meant for document updates instead of corrections.

<!DOCTYPE html>
<html lang="en">
  <head>
    <style>
      del {
        background-color: lightsalmon;
      }

      ins {
        text-decoration: none;
        background-color: lightgreen;
      }
    </style>
  </head>
  <body>
    My favorite programming language is <del>JavaScript</del>
    <ins>TypeScript</ins>
  </body>
</html>
Indicating editorial changes in a document with the <del> and <ins> tags.

4. mark

Marks or highlights text.

Coding <mark>Beauty</mark> Website

Yellow background color by default:

The <mark> tag applies a bright yellow background to its enclosed text.

Like how browsers show search results.

Display search results for the letter "e" with the <mark> tag.
e e e e e e ….

5. wbr

<wbr> tells browser, “You can only break text here and there”

So the browser doesn’t get lousy and start break crucial words all over the place.

That’s why it’s wbr — Word BReak Opportunity

<p>this-is-a-very-long-text-created-to-test-the-wbr-tag</p>
The text is broken at a location chosen by the browser.
Browser is joking around.

But now with <wbr />

<p>this-is-a-very-long-te<wbr />xt-created-to-test-the-wbr-tag</p>

Broken precisely after ...-te:

The text is broken at the location set with the <wbr> tag.
Obviously no reason to break there in real-world code though.

6. details

<details> is all about expanding and contracting — like the universe.

<details>
  <summary>Lorem Ipsum</summary>
  Lorem ipsum dolor sit, amet consectetur adipisicing elit. Deleniti eos
  quod fugiat quasi repudiandae, minus quae facere. Sed, quia? Quod
  cupiditate asperiores neque iste consectetur tempore eum repellat incidunt
  qui.
</details>

Contract:

A closed disclosure widget.
The disclosure widget is closed (default state).

Expand:

An open disclosure widget.
The disclosure widget is open.

7. optgroup

The name says it all — grouping options.

You can usually group gigantic option lists into clear hierarchies, and <outgroup> is here to help.

<select name="country" id="countries">
  <optgroup label="North America">
    <option value="us">United States</option>
    <option value="ca">Canada</option>
  </optgroup>
  <optgroup label="Europe">
    <option value="uk">United Kingdom</option>
    <option value="fr">France</option>
  </optgroup>
</select>

Countries → continents.

An open dropdown list contains grouped options.

8. datalist

<datalist> is all about making inputting text effortless.

With dropdown lists for autocomplete:

<form>
  <label for="lang">Choose a language:</label>
  <input list="langs" name="lang" id="lang" />

  <!-- 🔗<input> list to <datalist> id -->

  <datalist id="langs">
    <option value="English" />
    <option value="French" />
    <option value="Spanish" />
    <option value="Chinese" />
    <option value="German" />
  </datalist>
</form>
An input with an available list of options.
A list of available options for the input is displayed in a dropdown list.
An input with a responsive list of options.
The available options change according to what the user types in the input.

9. fieldset

A set of fields — farmers must find it useful.

Creating a clean visual separation to easily understand the forms.

<form>
  <fieldset>
    <legend>Name</legend>

    <label for="fname">First Name:</label>
    <input type="text" id="fname" name="fname" /><br />
    <label for="mname">Middle Name:</label>
    <input type="text" id="mname" name="mname" /><br />
    <label for="lname">Last Name:</label>
    <input type="text" id="lname" name="lname" />
  </fieldset>
  <br />
  <label for="email">Email:</label>
  <input type="email" id="email" name="email" />
  <br /><br />
  <label for="password">Password:</label>
  <input type="password" id="password" name="password" />
</form>

We use the <legend> tag to define a caption for the <fieldset> element.

Input elements, some grouped with a <fieldset> tag.

10. sup and sub

<sup> — superscript.

<sub> — subscript.

<p>This text contains <sub>subscript</sub> text</p>
<p>This text contains <sup>superscript</sup> text</p>
The text contains both subscript and superscript.

Something more intense: neutralization reaction 🧪

&#x1D465;<sup>2</sup> - 3&#x1D465; - 28 = 0. Solve for &#x1D465;. <br />
<br />
H<sub>2</sub>SO<sub>4</sub> + NaOH &#8594; Na<sub>2</sub>SO<sub>4</sub> +
H<sub>2</sub>O

Conclusion

In this article, we explored some of the least known and utilized tags in HTML. These rare tags can be quite useful in particular situations despite their low usage.