featured

This tiny mistake completely ruins your code

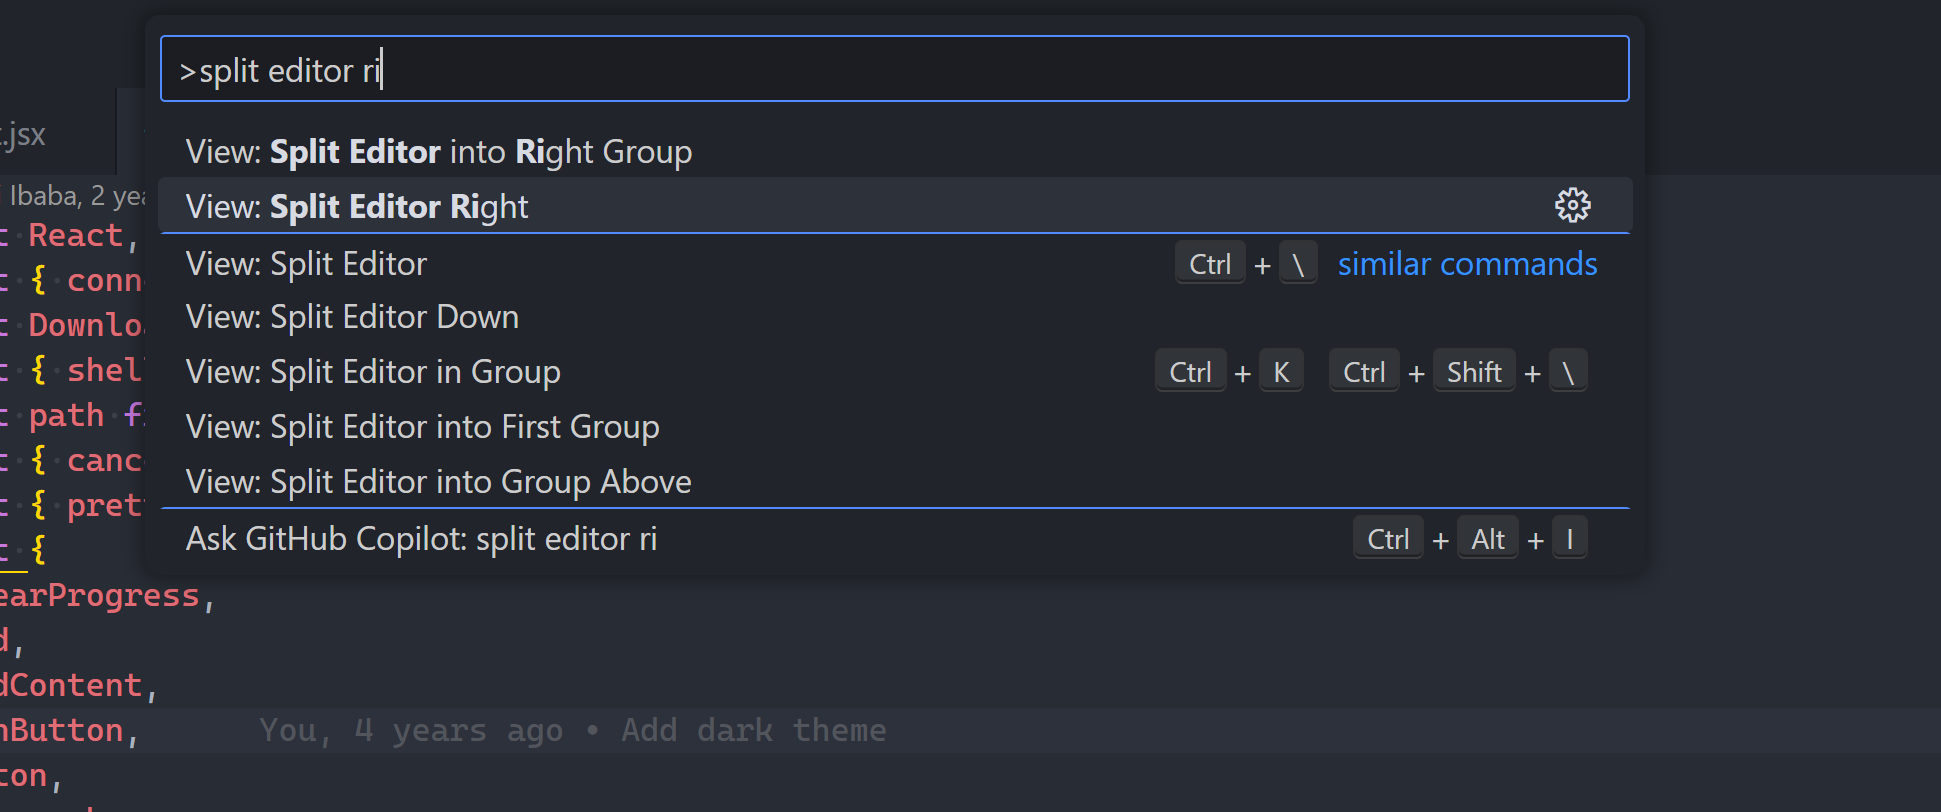
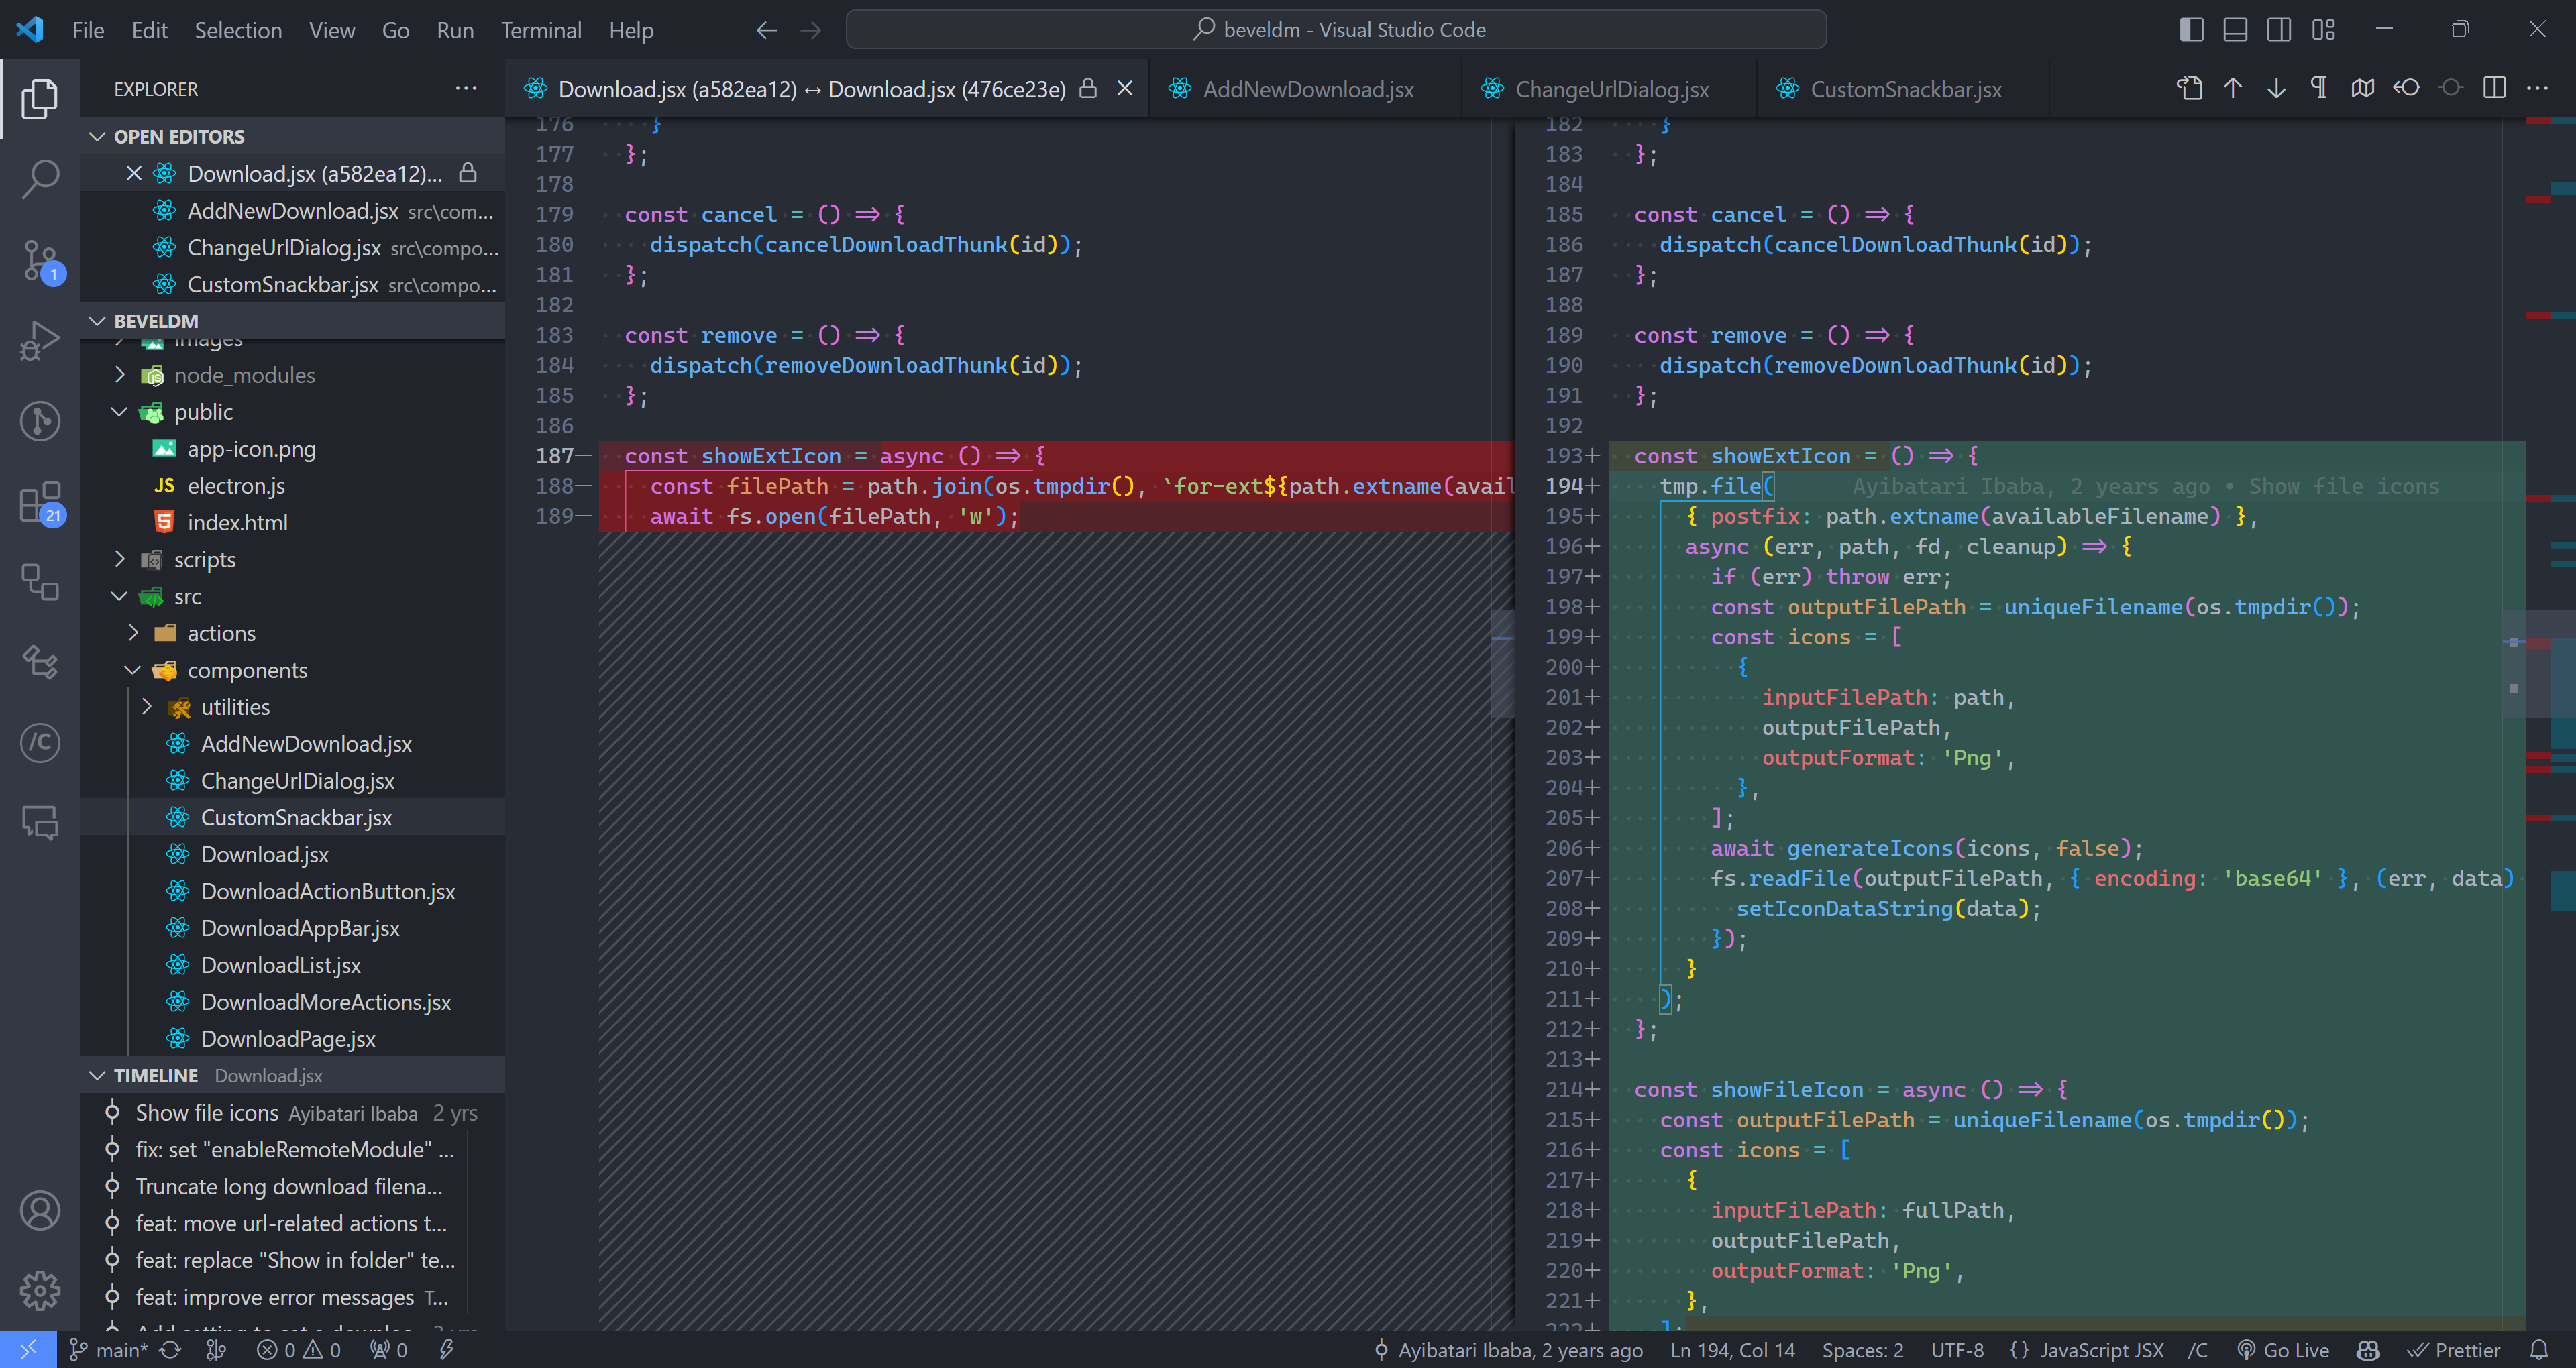
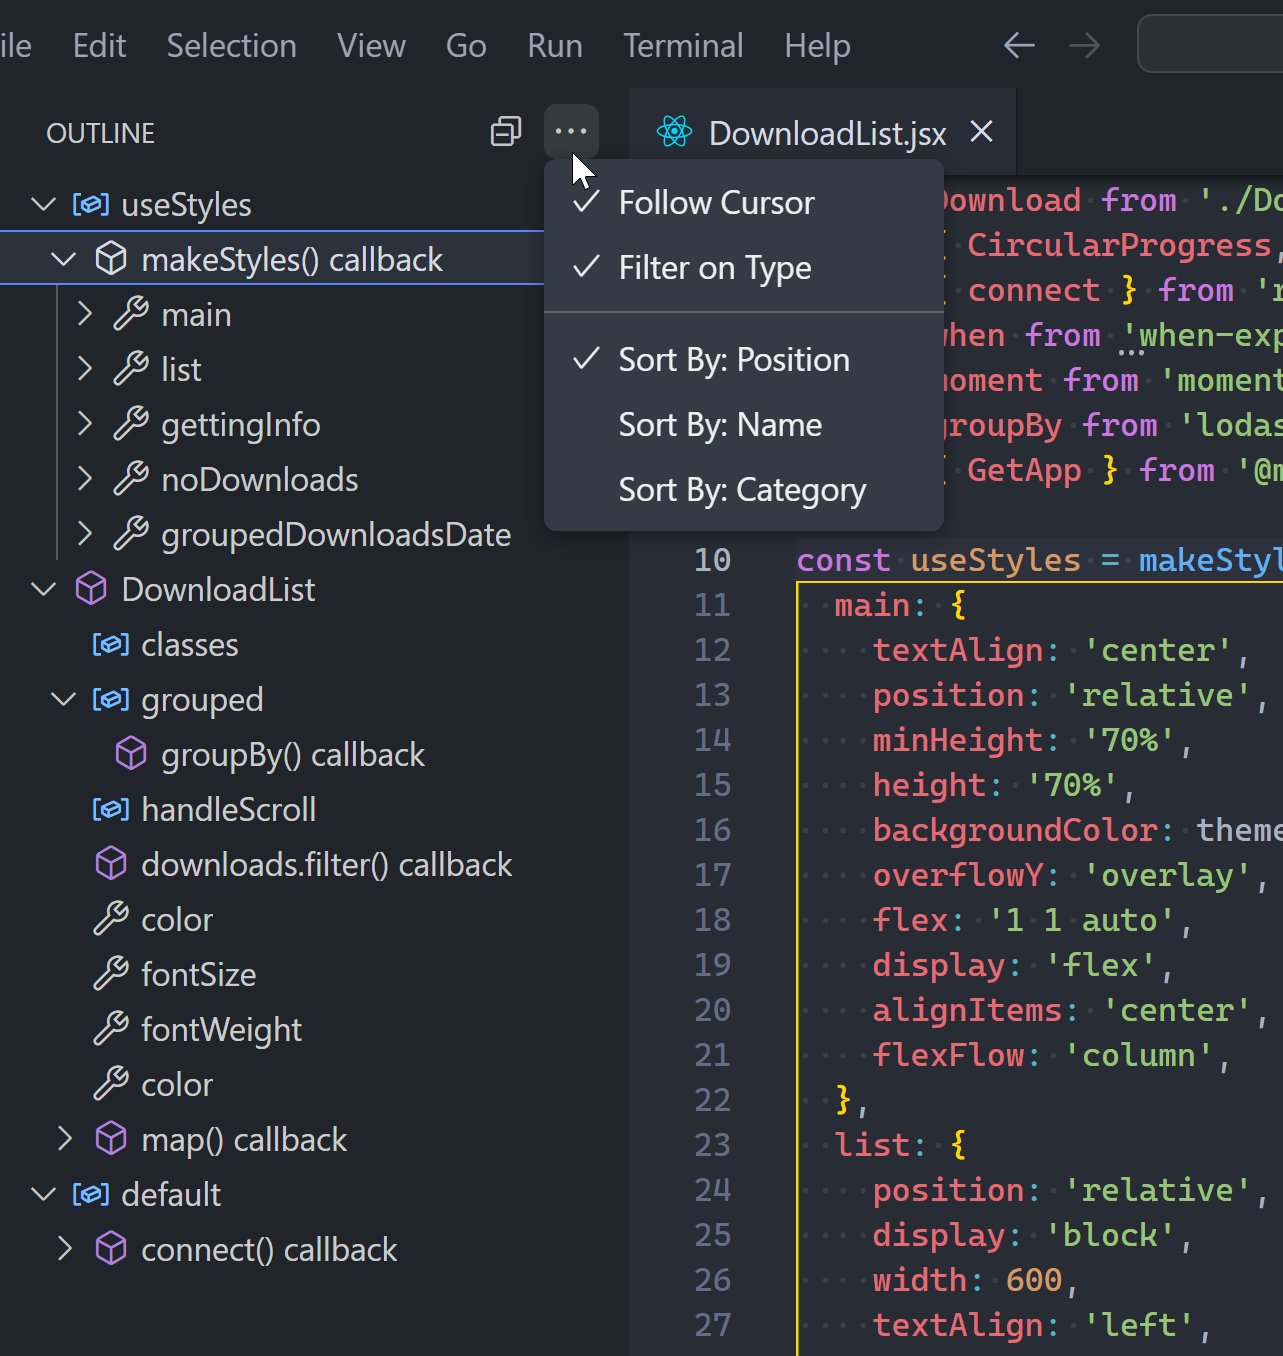
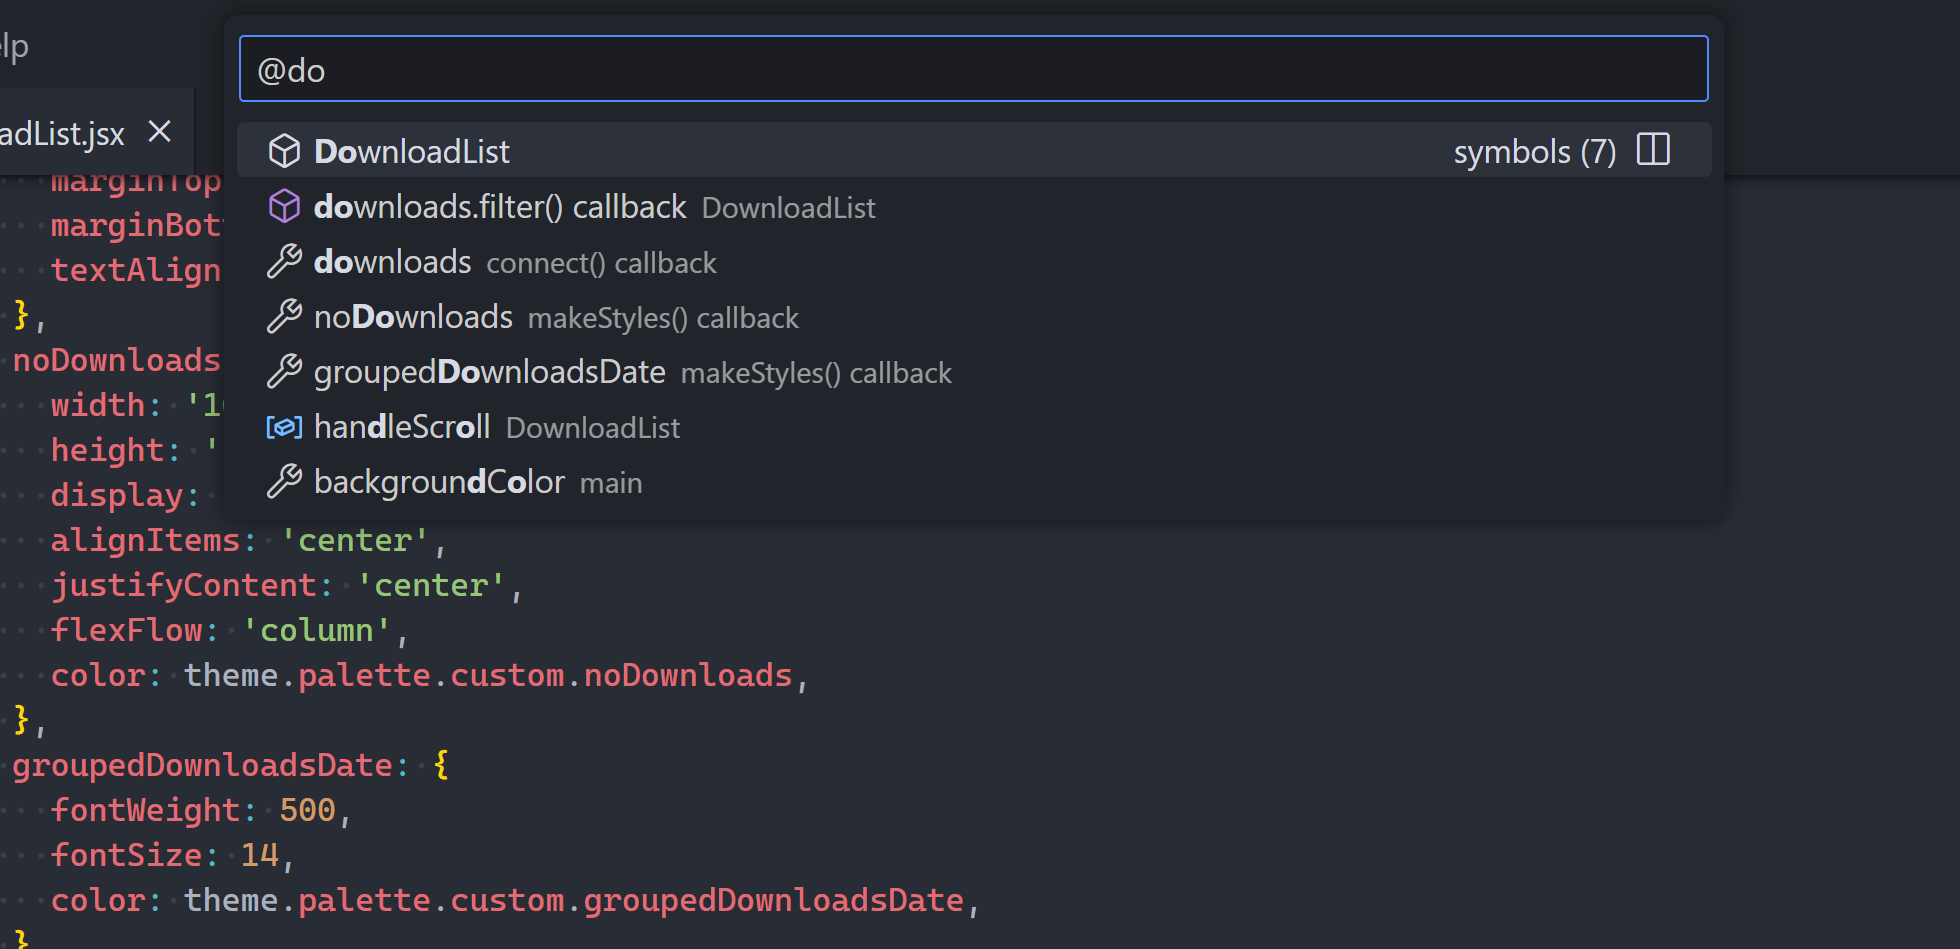
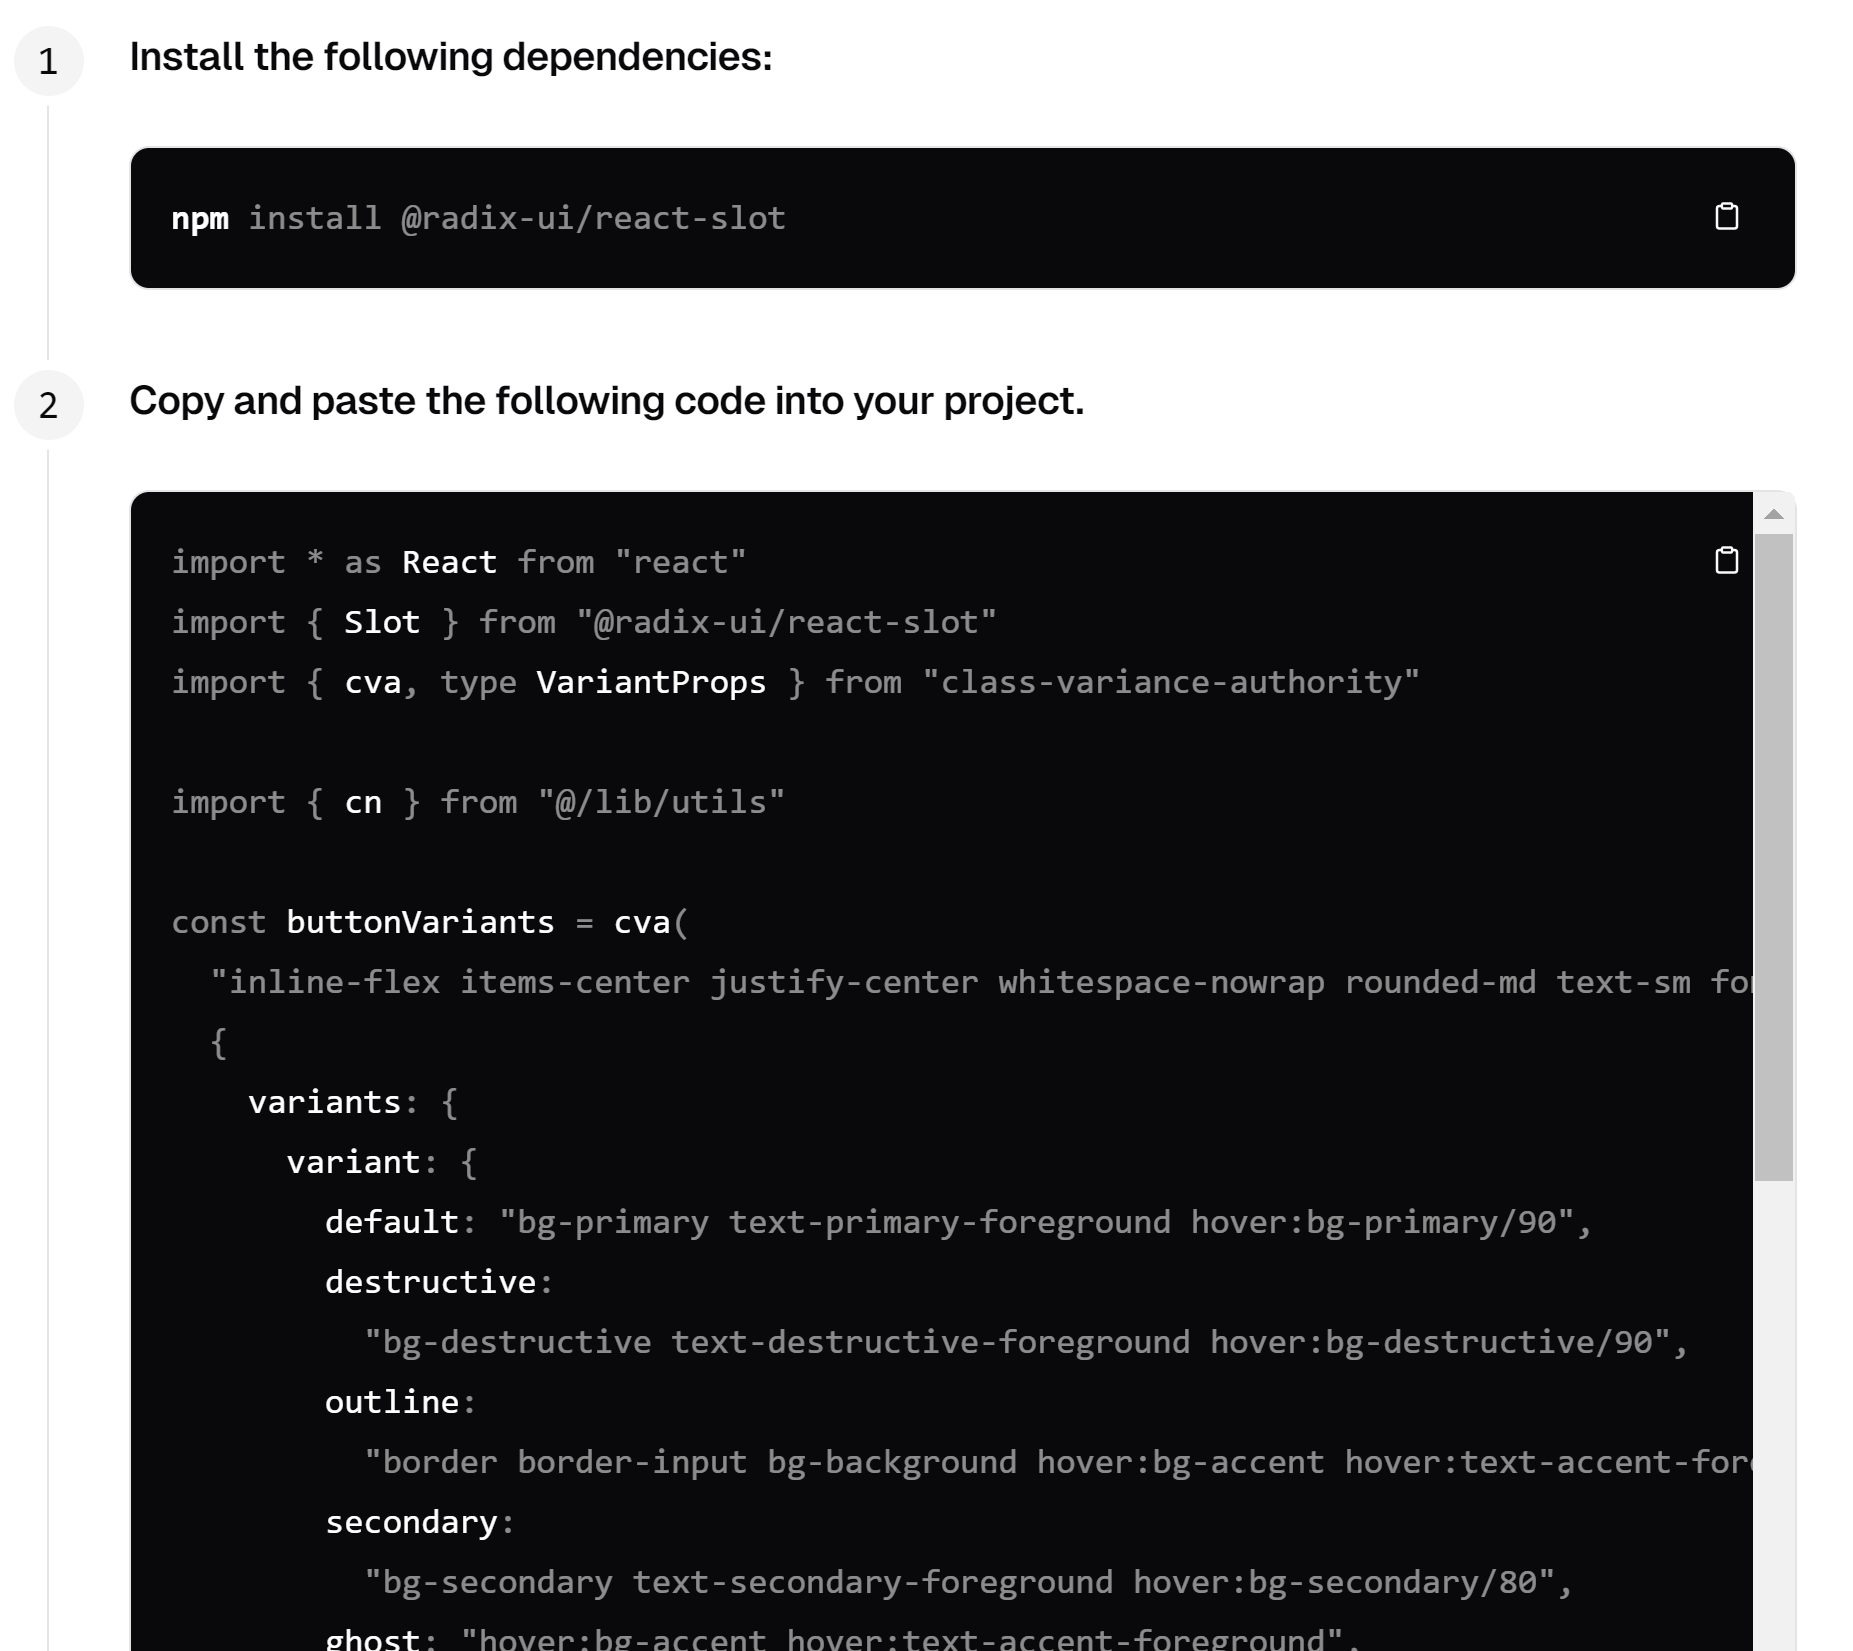
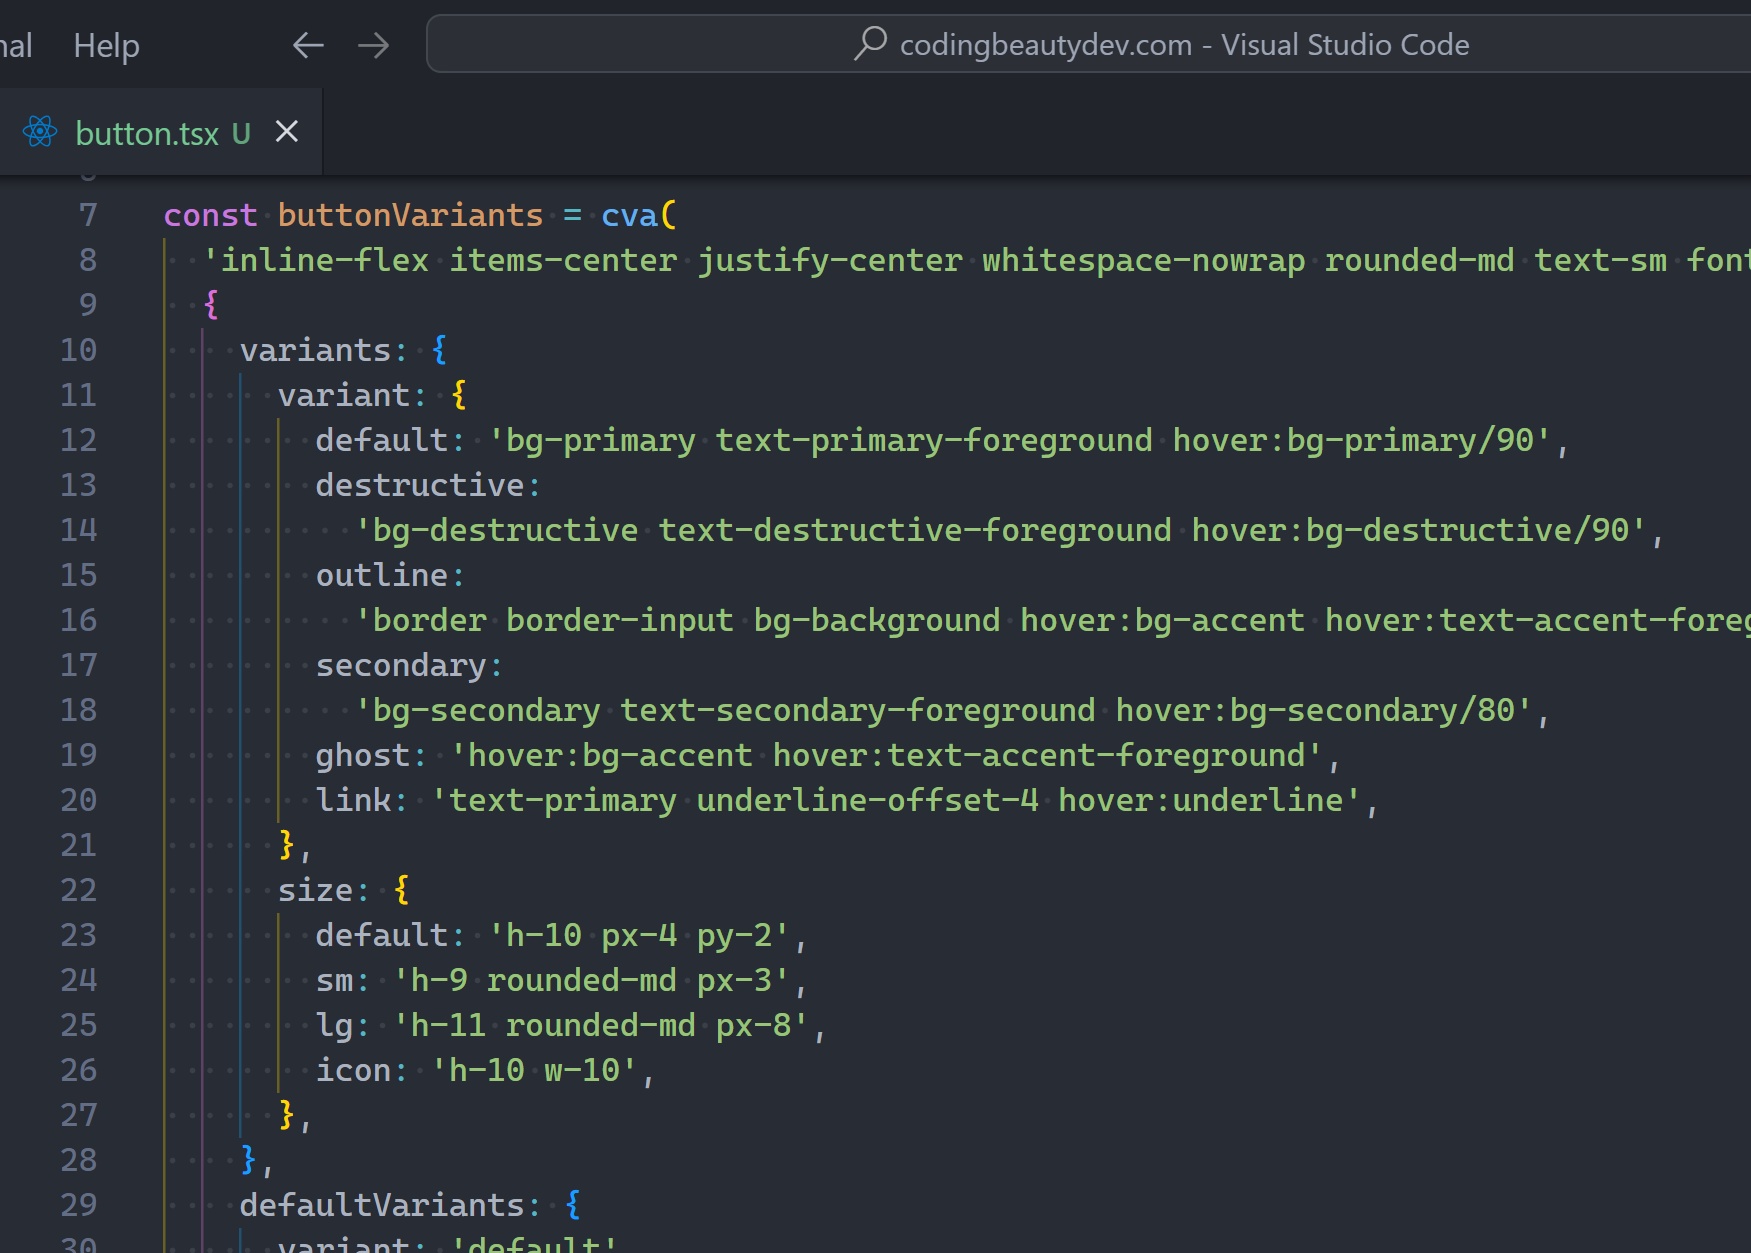
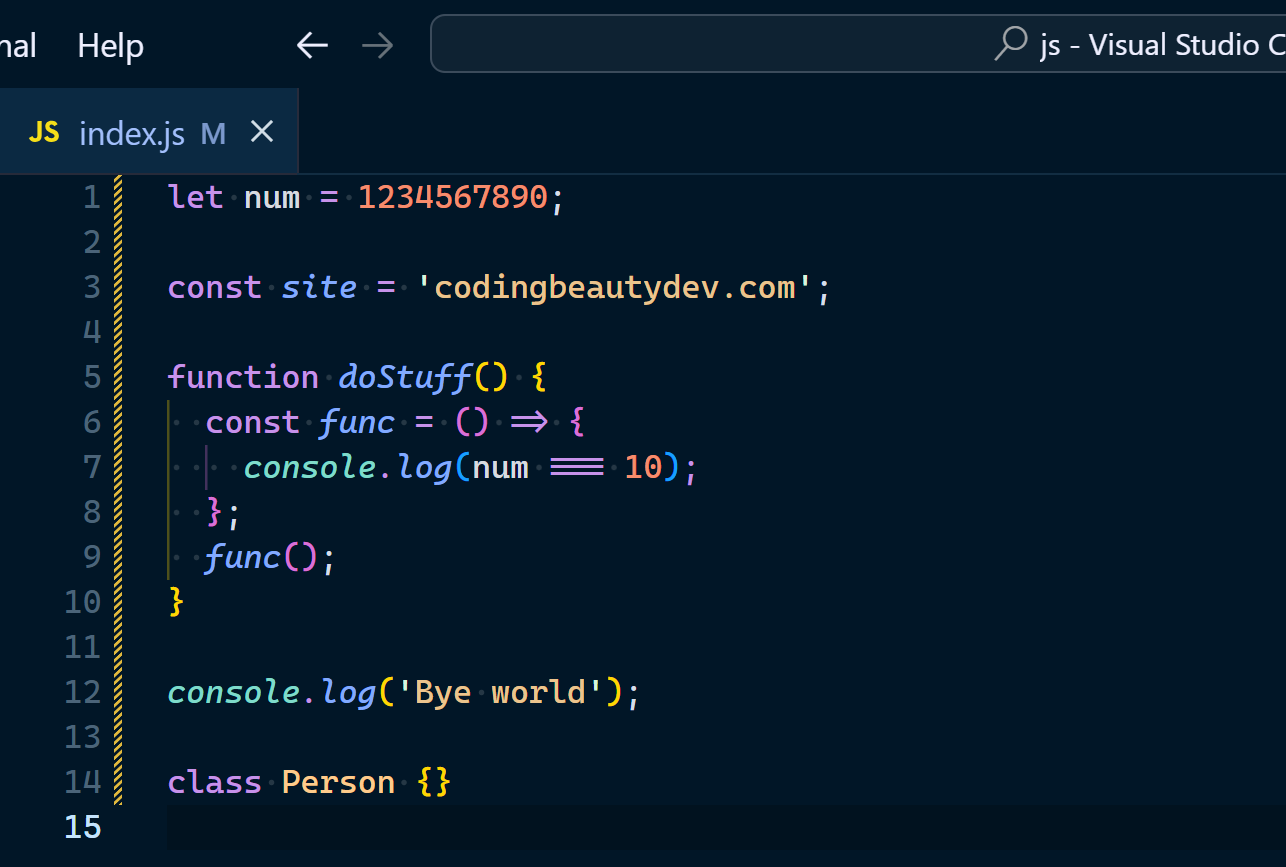
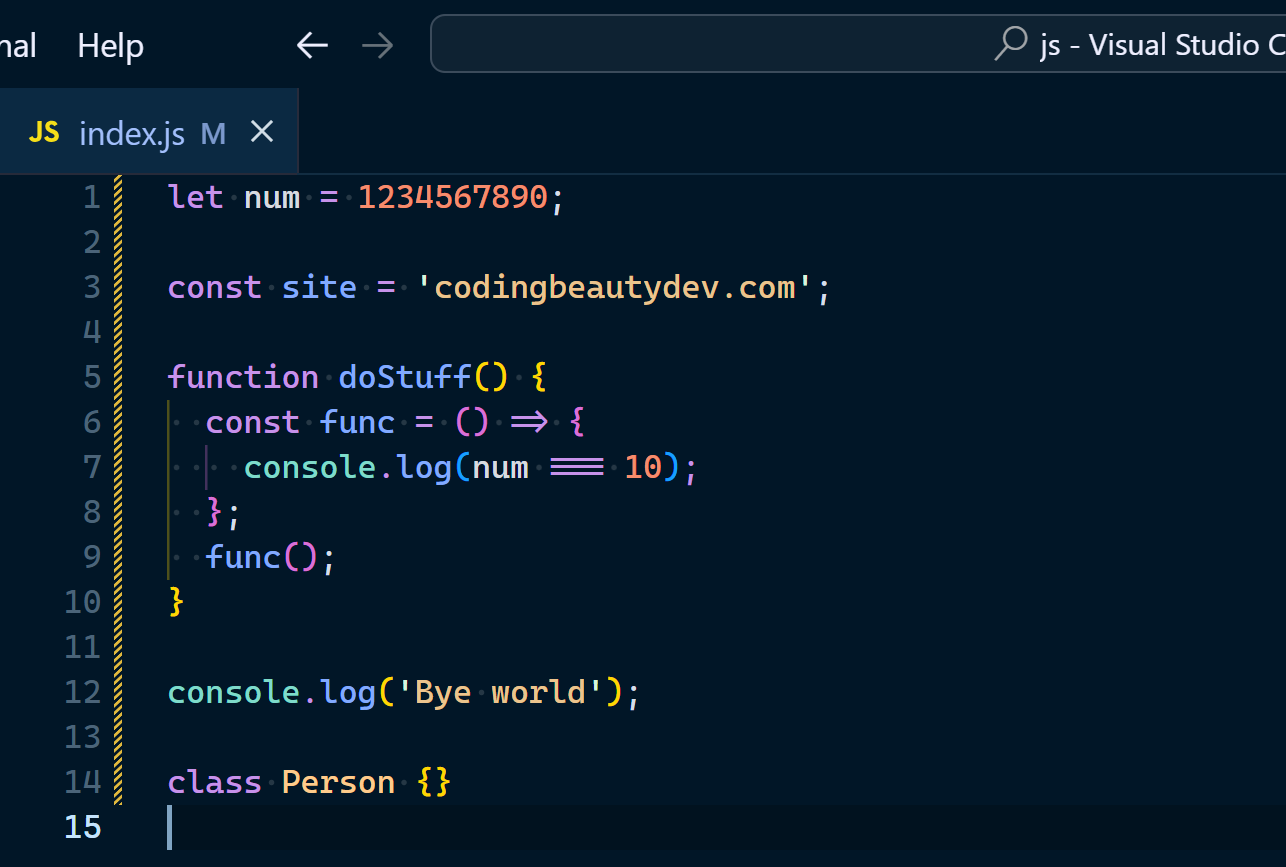
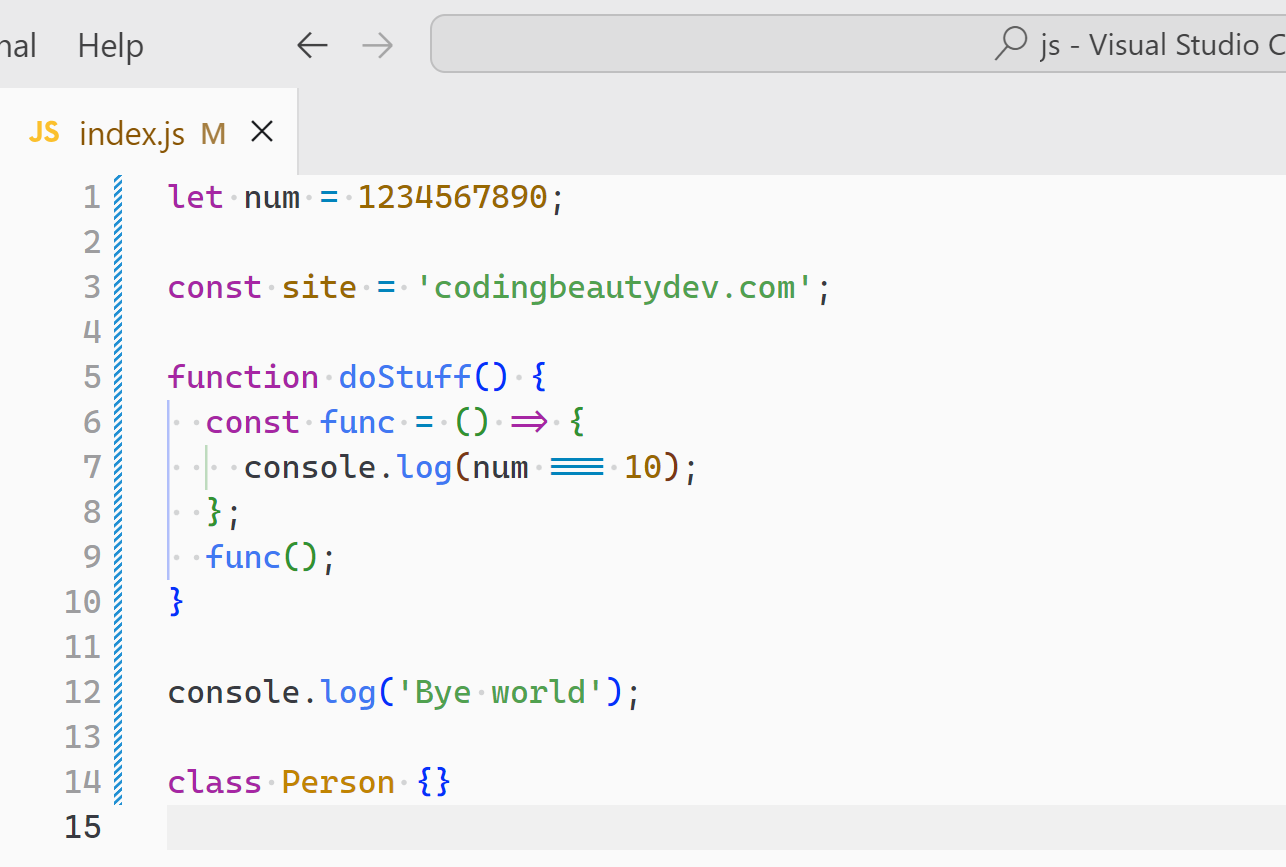
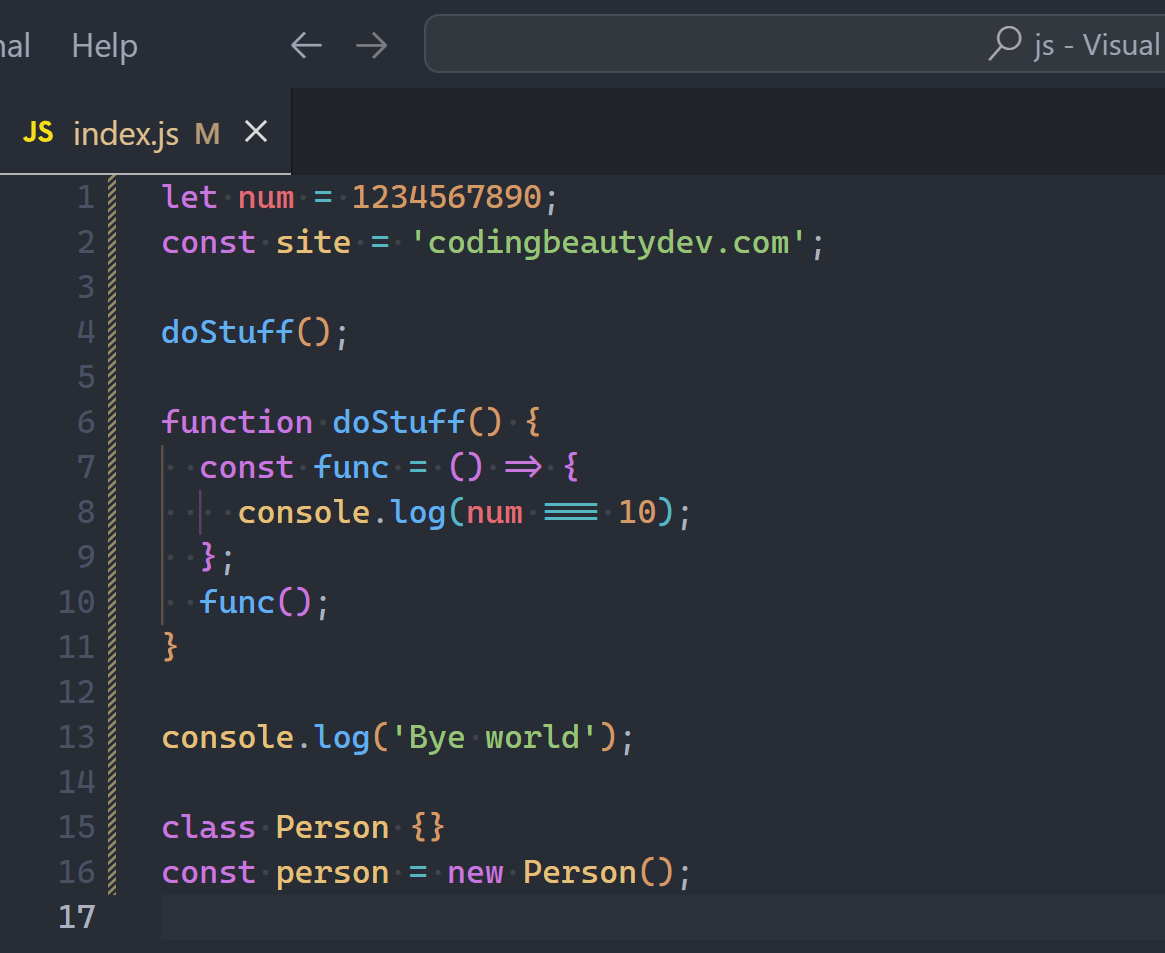
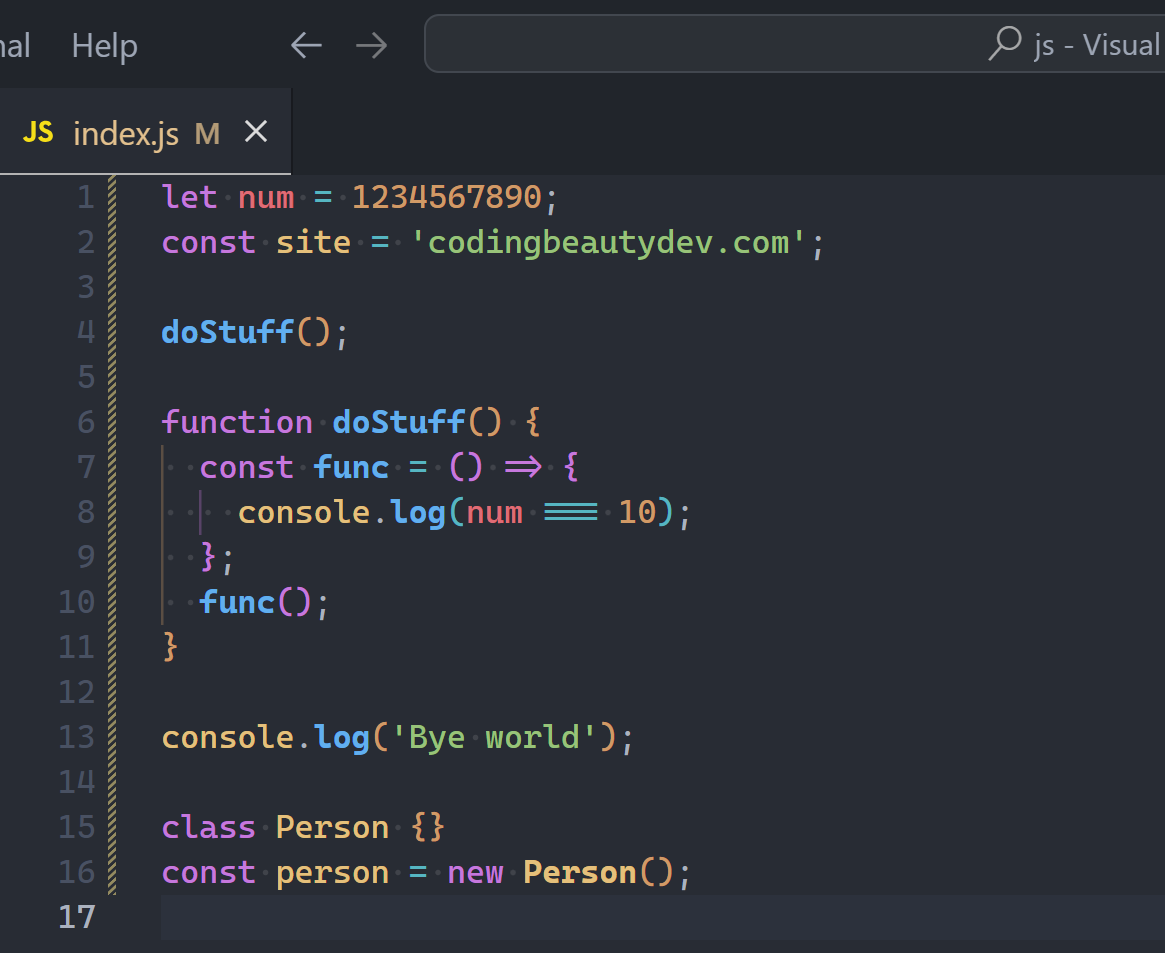
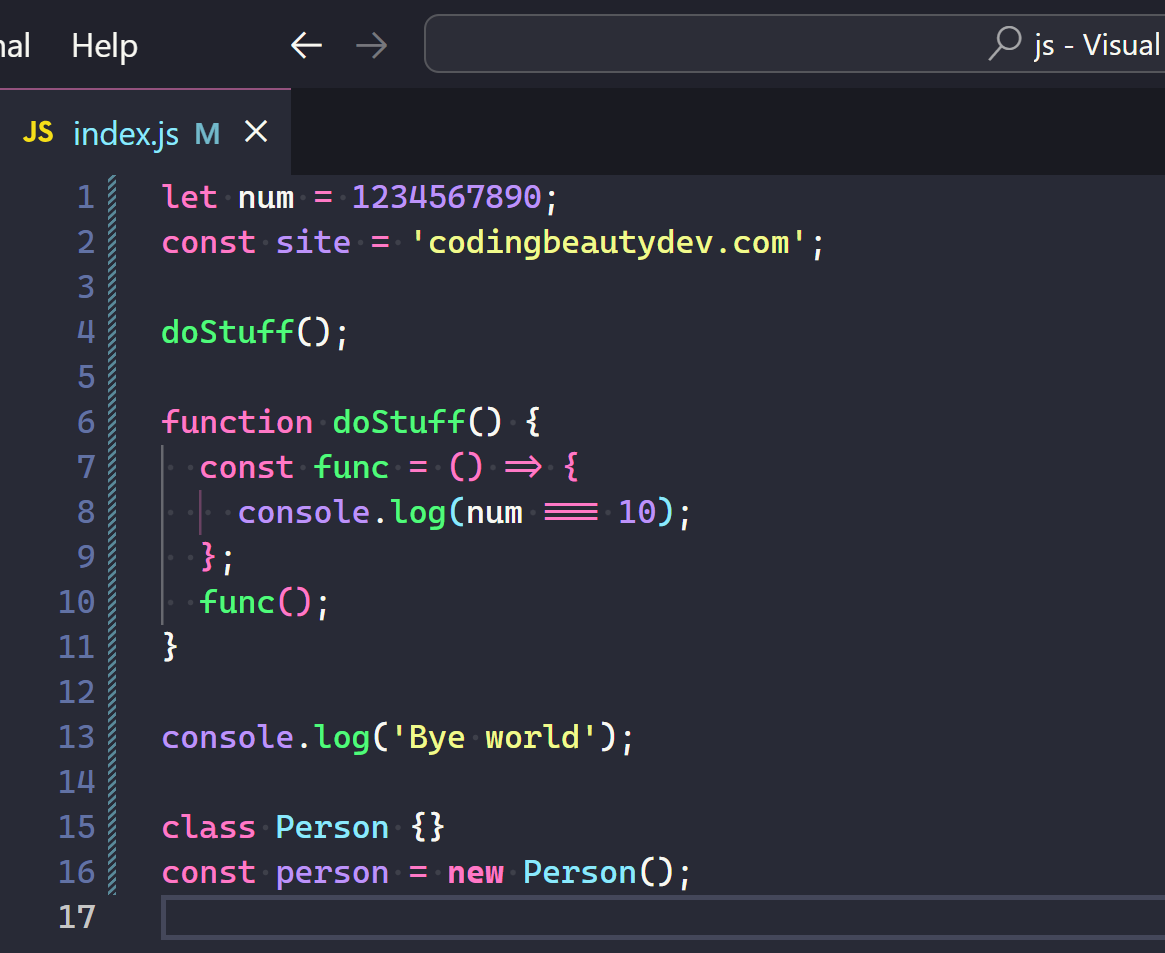
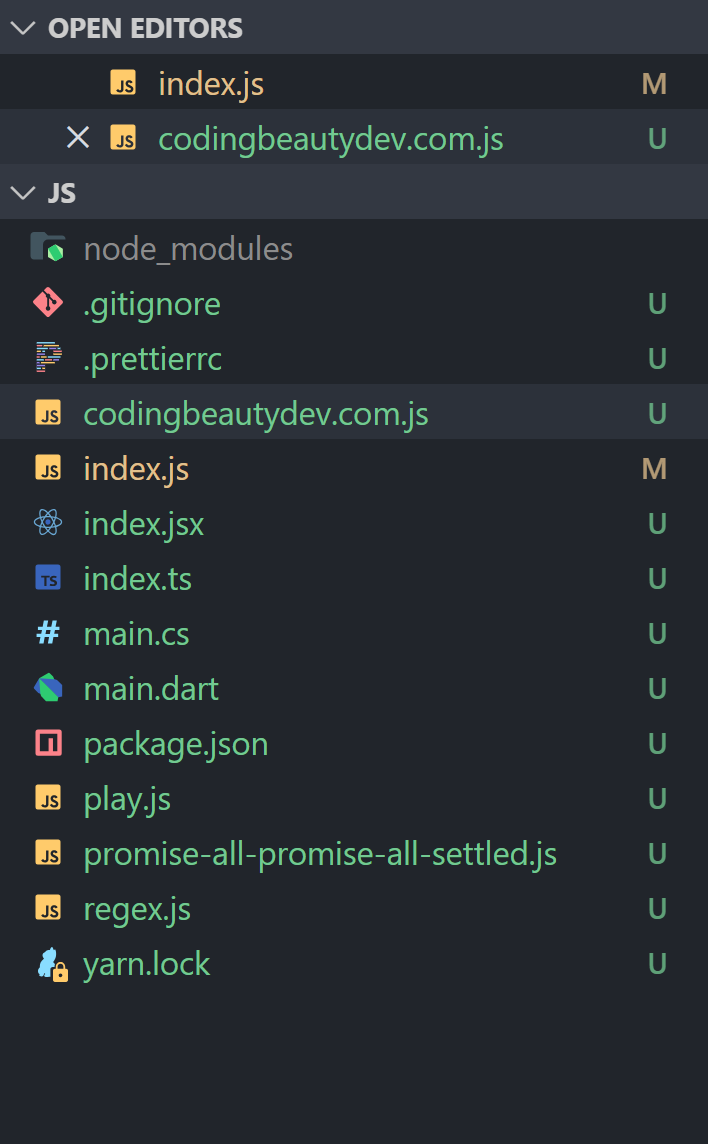
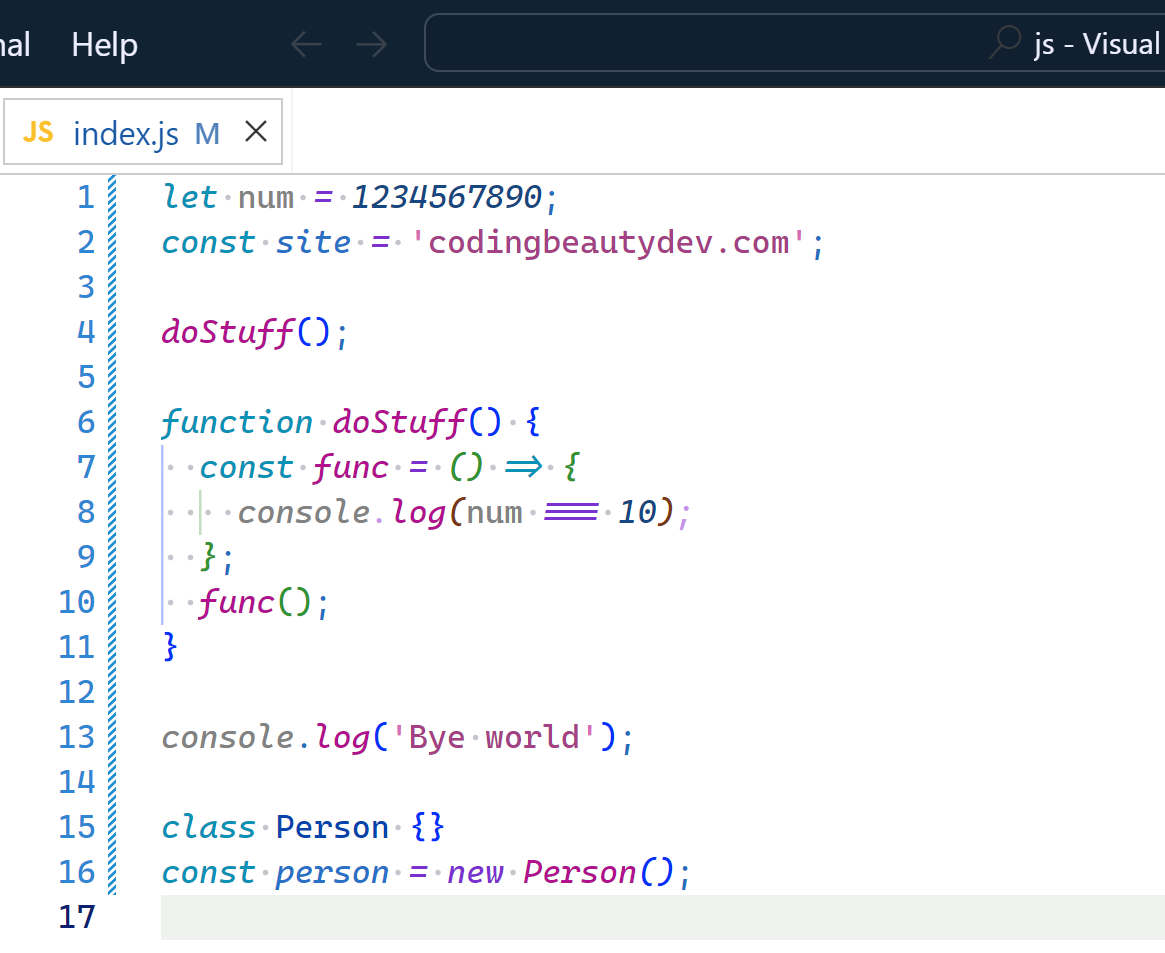
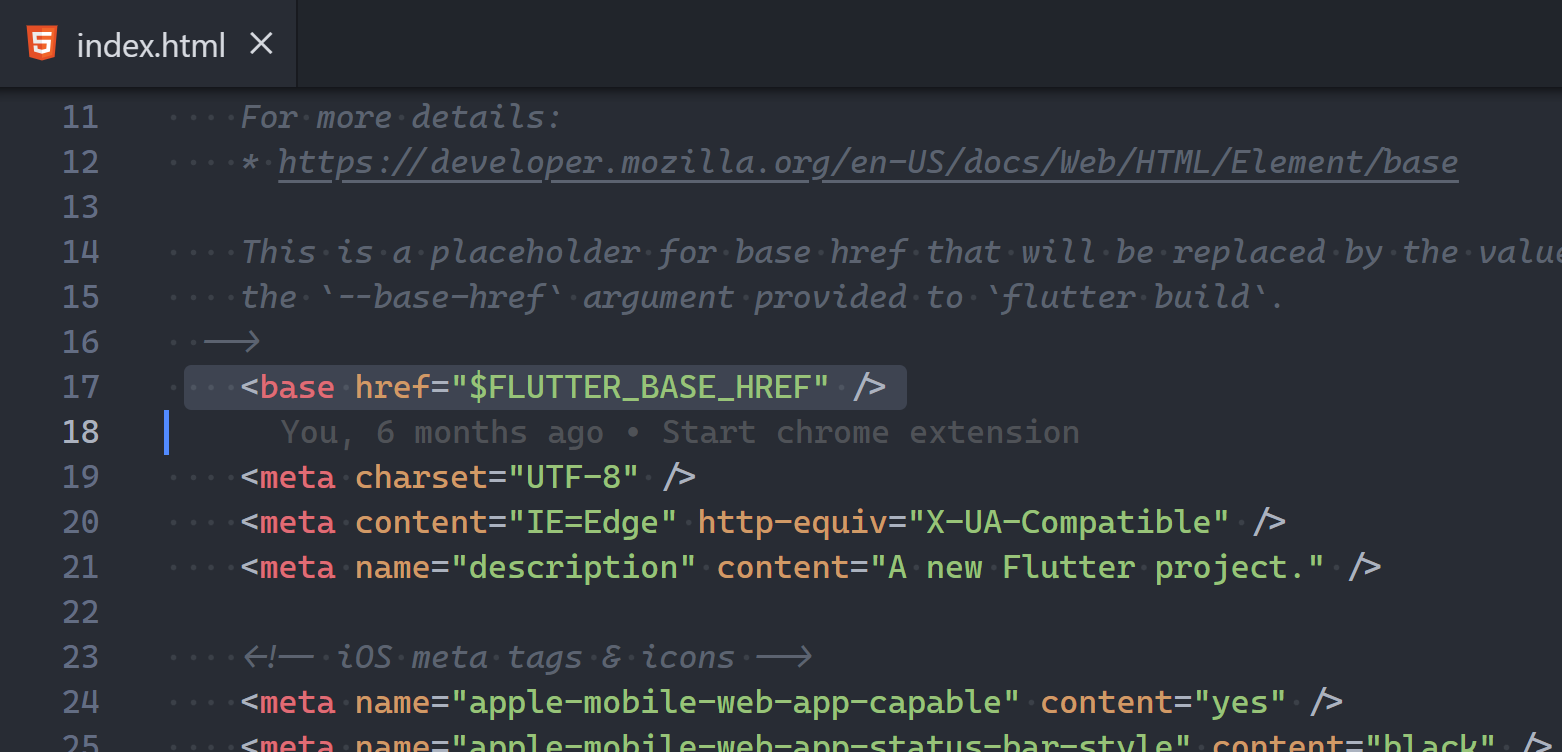
I was coding the other day and stumbled upon something atrocious.

Do you see it?

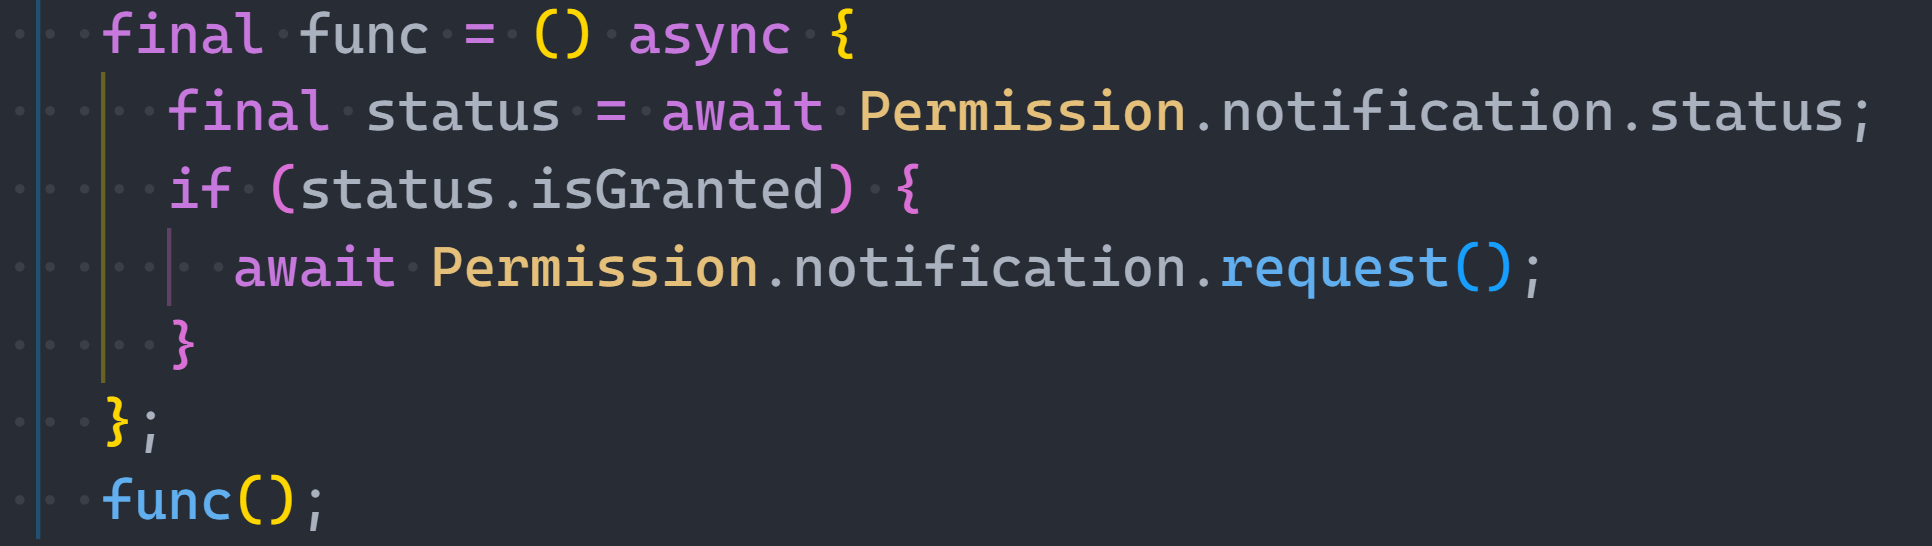
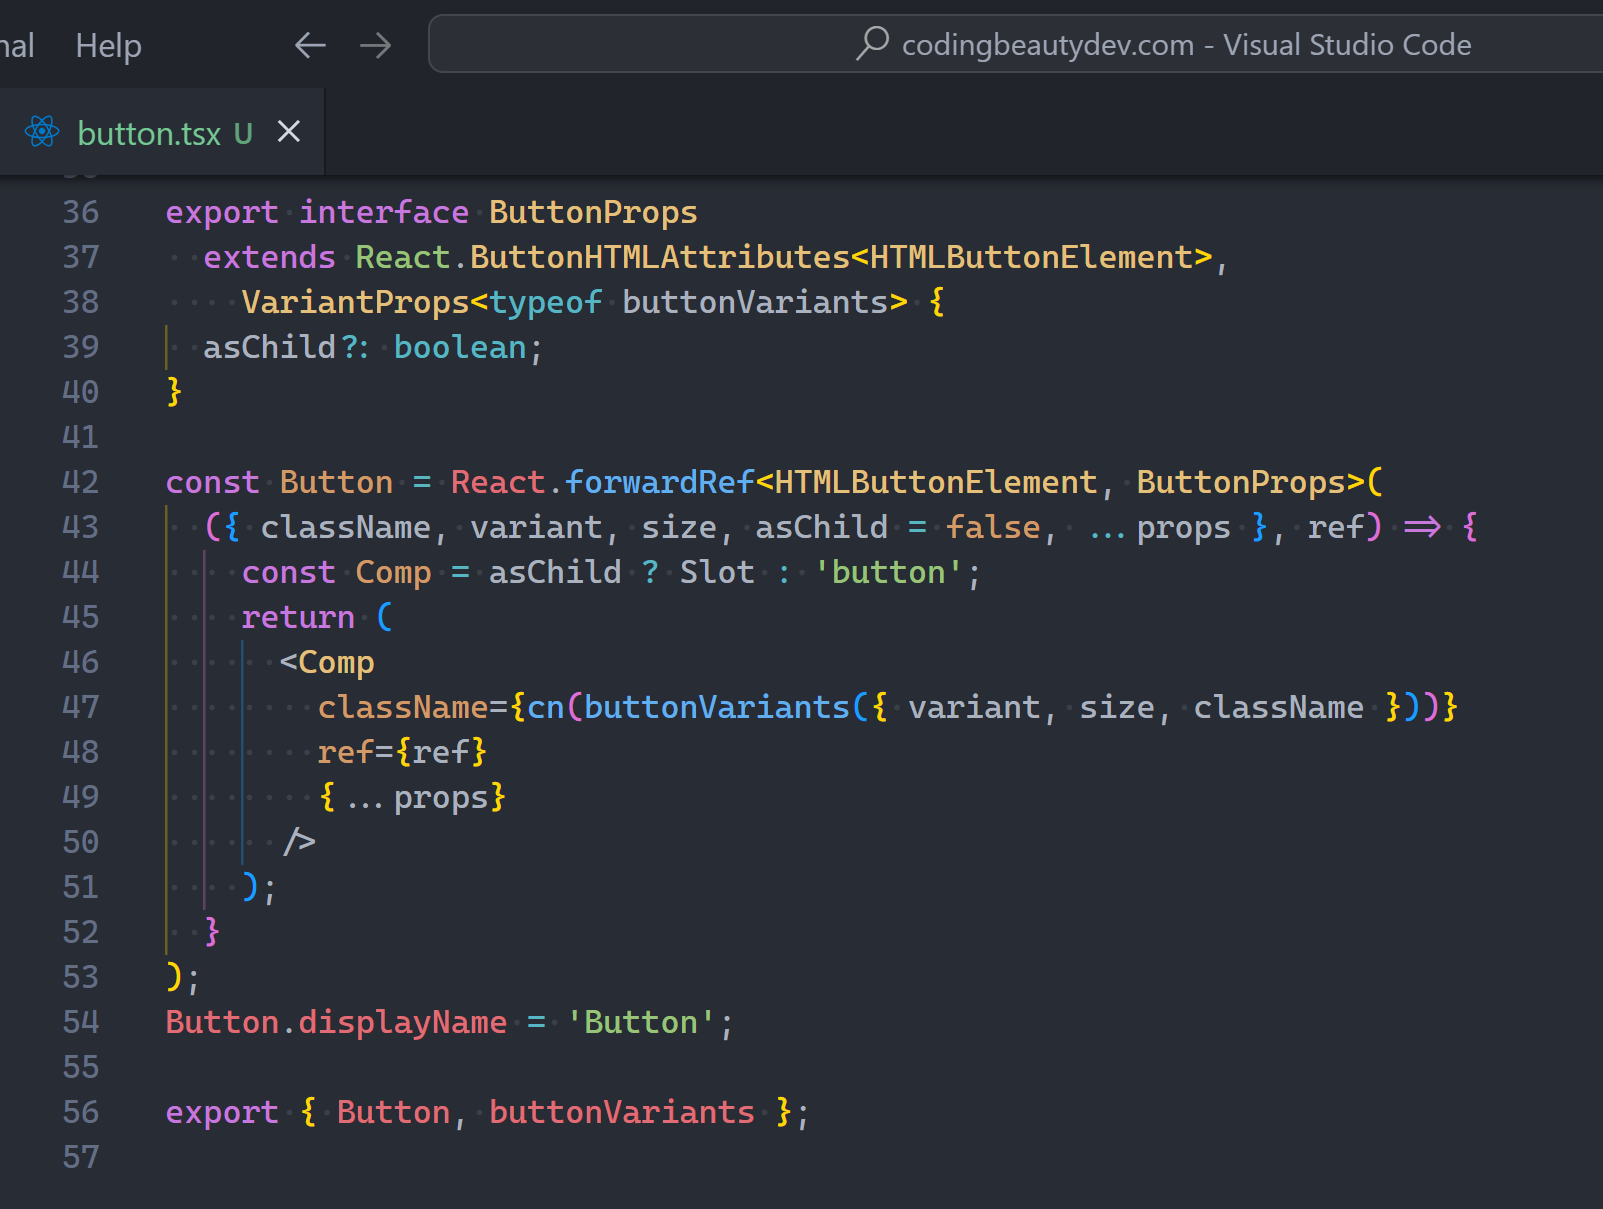
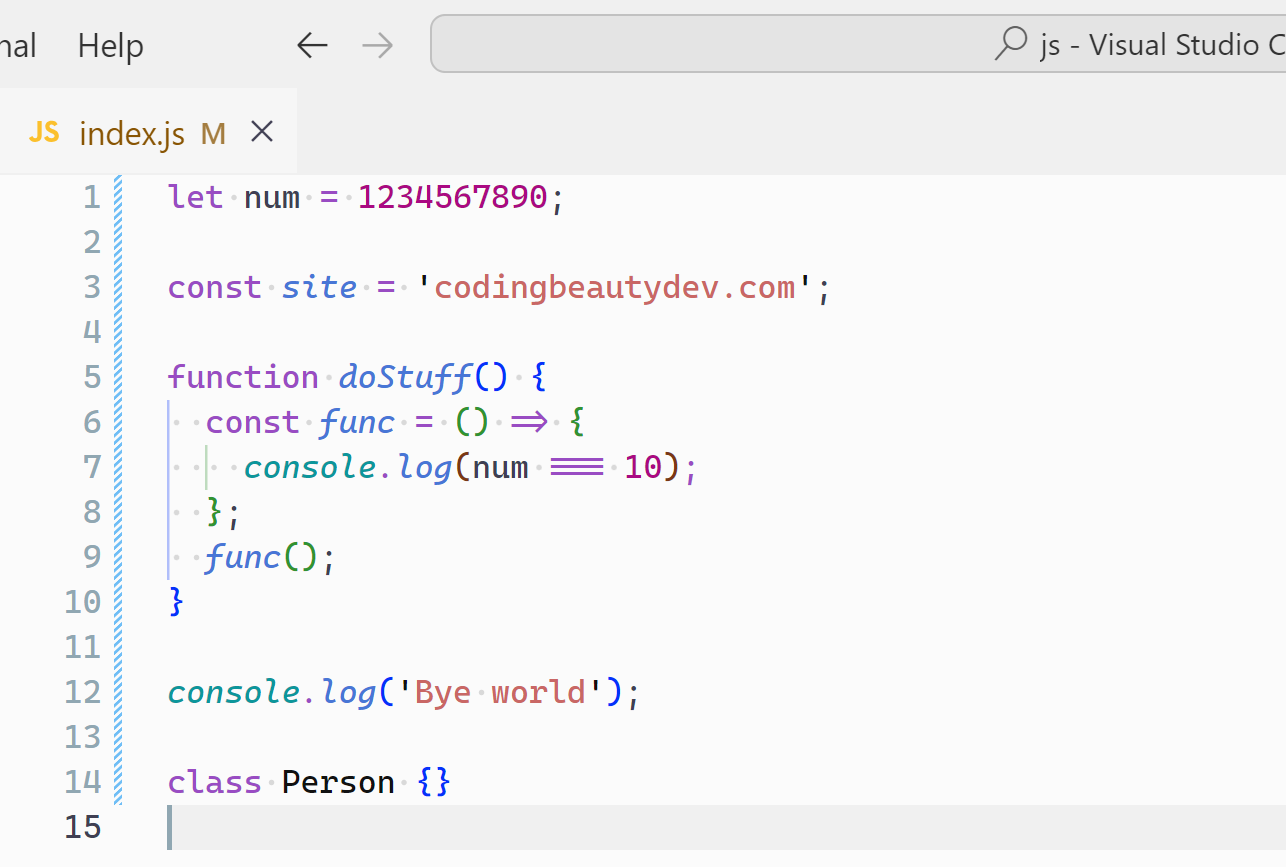
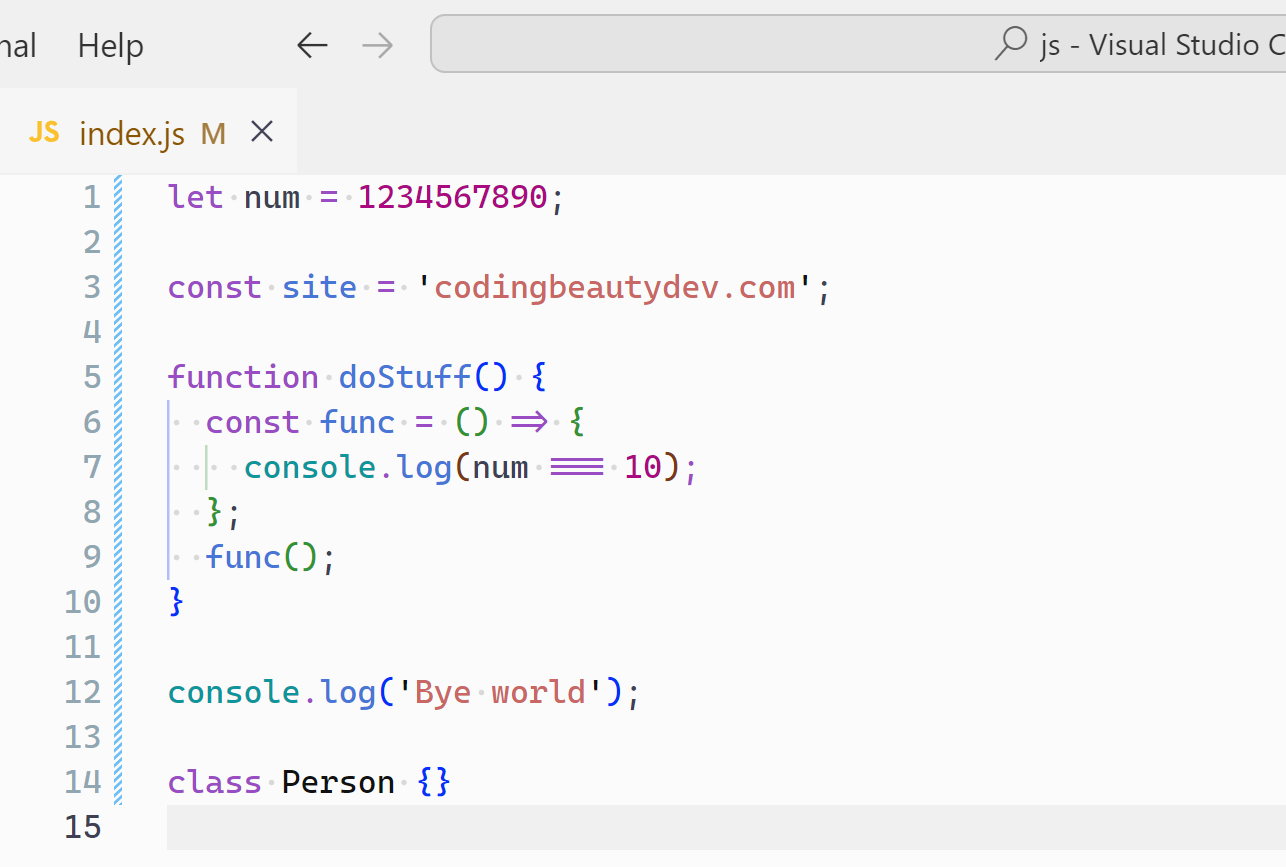
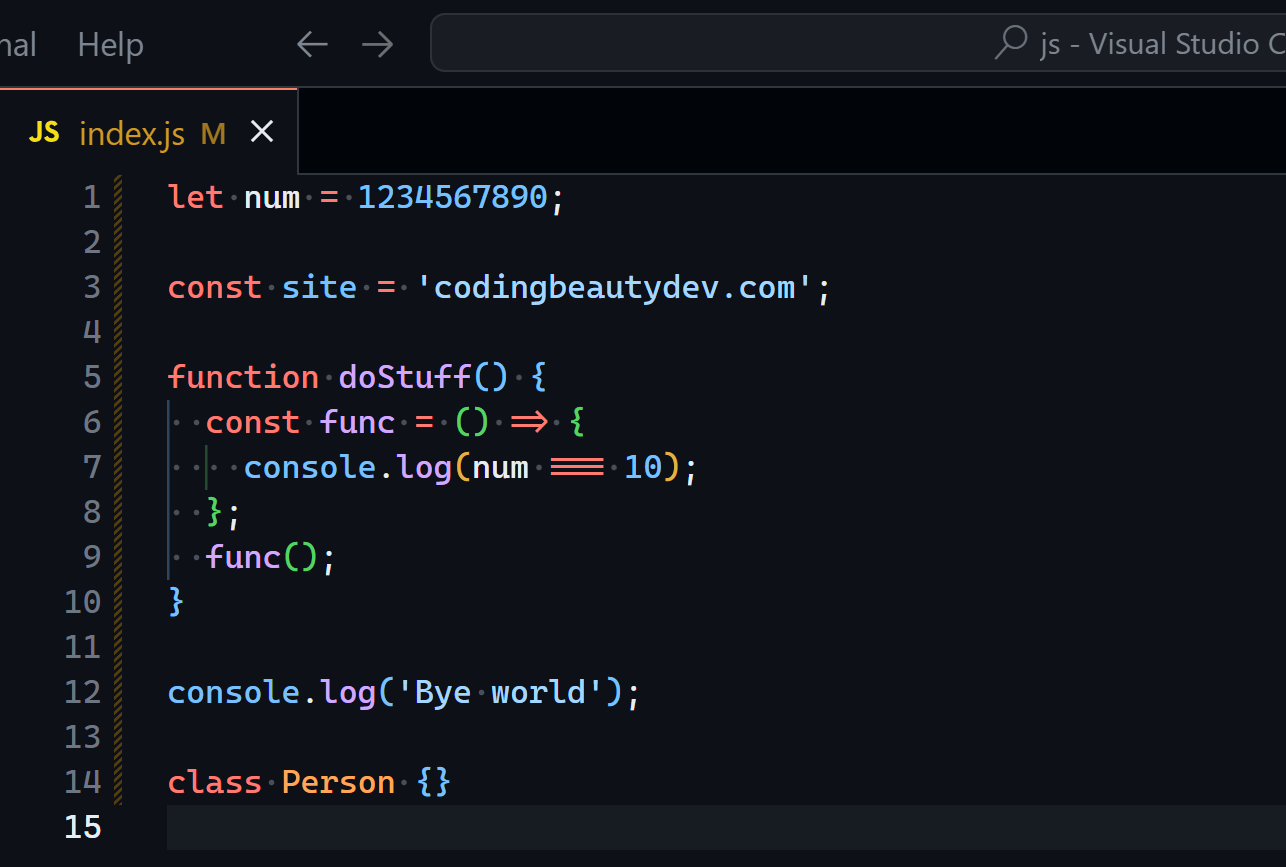
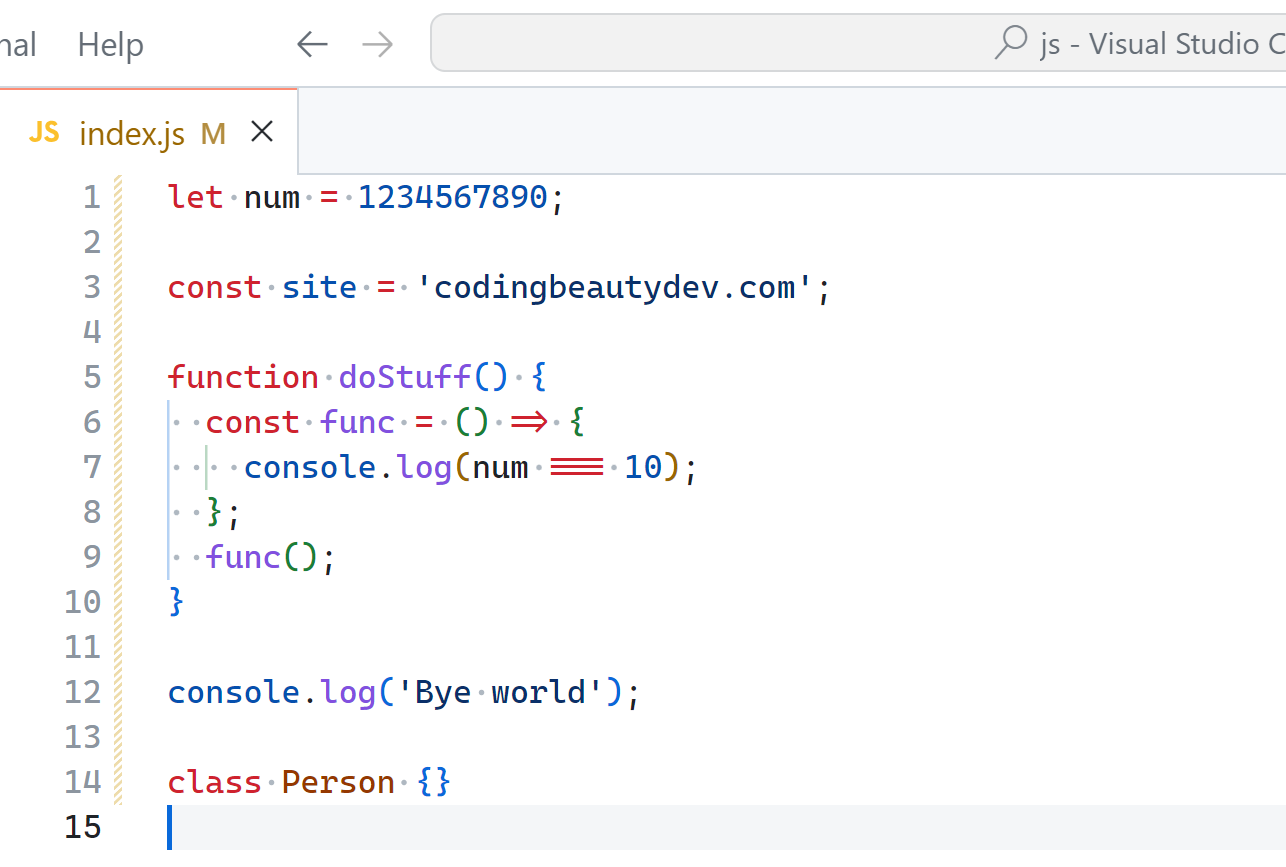
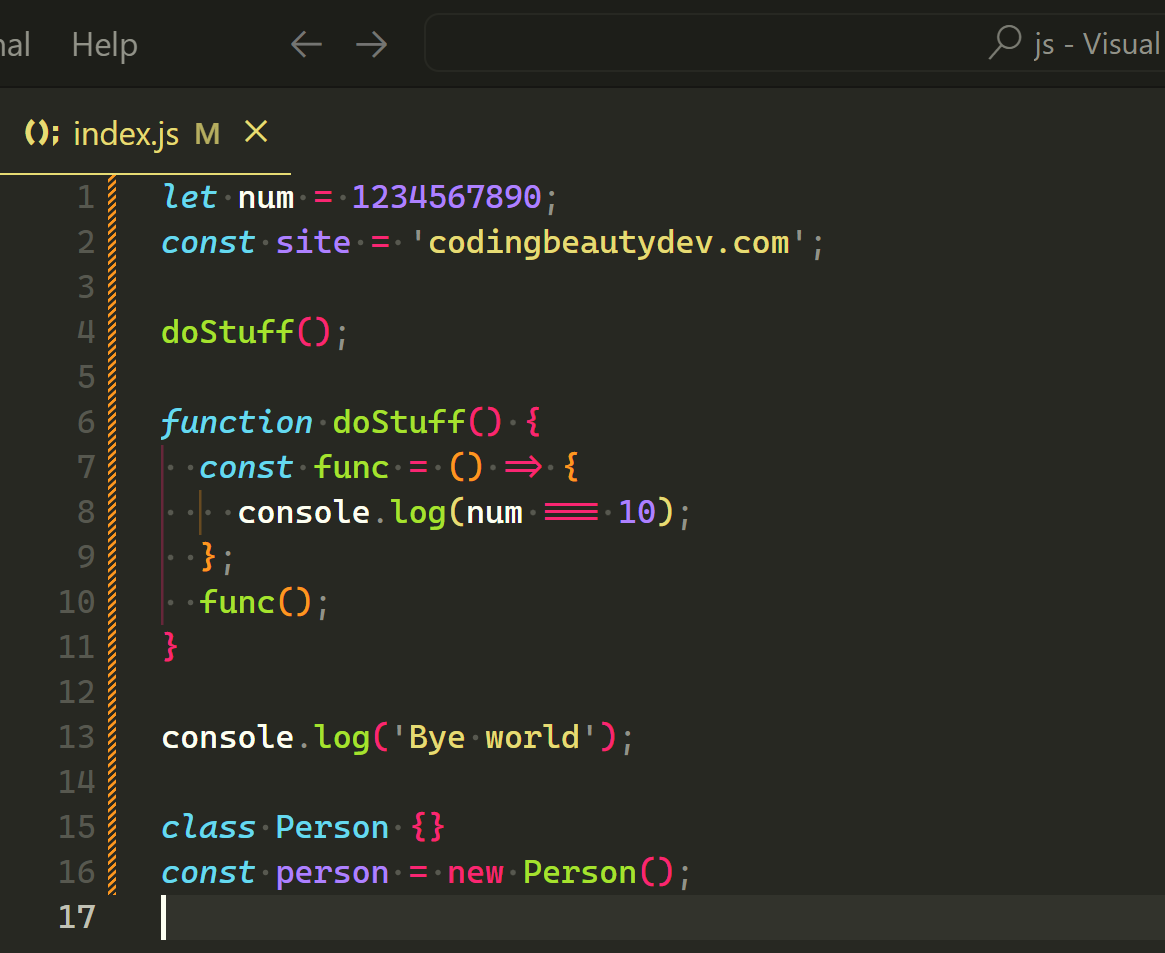
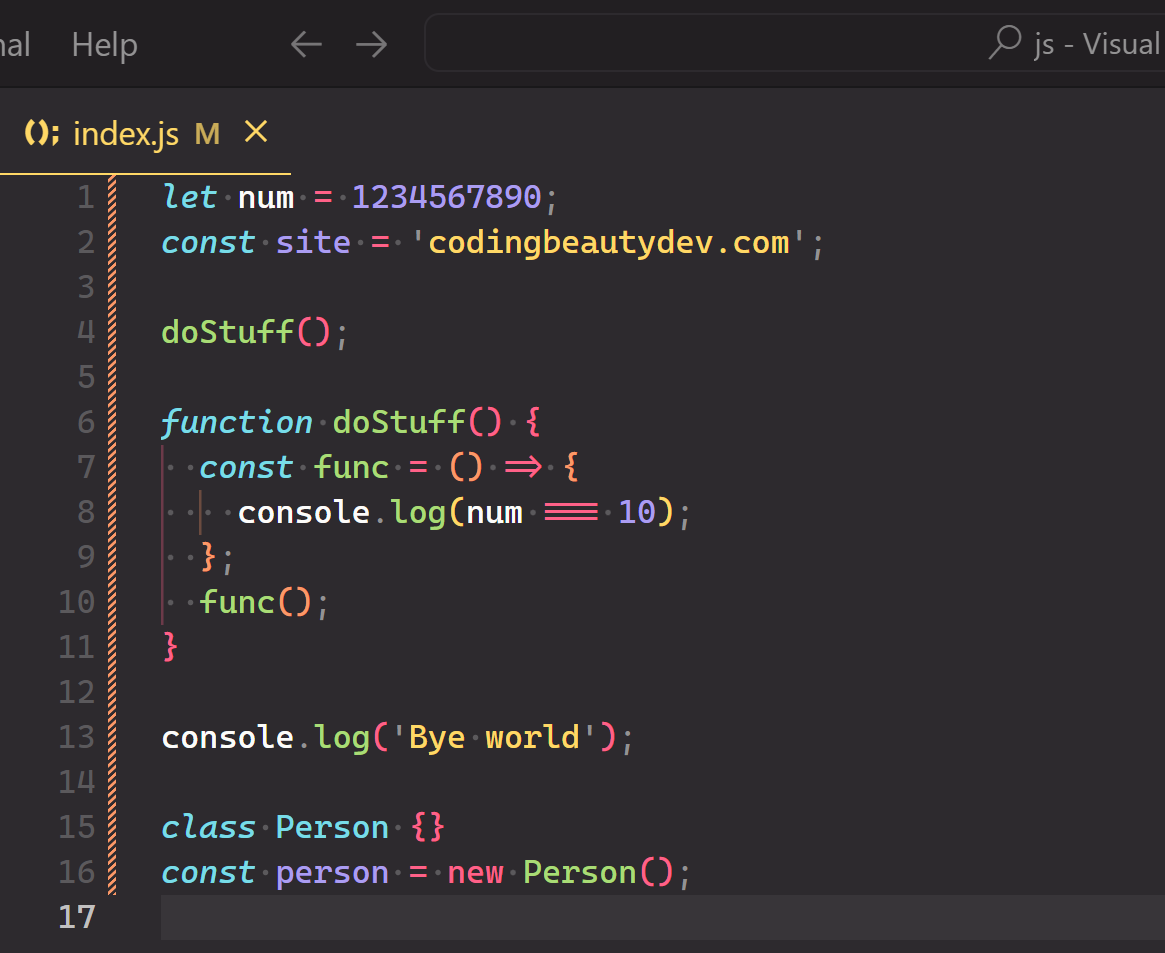
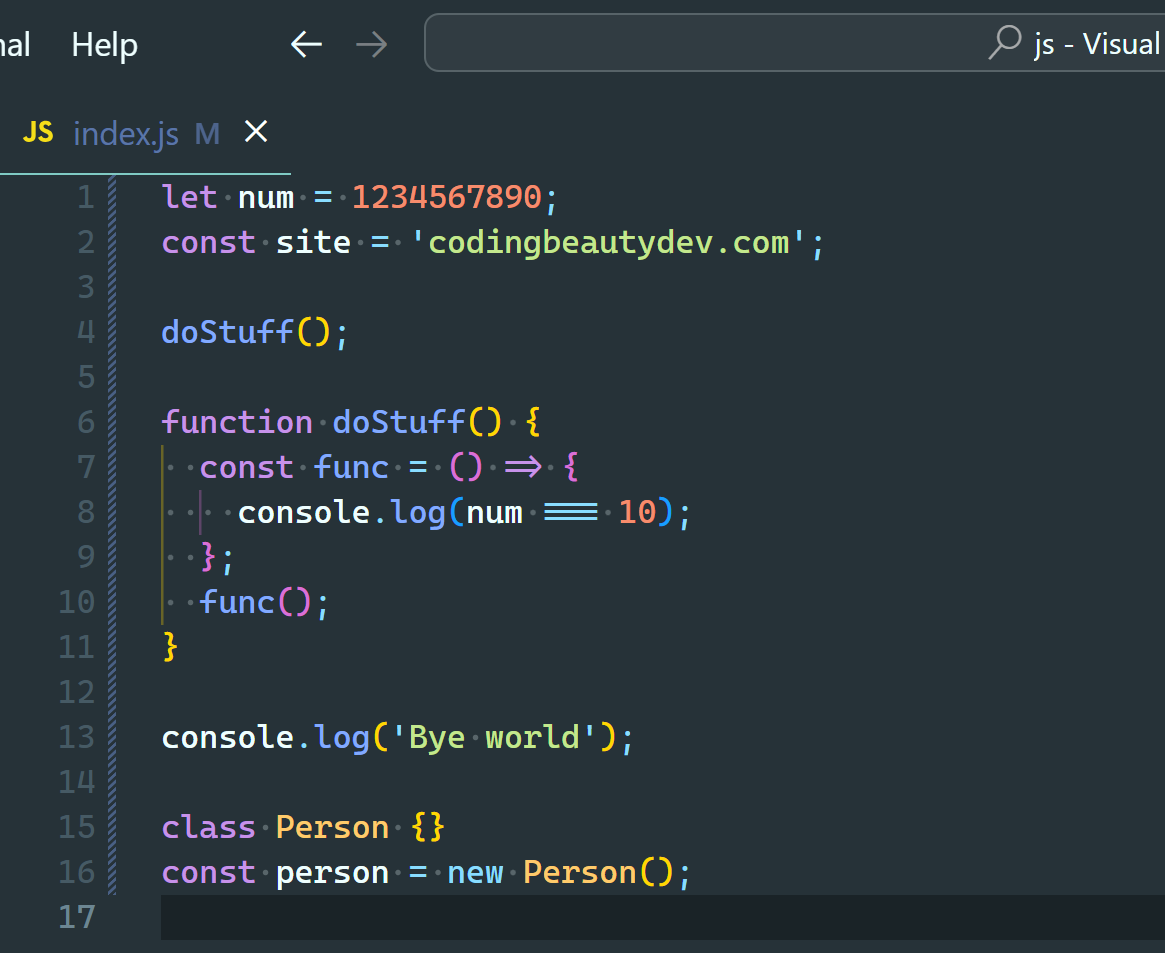
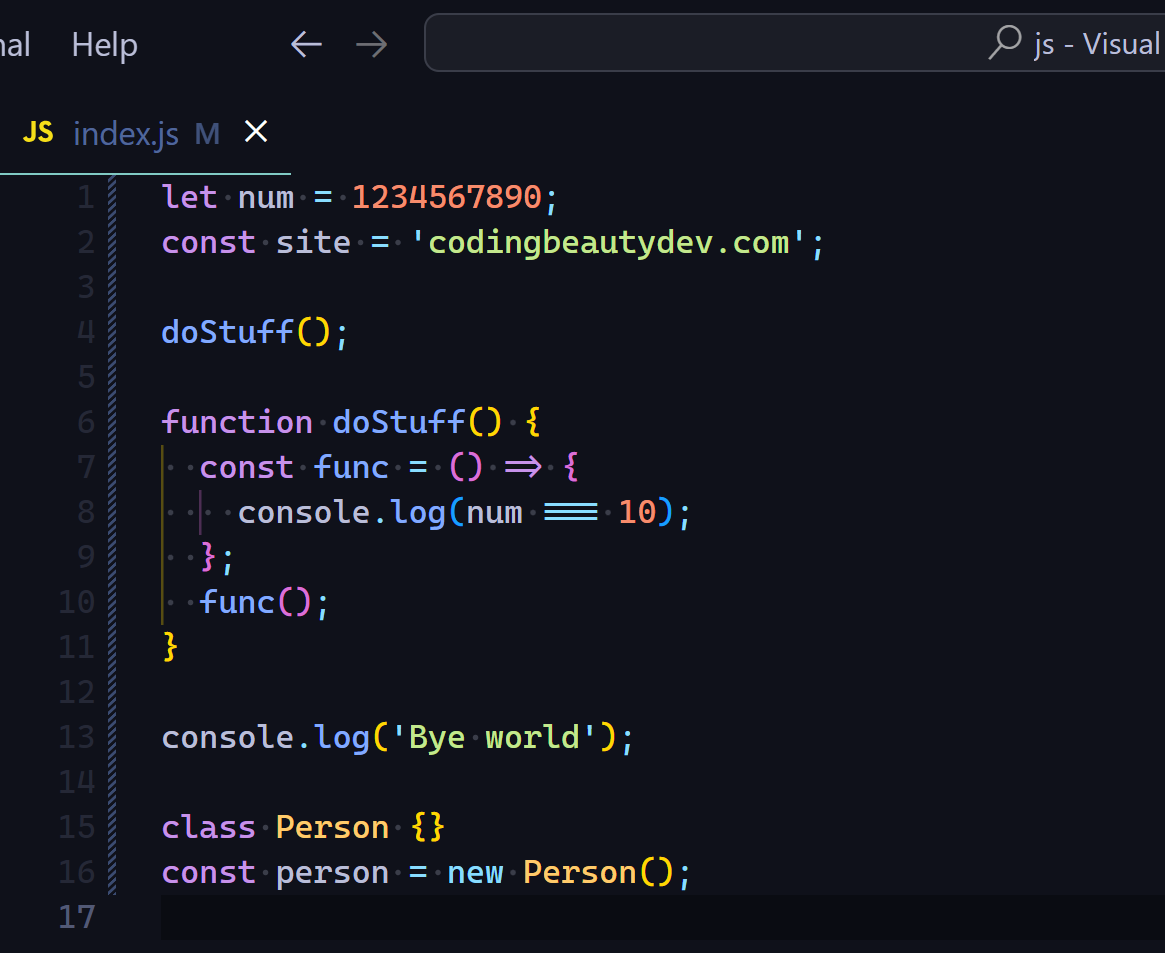
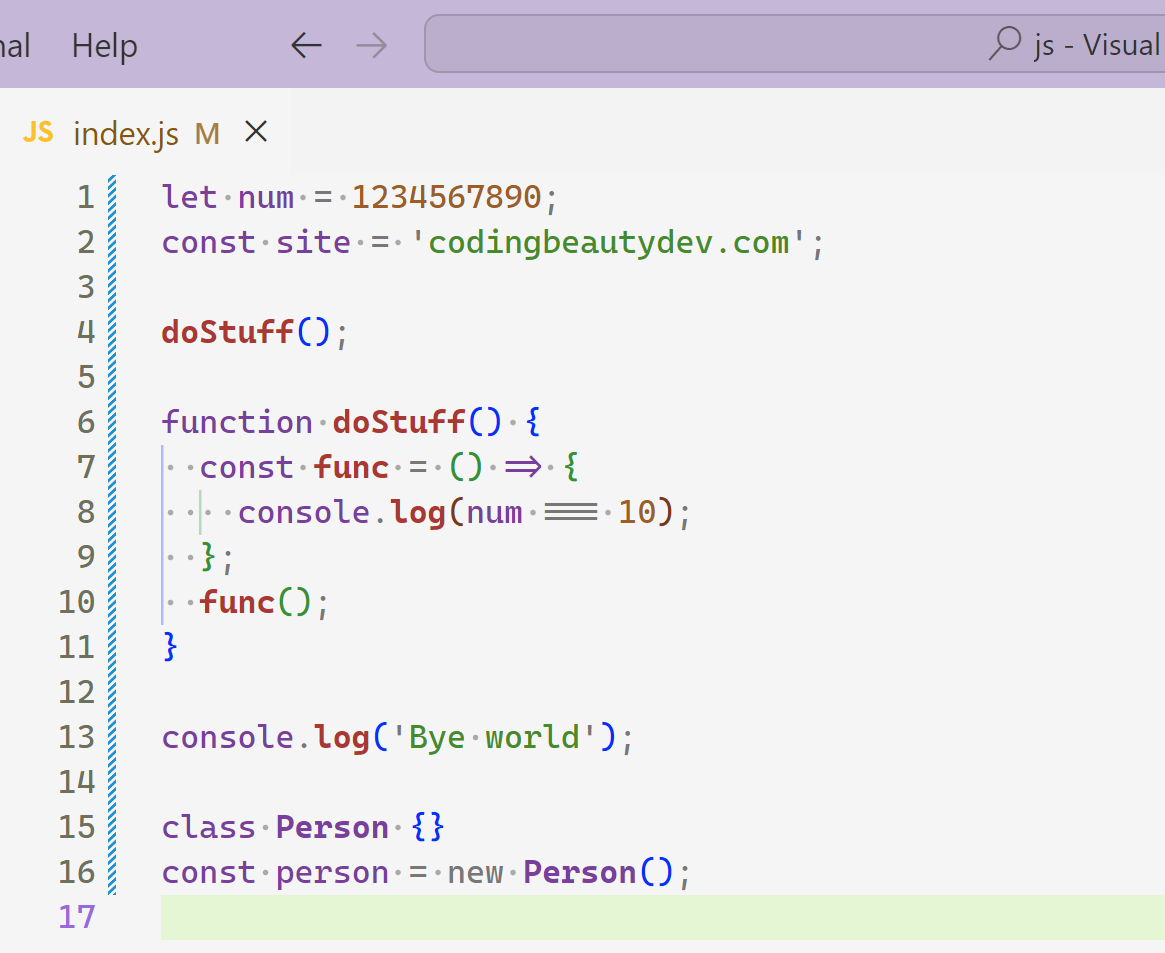
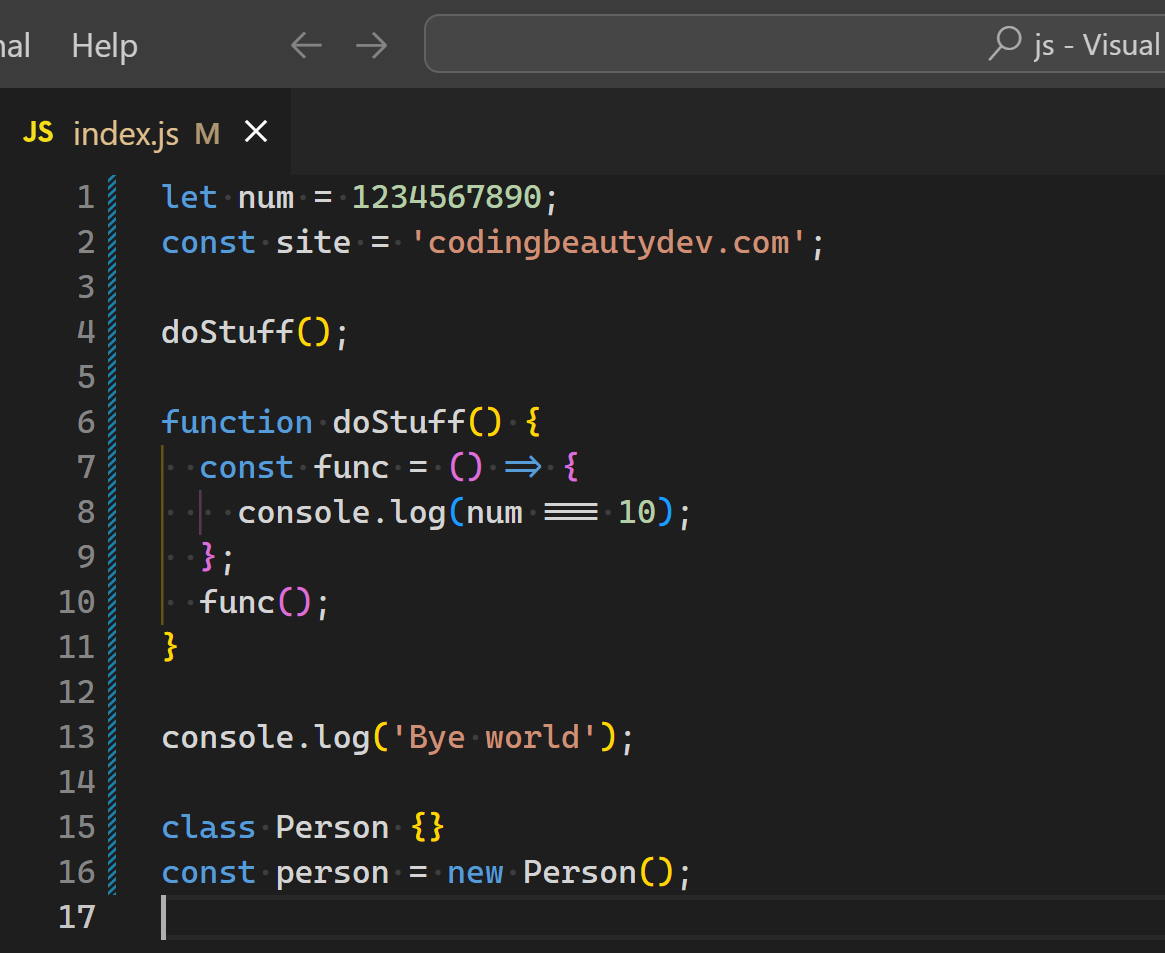
Let’s zoom in a bit more:
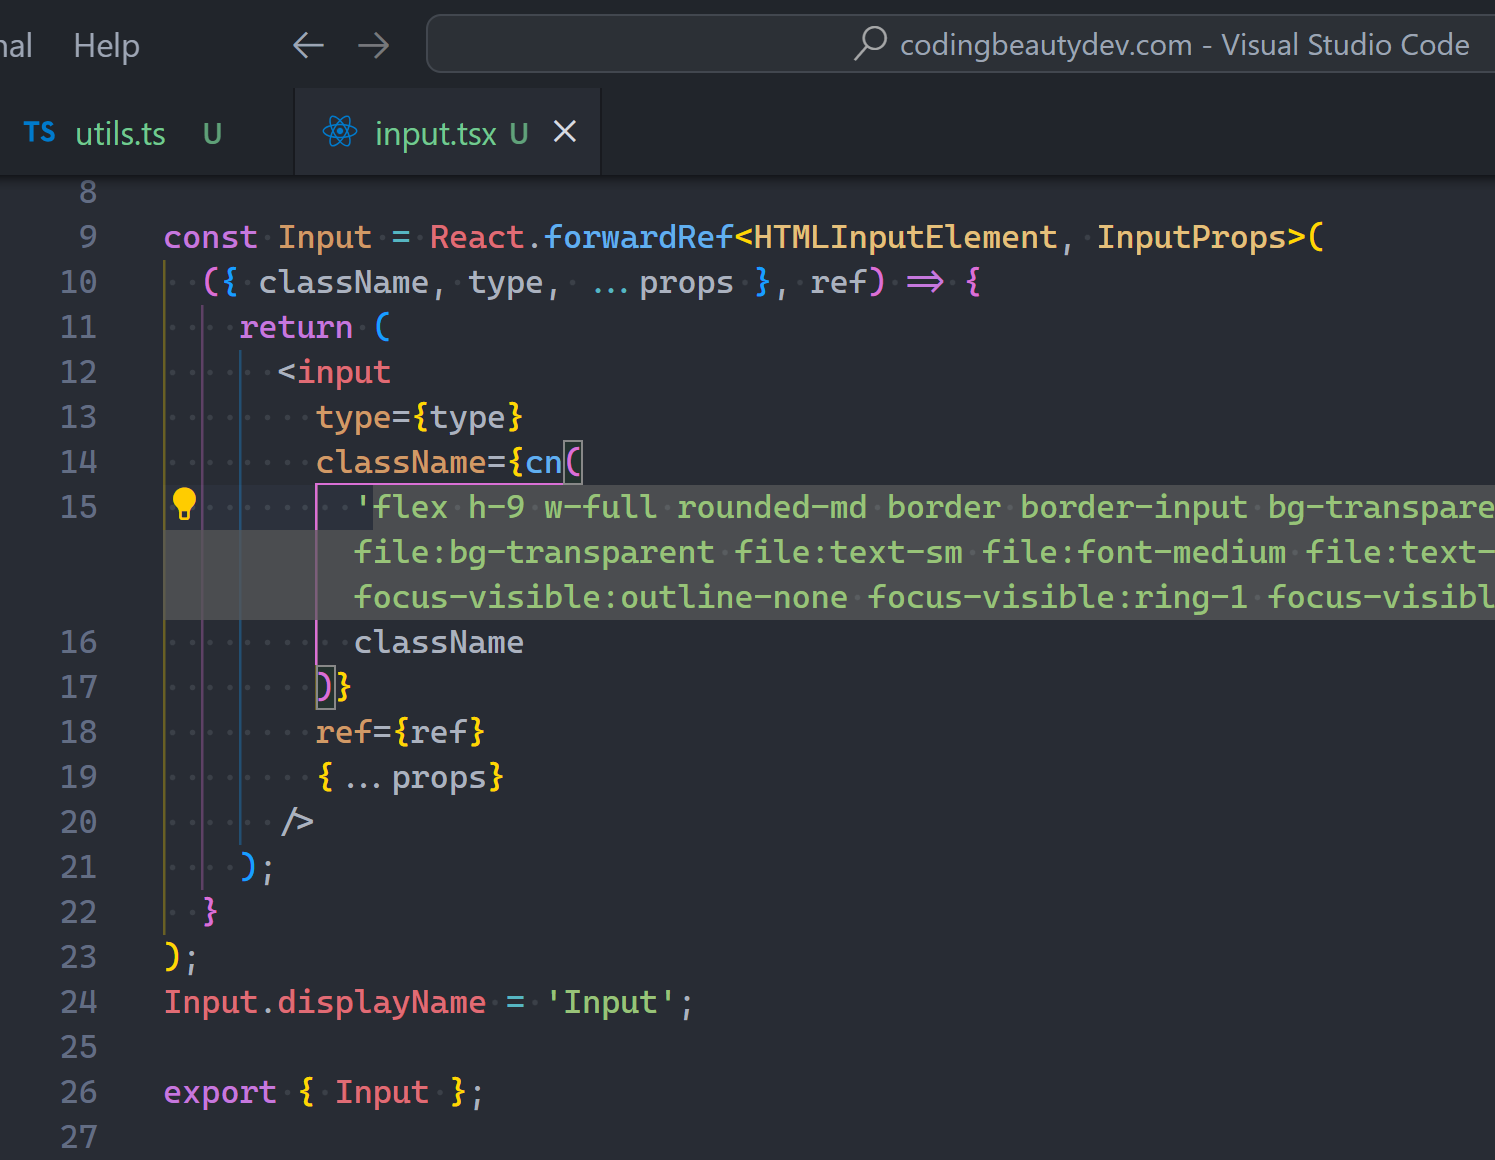
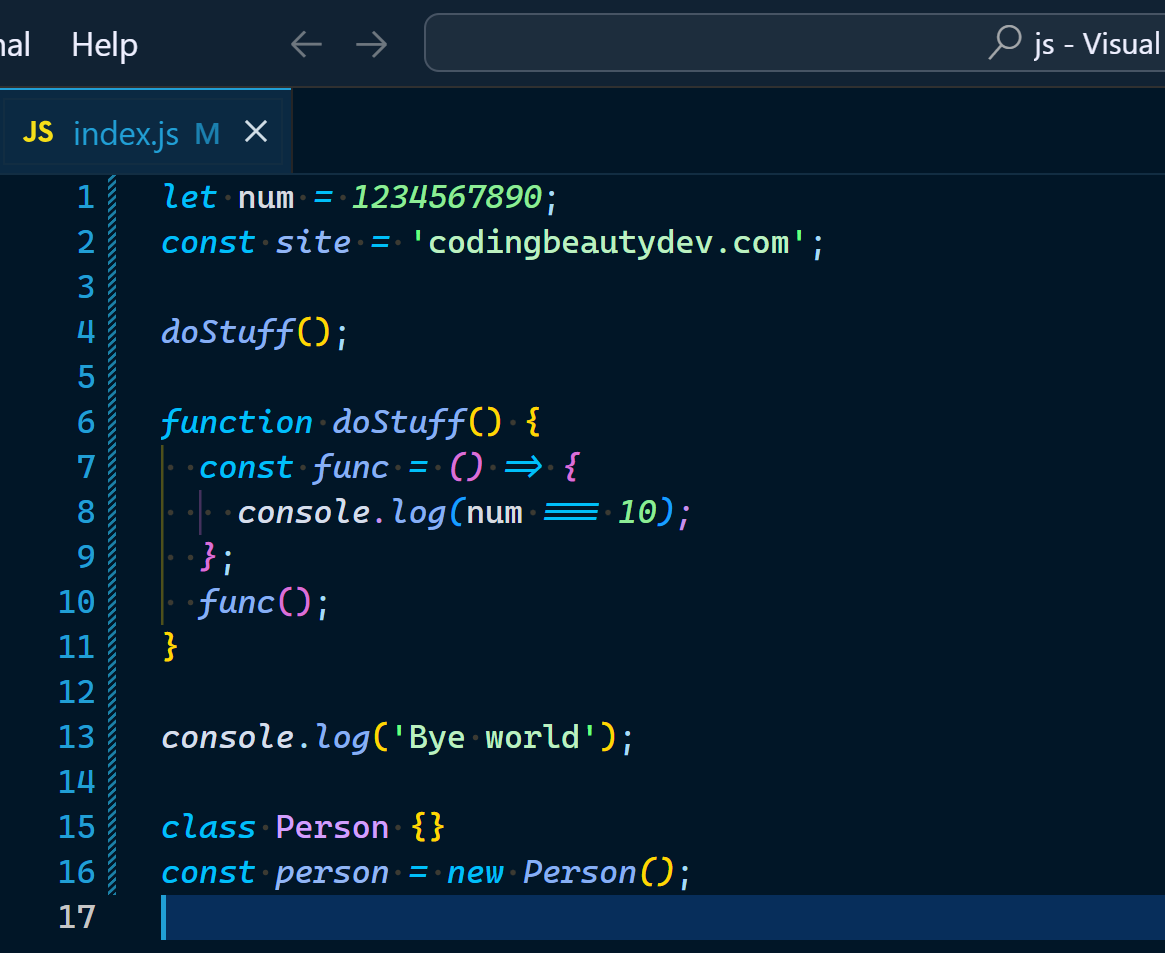
This line:

Please don’t do this in any language.

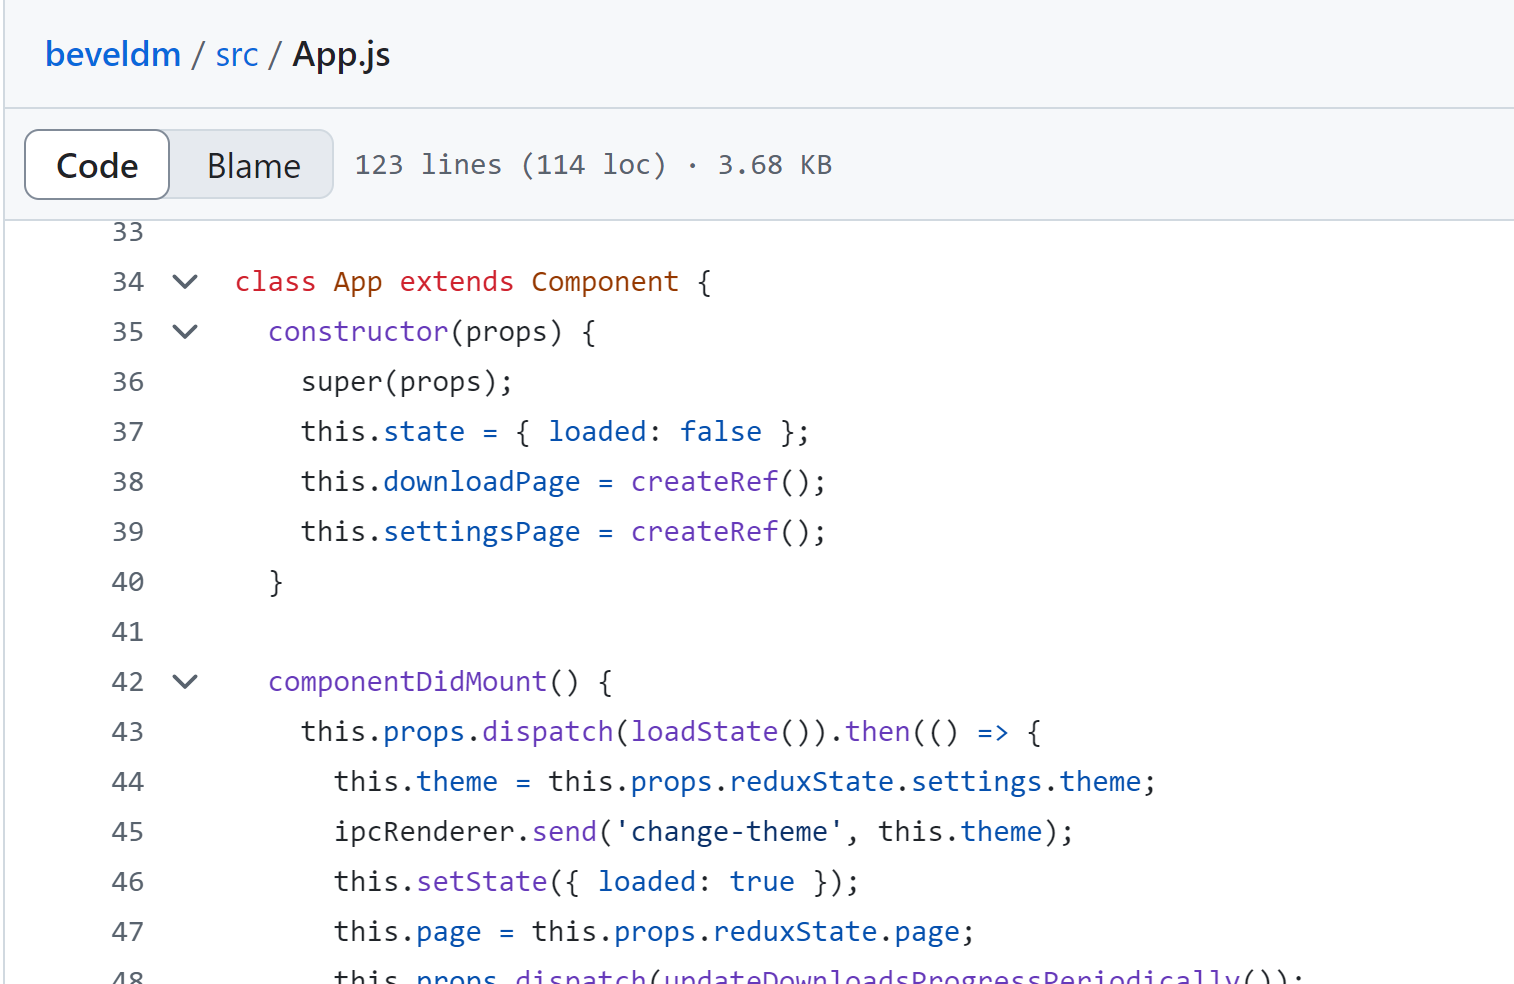
Don’t await properties.

You’re destroying your code readability and ruining the whole concept of OOP.

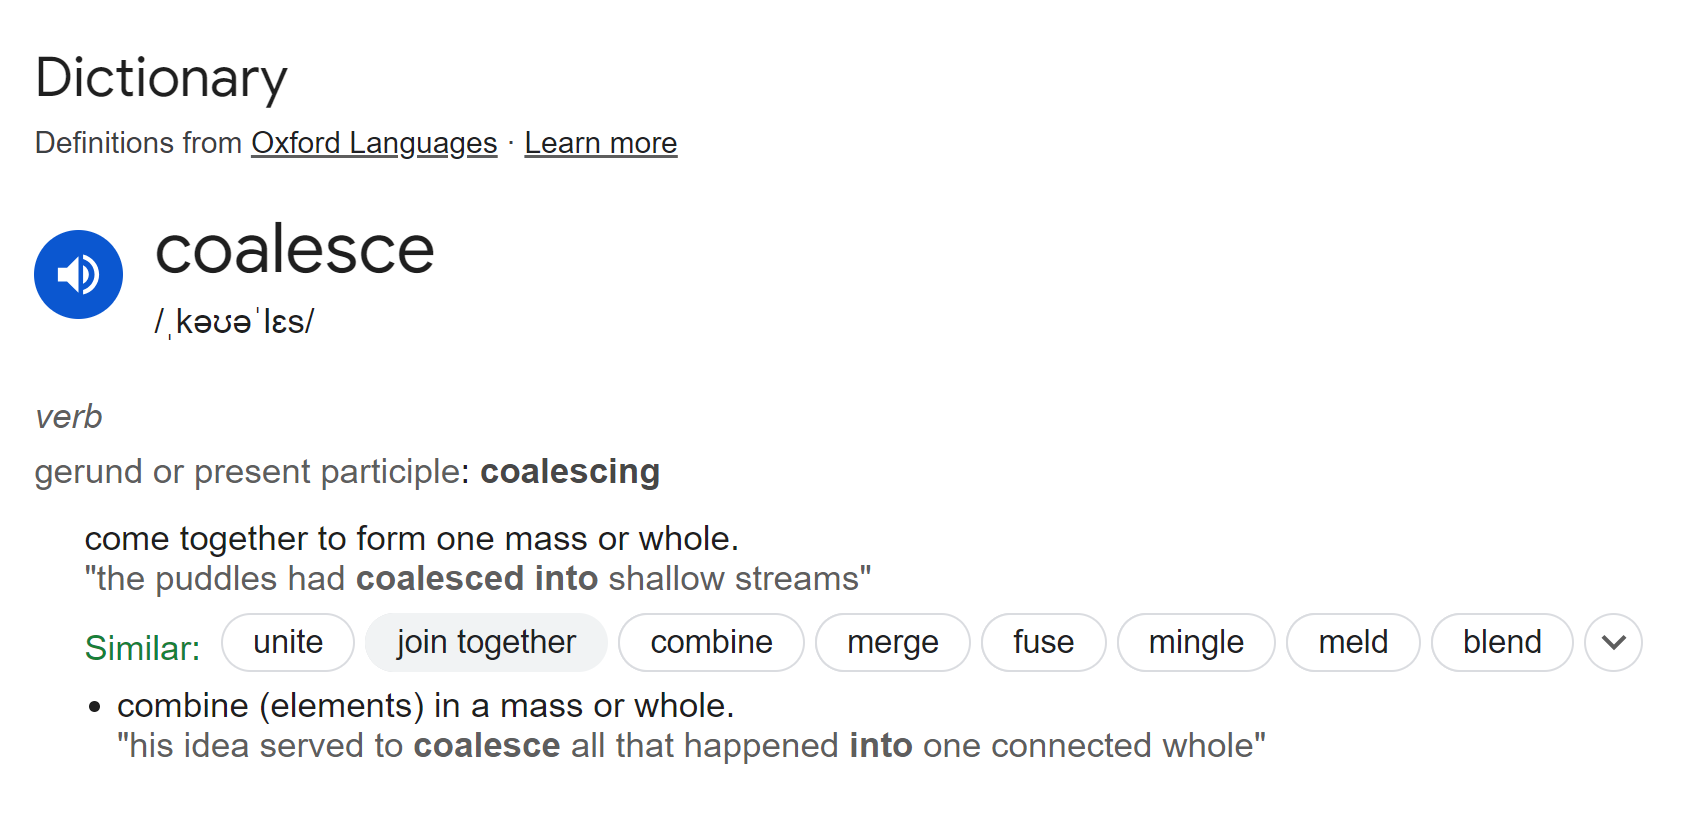
Properties are features not actions.

They don’t do like methods. They are.

They are data holders representing states of an object.

Simple states:

JavaScript
class Person { firstName = 'Tari'; lastName = 'Ibaba'; site = 'codingbeautydev.com'; }

Derived states — what getters are meant for:

JavaScript
class Person { firstName = 'Tari'; lastName = 'Ibaba'; site = 'codingbeautydev.com'; get fullName() { return `${this.firstName} ${this.lastName}`; } } const person = new Person(); console.log(person.fullName); // Tari Ibaba

But the status property was returning a Dart Future — JavaScript’s Promise equivalent:

❌Before:

JavaScript
class Permission { get status() { return new Promise((resolve) => { // resolve(); }); } } const notifications = new Permission(); await notifications.status;

It would have been so much better to use a method:

✅ After:

JavaScript
class Permission { getStatus() { return new Promise((resolve) => { // resolve(); }); } } const notifications = new Permission(); await notifications.getStatus();

And now async/await can make things even more intuitive:

JavaScript
class Permission { async getStatus() { // } } const notifications = new Permission(); await notifications.getStatus();

But guess what happens when you try async/await with properties?

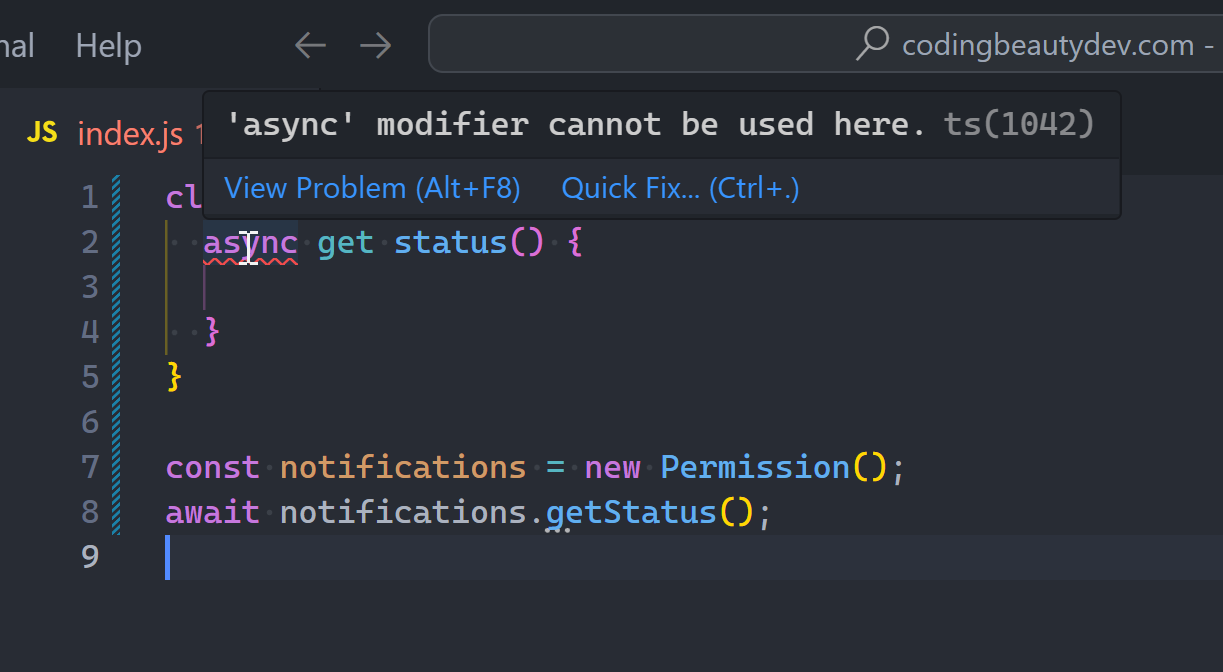
Exactly. It’s a property.

This rule doesn’t just apply to async tasks, it applies to any long-running action, synchronous or not:

❌ Before:

JavaScript
class ActionTimer { constructor(action) { this.action = action; } // ❌ Property get time() { const then = Date.now(); for (let i = 0; i < 1000000; i++) { this.action(); } const now = Date.now(); return now - then; } } const splice = () => [...Array(100)].splice(0, 10); const actionTimer = new ActionTimer(splice); console.log(`time@codingbeautydev.com: ${actionTimer.time}`);

✅ After:

Let them know that the action is expensive enough to deserve caching or variable assignment:

JavaScript
class ActionTimer { constructor(action) { this.action = action; } // ✅ Get method getTime() { const then = Date.now(); for (let i = 0; i < 1000000; i++) { this.action(); } const now = Date.now(); return now - then; } } const splice = () => [...Array(100)].splice(0, 10); const actionTimer = new ActionTimer(splice); const theTime = actionTimer.getTime(); console.log(`time@codingbeautydev.com: ${theTime}`);

But sometimes it still doesn’t deserve to be a property with this.

Check this out — do you see the issue with the level setter property?

JavaScript
class Human { site = 'codingbeautydev.com'; status = ''; _fullness = 0; timesFull = 0; set fullness(value) { this._fullness = value; if (this._fullness <= 4) { this.status = 'hungry'; } else if (this._fullness <= 7) { this.status = 'okay'; } else { this.status = 'full'; timesFull++; } } } const human = new Human(); human.fullness = 5; console.log(`I am ${human.status}`);

It doesn’t just modify the backing _fullness field — it changes multiple other fields. This doesn’t make sense as a property, as data.

It’s affecting so much aside from itself.

It has side-effects.

Setting this property multiple times modifies the object differently each time.

JavaScript
const human = new Human(); human.fullness = 8; console.log(human.timesFull); // 1 human.fullness = 9; console.log(human.timesFull); // 2 console.log(`I am ${human.status}`);

So even though it doesn’t do much, it still needs to be a method.

JavaScript
class Human { site = 'codingbeautydev.com'; status = ''; _fullness = 0; setLevel(value) { this._fullness = value; if (this._fullness <= 3) { this.status = 'hungry'; } else if (this._fullness <= 7) { this.status = 'okay'; } else { this.status = 'full'; } } } const human = new Human(); human.setLevel(5); console.log(`I am ${human.status}`);

Name them right

Natural code. Coding like natural language.

So always name the properties with nouns like we’ve been doing here.

JavaScript
class ActionTimer { constructor(action) { this.action = action; } // ✅ Noun for property get time() { // ... } }

But you see what we did when it was time to make it a property?

We made it a verb. Cause now it’s an action that does something.

JavaScript
class ActionTimer { constructor(action) { this.action = action; } // ✅ verb phrase for method getTime() { // ... } }

Nouns for entities: variables, properties, classes, objects, and more.

Not this

JavaScript
// ❌ do-examples.ts // ❌ Cryptic const f = 'Coding'; const l = 'Beauty'; // ❌ Verb const makeFullName = `${f} ${l}`; class Book { // ❌ Adjectival phrase createdAt: Date; }

But this:

JavaScript
// ✅ examples.ts // ✅ Readable const firstName = 'Coding'; const lastName = 'Beauty'; // ✅ Noun const fullName = `${firstName} ${lastName}`; class Book { // ✅ Noun phrase dateCreated: Date; }

Verbs for actions: functions and object methods.

Key points: when to use a method vs a property?

Use a property when:

  • The action modifies or returns only the backing field.
  • The action is simple and inexpensive.

Use a method when:

  • The action modifies multiple fields.
  • The action is async or expensive.

All for clean, readable, intuitive code.

Nobody wants to use these Array methods😭

There’s so much more to arrays than map()filter()find(), and push() .

But most devs are completely clueless about this — several powerful methods they’re missing out on.

Check these out:

1. copyWithin()

Array copyWithin() copies a part of an array to another position in the same array and returns it without increasing its length.

JavaScript
const array = [1, 2, 3, 4, 5]; // copyWithin(target, start, end) // replace arr with start..end at target // a. target -> 3 (index) // b. start -> 1 (index) // c. end -> 3 (index) // start..end -> 2, 3 const result = array.copyWithin(3, 1, 3); console.log(result); // [1, 2, 3, 2, 3]

end parameter is optional:

JavaScript
const array = [1, 2, 3, 4, 5, 6, 7, 8, 9, 10]; // "end" not specified so last array index used // target -> 0 (index) // start..end -> 6, 7, 8, 9, 10 const result = array.copyWithin(0, 5); // [6, 7, 8, 9, 10, 6, 7, 8, 9, 10] console.log(result);
JavaScript
const array = [1, 2, 3, 4, 5]; // Copy numbers 2, 3, 4, and 5 (cut off at index 4) const result = array.copyWithin(3, 1, 6); console.log(result); // [1, 2, 3, 2, 3]

2. at() and with()

at() came first and with() came a year after that in 2023.

They are the functional and immutable versions of single-element array modification and access.

JavaScript
const colors = ['pink', 'purple', 'red', 'yellow']; console.log(colors.at(1)); // purple console.log(colors.with(1, 'blue')); // ['pink', 'blue', 'red', 'yellow'] // Original not modified console.log(colors); // ['pink', 'purple', 'red', 'yellow']

The cool thing about these new methods is how they let you get and change element values with negative indexing.

3. Array reduceRight() method

Works like reduce() but the callback goes from right to left instead of left to right:

JavaScript
const letters = ['b', 'e', 'a', 'u', 't', 'y']; const word = letters.reduce((word, letter) => word + letter, ''); console.log(word); // beauty // Reducer iterations // 1. ('', 'y') => '' + 'y' = 'y' // 2. ('y', 't') => 'y' + 't' = 'yt'; // 3. ('yt', 'u') => 'ytu'; // ... // n. ('ytuae', 'b') => 'ytuaeb'; const wordReversed = letters.reduceRight((word, letter) => word + letter, ''); console.log(wordReversed); // ytuaeb

Here’s another great scenario for reduceRight():

JavaScript
const thresholds = [ { color: 'blue', threshold: 0.7 }, { color: 'orange', threshold: 0.5 }, { color: 'red', threshold: 0.2 }, ]; const value = 0.9; const threshold = thresholds.reduceRight((color, threshold) => threshold.threshold > value ? threshold.color : color ); console.log(threshold.color); // red

4. Array findLast() method

New in ES13: find array item starting from last element.

Great for cases where where searching from end position produces better performance than with find()

Example:

JavaScript
const memories = [ // 10 years of memories... { date: '2020-02-05', description: 'My first love' }, // ... { date: '2022-03-09', description: 'Our first baby' }, // ... { date: '2024-01-25', description: 'Our new house' }, ]; const currentYear = new Date().getFullYear(); const query = 'unique'; const milestonesThisYear = events.find( (event) => new Date(event.date).getFullYear() === currentYear && event.description.includes(query) );

This works but as our target object is closer to the tail of the array, findLast() should run faster:

JavaScript
const memories = [ // 10 years of memories... { date: '2020-02-05', description: 'My first love' }, // ... { date: '2022-03-09', description: 'Our first baby' }, // ... { date: '2024-01-25', description: 'Our new house' }, ]; const currentYear = new Date().getFullYear(); const query = 'unique'; const milestonesThisYear = events.findLast( (event) => new Date(event.date).getFullYear() === currentYear && event.description.includes(query) );

Another use case for findLast() is when we have to specifically search the array from the end to get the correct element.

For example, if we want to find the last even number in a list of numbers, find() would produce a totally wrong result:

JavaScript
const nums = [7, 14, 3, 8, 10, 9]; // gives 14, instead of 10 const lastEven = nums.find((value) => value % 2 === 0); console.log(lastEven); // 14

But findLast() will start the search from the end and give us the correct item:

JavaScript
const nums = [7, 14, 3, 8, 10, 9]; const lastEven = nums.findLast((num) => num % 2 === 0); console.log(lastEven); // 10

5. toSorted(), toReversed(), toSpliced()

ES2023 came fully packed with immutable versions of sort(), reverse(), and splice().

Okay maybe splice() isn’t used as much as the others, but they all mutate the array in place.

JavaScript
const original = [5, 1, 3, 4, 2]; const reversed = original.reverse(); console.log(reversed); // [2, 4, 3, 1, 5] (same array) console.log(original); // [2, 4, 3, 1, 5] (mutated) const sorted = original.sort(); console.log(sorted); // [1, 2, 3, 4, 5] (same array) console.log(original); // [1, 2, 3, 4, 5] (mutated) const deleted = original.splice(1, 2, 7, 10); console.log(deleted); // [2, 3] (deleted elements) console.log(original); // [1, 7, 10, 4, 5] (mutated)

Immutability gives us predictable and safer code; debugging is much easier as we’re certain variables never change their value.

Arguments are exactly the same, with splice() and toSpliced() having to differ in their return value.

JavaScript
const original = [5, 1, 3, 4, 2]; const reversed = original.toReversed(); console.log(reversed); // [2, 4, 3, 1, 5] (copy) console.log(original); // [5, 1, 3, 4, 2] (unchanged) const sorted = original.toSorted(); console.log(sorted); // [1, 2, 3, 4, 5] (copy) console.log(original); // [5, 1, 3, 4, 2] (unchanged) const spliced = original.toSpliced(1, 2, 7, 10); console.log(spliced); // [1, 7, 10, 4, 5] (copy) console.log(original); // [5, 1, 3, 4, 2] (unchanged)

6. Array lastIndexOf() method

The lastIndexOf() method returns the last index where a particular element can be found in an array.

JavaScript
const colors = ['a', 'e', 'a', 'f', 'a', 'b']; const index = colors.lastIndexOf('a'); console.log(index); // 4

We can pass a second argument to lastIndexOf() to specify an index in the array where it should stop searching for the string after that index:

JavaScript
const colors = ['a', 'e', 'a', 'f', 'a', 'b']; // Get last index of 'a' before index 3 const index1 = colors.lastIndexOf('a', 3); console.log(index1); // 2 const index2 = colors.lastIndexOf('a', 0); console.log(index2); // 0 const index3 = colors.lastIndexOf('f', 2); console.log(index3); // -1

7. Array flatMap() method

The flatMap() method transforms an array using a given callback function and then flattens the transformed result by one level:

JavaScript
const arr = [1, 2, 3, 4]; const withDoubles = arr.flatMap((num) => [num, num * 2]); console.log(withDoubles); // [1, 2, 2, 4, 3, 6, 4, 8]

Calling flatMap() on the array does the same thing as calling map() followed by a flat() of depth 1, but it`s a bit more efficient than calling these two methods separately.

JavaScript
const arr = [1, 2, 3, 4]; // flat() uses a depth of 1 by default const withDoubles = arr.map((num) => [num, num * 2]).flat(); console.log(withDoubles); // [1, 2, 2, 4, 3, 6, 4, 8]

Final thoughts

They are not that well-known (yet) but they have their unique uses and quite powerful.

Learn these algorithms fast to get into lucrative freelance networks

Exclusive freelance networks are an incredible way to gain consistent access to dozens of new lucrative clients.

But there’s a catch — they’re exclusive — it’s tough to get in.

It’s definitely worth it, but you’ll need to go through a grilling multi-stage process to be accepted into most of them.

Now coding quizzes are a core stage, and algorithm knowledge is crucial for you to go through.

Check these out and find out which areas you need to work on to maximize your chances of gaining entry.

The coding questions are an awesome way to test your algorithmic skills.

1. Advanced iteration

You need to know how to implement complex logic and output with while, do..while and for loops.

Common questions

How to:

  • Create shapes and structures with asterisks — like a right-angle triangle, or a pizza slice.
  • Print Fibonacci numbers until n
  • Print sum of numbers until n
JavaScript
function printFibonacci(n) { let a = 0, b = 1, temp; for (let i = 0; i < n; i++) { console.log(a); temp = a + b; a = b; b = temp; } } printFibonacci(10);

2. Arrays

Lists are everywhere in life and code.

If you want to have any chance at the algorithms you’ll meet, you need to know the in’s and out’s of inspecting and manipulating them.

Iteration, calculating sums, finding elements.

Common questions

  • Find the maximum value in an array.
  • Calculate the sum of all elements.
  • Rotate an array.
  • Find the second largest element.
  • Merge two sorted arrays.
JavaScript
function rotateArray(arr, k) { const n = arr.length; k = k % n; // in case k is greater than array length return arr.slice(-k).concat(arr.slice(0, n - k)); } // Example let arr = [1, 2, 3, 4, 5]; let k = 2; let rotatedArr = rotateArray(arr, k); console.log(rotatedArr); // Output: [4, 5, 1, 2, 3]

3. Linked Lists

Essential for lists needing efficient insertion.

Common questions

  • Re-order a linked group of words by their first element
  • Reverse a Linked List
  • Find the middle of a Linked List
  • Swap nodes in a Linked List
  • Find the starting point of a linked list

I was asked a variant of this in one of the live coding quizzes:

JavaScript
function reorderWords(pairs) { const map = Object.fromEntries(pairs); let start = pairs.find( ([from]) => !pairs.some(([, to]) => to === from) )[0]; let result = start; while (map[start]) { start = map[start]; result += start; } return result; } // Example input const pairs = [ ['G', 'A'], ['L', 'P'], ['R', 'T'], ['P', 'O'], ['O', 'R'], ['T', 'U'], ['A', 'L'], ['U', 'G'], ]; console.log(reorderWords(pairs)); // Output: 'PORTUGAL'

4. Time complexity

Time complexity evaluates how the runtime of an algorithm increases as the input size grows.

You’ll often be asked to analyze and optimize the time complexity of your solutions in coding interviews.

Common concepts

  • O(1): Constant time operations.
  • O(n): Linear time, where the runtime increases with input size.
  • O(n²): Quadratic time, often a sign that optimization is needed.

Learning how to analyze the time complexity of loops and recursive functions is key to writing efficient code.

5. Counting elements

Common questions

  • Count the number of distinct elements in an array.
  • Find how many capital letters are in a string
  • Find the majority element (appears more than half the time) in an array.
JavaScript
function findMajorityElement(arr) { let candidate = null; let count = 0; // First pass to find a candidate for (const num of arr) { if (count === 0) { candidate = num; } count += num === candidate ? 1 : -1; } // Optional second pass to confirm the candidate count = 0; for (const num of arr) { if (num === candidate) { count++; } } // Check if candidate is indeed the majority element if (count > arr.length / 2) { return candidate; } else { return null; // or throw an error if you want to indicate no majority element } } // Example usage: const arr = [3, 3, 4, 2, 4, 4, 2, 4, 4]; const majorityElement = findMajorityElement(arr); console.log(majorityElement); // Output: 4

Using data structures like hashmaps or dictionaries to count occurrences helps solve these problems efficiently.

6. Two-pointer method

A two-pointer technique used to solve problems involving subarrays, like finding subarrays with a given sum or maximum length.

Common questions

  • Find all subarrays with a given sum.
  • Determine the maximum subarray length that satisfies a condition.
JavaScript
function findSubarraysWithSum(arr, targetSum) { const result = []; let left = 0; // Left pointer let currentSum = 0; // Current sum of the window for (let right = 0; right < arr.length; right++) { currentSum += arr[right]; while (currentSum > targetSum && left <= right) { currentSum -= arr[left]; left++; } // If current sum equals targetSum, we found a subarray if (currentSum === targetSum) { result.push(arr.slice(left, right + 1)); } } return result; } // Example usage: const arr = [1, 2, 3, 7, 5]; const targetSum = 12; const subarrays = findSubarraysWithSum(arr, targetSum); console.log(subarrays); // Output: [[2, 3, 7], [7, 5]]

This technique is essential for optimizing sliding window problems.

7. Prefix sums

Prefix sums efficiently calculate the sum of elements in a subarray, enabling constant-time range queries after linear-time preprocessing.

Common questions

  • Find the sum of elements between two indices in an array.
  • Solve range sum queries efficiently.

Understanding this technique can drastically reduce the complexity of sum-based problems.

8. Sorting

Sorting is a fundamental algorithmic concept.

Bubble sort, quick sort, merge sort…

Common questions

  • Sort an array of integers.
  • Sort an array based on custom criteria.

Interviewers often expect you to recognize when sorting can simplify a problem and to implement common sorting algorithms.

9. Stacks

Stack of cards, stack of books, stack of plates…

It’s all about LIFO — Last In First out.

They’re there for problems needing backtracking or maintaining order.

Common questions

  • Evaluate expressions using stacks (e.g., reverse Polish notation).
  • Implement a stack with basic operations (push, pop, peek).

Understanding stack operations is key in solving problems like balancing parentheses or processing nested structures.

10. Leader at position

The leader in an array is an element that is greater than all elements to its right.

Identifying such elements efficiently is a common interview problem.

Common questions

  • Find all leader elements in an array.
  • Return the leader of a particular segment.

This concept help solve problems related to maximizing or minimizing values over a range.

Final thoughts

Mastering these concepts will go a long way towards acing the coding quizzes. Not just for freelance networks but for traditional job interviews.

Remember to practice not just solving problems but understanding the underlying principles behind each solution

10 powerful tools for faster web development

10 fantastic web dev tools to level up your productivity and achieve your coding goals faster than ever.

From colorful styling effects to faster typing, these tools will boost your workflow and make a lot of things easier.

1. React Glow

Create a playful glow that dances with the user’s mouse, adding a touch of magic to your interface:

Whenever I see effects like this on a page, it just gives me an aura of sophistication and quality.

2. Vite

Ditch Create React App and make development a breeze with Vite.

Say hello to lightning-fast hot module replacement and built-in TypeScript support.

And absolutely no need to worry about outdated dependencies or vulnerable packages – unlike with Create React App:

On the other hand, this is what I get for using dinosaur Create React App in one my Electron projects:

3. TODO Highlight for VS Code

With TODO highlight I can quickly add TODO comments anywhere in my codebase and keep track of all them effortlessly.

You quickly add a TODO with comment prefixed with TODO:

Then view in the Output window after running the TODO-Highlight: List highlighted annotations command:

I find it a great alternative to storing them in a to-do list app, especially when they’re something very low-level and contextual, for example: “TODO: Use 2 map()’s instead of reduce()”.

4. Rough Notation

Powerful JS library for creating and animating colorful annotations on a web page with a hand-drawn look and feel.

When I see this I see a human touch in the deliberate imperfections; it stands out.

So there’s underline, box, circle, highlight, strike-through… many many annotation styles to choose from with duration and color customization options.

5. JavaScript (ES6) Code Snippets for VS Cod

VS Code extension fully loaded with heaps of time-saving JavaScript code snippets for ES6.

Snippets like imp and imd:

A demo of how to use the JavaScript (ES6) Code Snippets extension.

6. background-removal-js

This free, browser-based JavaScript library lets you easily remove backgrounds from your images all while keeping your data private.

7. VanJS

This is a super small and simple library for building user interfaces.

It uses plain JavaScript and the built-in DOM functionality, just like React. But unlike React it doesn’t need any special syntax for defining UI elements.

JavaScript
// Reusable components can be just pure vanilla JavaScript functions. // Here we capitalize the first letter to follow React conventions. const Hello = () => div( p("👋Hello"), ul( li("🗺️World"), li(a({href: "https://wp.codingbeautydev.com/"}, "💻Coding Beauty")), ), ) van.add(document.body, Hello()) // Alternatively, you can write: // document.body.appendChild(Hello())

8. Mailo

This drag-and-drop builder makes crafting beautiful, responsive emails a breeze. No more coding headaches, just watch your emails light up inboxes across all devices.

9. Color Names

Dive into a treasure trove of over 30,000 color names, meticulously gathered from across the web and lovingly enriched by thousands of passionate users.

Find the perfect shade to ignite your creativity and bring your designs to life

10. Flowbite Icons

Unleash a treasure trove of 450+ stunning SVG icons, all open-source and ready to bring your web projects to life.

Whether you prefer bold solids or crisp outlines, these icons seamlessly integrate with Flowbite and Tailwind CSS, making customization a breeze.

Final thoughts

Use these awesome tools to level up your productivity and developer quality of life.

10 amazing VS Code tips and tricks for rapid coding

10 powerful VS Code tricks to massively enhance your productivity.

From rapid navigation to speedy code editing, these tips will help you achieve your coding goals faster than ever with a top-notch development experience.

1. Publish repo to GitHub in literal seconds

Do you remember this?

Or maybe you still do this?

It’s the old-school way of publishing your code to GitHub. Create a repo, enter name and details, create remotes…

With VS Code you don’t need to do this anymore. From the Source Control panel you can now quickly publish any local repo to GitHub in just 2 clicks.

And forget git init: creating the repo is even easier with a single click:

You can safely forget about git init

Quickly commit with Ctrl + Enter:

Now easily publish your repo in seconds:

Okay this is definitely more than “seconds” — but that was the Internet connection’s fault. Ideally it should be like this:

Now we can enjoy our Sigma English rant directly on GitHub:

2. Workspaces for multi-codebase coding

There was a point when I couldn’t do without this feature.

And you won’t when your project is sprawling with numerous inter-connected codebases stored in different folders that all make an important part of the system.

In one of our projects, we had at least 3 folders.

  1. One folder for Firebase-y stuff: Functions, DB security rules, and more.
  2. One folder for the Next.js website/app.
  3. One folder for the cross-platform app codebase.

Imagine the pain of having to switch back and forth between these in 3 open VS Code windows; opening terminals here and there, searching for the wrong file in the wrong codebase, mixing up your Alt + Tab sequence with other open apps, along with the mental confusion and delay it causes anytime you switch apps.

And don’t forget this 👇. This is a pain.

The pain of clicking twice and having to select the correct window based on their titles.

This is why we need workspaces — one window with all the files and subfolders you need.

Sidenote: And if you’re a Windows user struggling to manage your File Explorer you probably want to try this tiny utility (WinENFET).

Every folder is a workspace to VS Code, so you can easily add more folders with File > Add Folder to Workspace…

When everything is done you’ll have all the folders you need and their files easily accessible on the File Explorer pane.

And when you search for files with Ctrl + P or Ctrl + Shift + F, it’ll apply to every file in all the folders:

You can also rapidly create new terminals with any of the folders as the working directory.

With this and Win 11 22H2 Tabs we’ve easily cut our open windows in half.

3. Power editing with side-by-side view

And when you need to work with multiple of those workspace files at once? Split mode has you covered.

I once ported a Flutter Dart class to its JavaScript equivalent and this feature made things much easier and faster.

You can also do this with one of the View: Split Editor... commands.

Split them down or split them right:

Master coder at work.

VS Code also uses this split view to show changes between different file versions saved in the Timeline view or source control.

4. Rapidly copy any line

Please don’t tell me you still drag your mouse over the line and Ctrl + C.

Look, copying a line is super easy in VS Code.

It’s not like most other text editors; it’s a clean productivity beast! It had to be to get a permanent spot on my taskbar.

Just put the cursor on the line — anywhere — and Ctrl + C.

Whenever you do need to highlight the line you can always use Ctrl + L:

Press it again to highlight more lines below.

And when you just want part of the line you can use Shift + Left / Right to highlight one way or the other.

You can also use Ctrl + X to quickly cut the line where the cursor is without any highlighting.

5. Move line up and down

But if you’re cutting just to paste somewhere else in the same file, then there’s no need to pollute the clipboard.

Simply use the Alt + Up/Down to move the line to wherever you want:

You can even move large selections of multiple lines up and down.

Including code folds:

6. Code folding for monstrous files

I found this invaluable for those gigantic files with tons of functions and methods. Or a huge Flutter or JSX component with unbelievable amounts of deep nesting.

Why some people hate Flutter/Dart

By clicking those down-facing arrows you can easily collapse various segments of the code you’re not currently working with.

Better still the Ctrl + Shift + [ has us covered.

And Ctrl + Shift + [ has us uncovered.

7. Bird’s eye with Outline view

The Outline View is another brilliant way to keep track of large code files.

This feature gives a broad overview of all the symbols and nested symbols in the file: variables, classes, functions… you name it.

You can sort the top-level symbols shown by their position, name, or type.

And when you’re moving around a lot you probably want to keep the Follow Cursor option turned on, to make the selected symbol in the outline match the selected symbol in the file:

Normally you’ll find this view in the File Explorer pane along with Open Editors and Timeline, but as I started using them more often for my own monstrous files I moved it to a separate pane:

8. Go to symbol quickly

And when we stubbornly refuse to split up the file and it gets HUGE; so huge that navigating through the *outline* is becoming a chore, then it’s time to: Go To Symbol.

With the Ctrl + P, @ shortcuts.

And when we finally do the sensible thing and break up the file, we can still search across all those files and more, with Ctrl + T:

9. Go to definition

And once you get to a symbol, you can easily view the definition with Alt + Click or F12:

Double-click the definition popup to fully open the file:

10. Undo cursor quickly

After going to a symbol or viewing its definition we’ll probably want to return to where we were just a few moments prior.

Instead of wasting time relying on short-term memory, you can rest assured that the Ctrl + U keyboard will take you to exactly where you were before.

This is also essential when you go to a line by Ctrl + G.

These 10 powerful tips will elevate your efficiency and make day-to-day coding life easier and more enjoyable.

Key takeaways

  1. Create and publish a GitHub repo in seconds from the Source Control Panel (open with Ctrl + Shift + G G).
  2. Manage multiple folders in a workspace with File> Add Folder to Workspace....
  3. Code with multiple files at once with the View > Split Editor....
  4. Quickly copy a line with Ctrl + C.
  5. Move a line or up or down with Alt + Up / Down.
  6. Collapse code blocks and nested JSX with Ctrl + Shift [.
  7. View all symbols in a file at once with Outline View
  8. Search all symbols in the file with Ctrl + P, @, search in workspace with Ctrl + T
  9. Go to where a symbol was definite with Ctrl + Click or F12.
  10. Revert cursor to previous location with Ctrl + U.

This new UI framework is an absolute game changer😲

The new shadcn/ui framework completely transforms how we design and build modern web apps.

It solves every major issue we’ve had with ALL those UI frameworks: Material UI, Bootstrap…

Project bloat and customization have always been huge pains.

Imagine, you import thousands of lines of CSS code, all just to create a button — that you end up customizing anyway.

When you install these classic libraries, you get every single one of the components dumped into your codebase. There’s no escape.

ShadCN solves this problem in a radical way.

Zero classes. Zero built-in components.

It’s pure… copy and paste?

❌Before in Material UI and others:

You couldn’t see the component code directly and could only customize it with external classes.

The worst part is that the component’s appearance can change completely and break your styles when you upgrade to a new version.

✅But now with shadcn/ui:

You have total control over all your component files. You can see everything.

The button code completely belongs to me here. I can make whatever change I want and it’ll stay that way.

Result in page:

And all the initial styles are done with Tailwind classes for rapid, effortless customization.

It’s an open book where you see exactly how everything is styled and all the possible variants.

And of course this button is only one of several dozen components in the library.

We’ve got all the classics: Alerts, Cards, Dialogs, and so much more.

And now with the new shadcn/ui CLI, adding new components to our project is easier than ever.

Instead of going to the site to copy the component I can add it directly from the CLI:

Note: It doesn’t “install” anything in node_modules. It simply automates the copying and pasting for us:

Everything we need:

shadcn/ui‘s reusable nature makes it perfect not just for providing components, but also for even more complex UI element groups we call blocks.

Chart blocks:

Dashboard element blocks:

So many amazing blocks that look great by default and are endlessly customizable.

Since it’s just JSX and CSS, you can copy just the few chunks you want and drop them into your project.

Every great UI framework has extensive theme support and ShadCN is no exception.

You can pick from a broad range of color and border-radius to create the theme.

Stunning dark mode:

And when you’re done, you simply copy and paste the CSS as variables in your Tailwind layer:

You can even set a theme when you first add the shadcn/ui config files to your project.

Final thoughts

shadcn/ui changes everything for web development, helping us design and build breathtaking web apps easier and faster than ever.

These coding themes are incredible

10 breathtaking themes to upgrade your dev quality of life and coding enjoyment.

1. Night Owl

Night Owl is here for all your late-night coding drills.

Easy on the eyes with a cool color palette:

Sit in a dark room and code all night long.

And there’s a different variant, for those who hate the italics:

And when the morning comes around again:

No italics:

2. Atom One Theme

My absolute favorite.

The signature color scheme from the Atom editor that GitHub killed.

I find dark themes annoying in the day with bright light all around me — so thankfully this also has a light counterpart.

3. GitHub Theme

Speaking of GitHub: Their official theme for VS Code:

Look familiar? No? How about this:

Reduce the font size and change it to Consolas and you have a perfect replica of the theme at github.com.

4. One Dark Pro

The biggest difference from Atom One Dark is the variable color.

It’s got a vibrant yellow compared to the gray of the former.

Essentially all the rainbow colors now — can’t get much more colorful than that.

Especially when you sprinkle bracket pair colorization.

And One Dark Pro also has some nice variants you may want to try: Check out One Dark Pro Mix.

It’s got a slightly darker background with a pleasant bold color for the function blue.

No light theme though.

5. Monokai

A visually stunning theme with strikingly vibrant colors and excellent readability.

Look at the alluring contrast between the green and the pink, and the purple too. All with a nice brownish background.

There’s also Monokai Pro for a lesser contrast and a more sophisticated feel.

The extension also comes with a beautiful file icon theme with multiple variants:

6. Dracula Theme

Dark and dramatic — that’s Dracula.

It’s a purple-centric theme with a mysterious vibe.

Not surprising it doesn’t have a light theme — that’s Dracula.

7. Material Theme

A popular theme packed with sleek, modern colors.

Comes with gorgeous color variants, like Material Theme Ocean:

Material Theme also has its own icon set:

8. Quiet Light

Minimalistic theme with a clean interface:

Purple purple purple.

9. Winter Is Coming

Lovely night-friendly theme cool blue hues:

If you’re not a big fan of the dark blue background, then dark black should help.

And it’s only fitting for it to have a light counterpart — it’s Winter after all.

10. Visual Studio Theme

For those with Visual Studio nostalgia.

Instantly recognizable with the blue variables and red strings.

Final thoughts

There’s a theme here for every developer’s taste – all clear and breathtaking to upgrade your coding experience.

Whether you prefer dark modes for late-night coding or bright themes for daytime clarity, the right theme can make all the difference in how comfortable and productive you are as you work.

Explore these options, find the one that resonates with your style, and take your coding sessions to the next level.

The 5 most transformative JavaScript features from ES11

JavaScript has come a long way in the past 10 years with brand new feature upgrades in each one.

Let’s take a look at the 5 most significant features that arrived in ES11; and see the ones you missed.

1. Modularization on the fly: Dynamic imports

ES11 was the awesome year when import could now act as function, like require().

An async function.

Keeping imports at the top level was no longer a must; We could now easily resolve the module’s name at compile time.

Loading modules optionally and only when needed for high-flying performance…

JavaScript
async function asyncFunc() { if (condition) { const giganticModule = await import('./gigantic-module'); } }

Loading modules based on user or variable input…

JavaScript
import minimist from 'minimist'; const argv = minimist(process.argv.slice(2)); viewModule(argv.name); async function viewModule(name) { const module = await import(name); console.log(Object.keys(module)); }

It’s also great for using ES modules that no longer support require():

JavaScript
// ❌ require() of ES modules is not supported const chalk = require('chalk'); console.log(chalk.blue('Coding Beauty')); (async () => { // ✅ Runs successfully const chalk = (await import('chalk')).default; console.log(chalk.blue('Coding Beauty')); })();

2. Promise.allSettled()

But we already had Promise.all() to wait for all the Promises in a list to resolve?

JavaScript
const responses = await Promise.all([ fetch(endpoint1), fetch(endpoint2), ]);

So what was the point of this, right?

But no, allSettled() turns out to be quite different from all().

Promise.all(): If even a single Promise in the list fails, everything fails.

But you see the problem: We’d have no idea if one failed and which succeeded.

What if you want to retry the failed errors until they do succeed? You’re stuck.

Until you turn to Promise.allSettled():

❌ Before ES11:

JavaScript
// ❌ Promise.all() async function fetchData() { const apiUrl = 'api.tariibaba.com'; const endpoint1 = `${apiUrl}/route1`; const endpoint2 = `${apiUrl}/route2`; try { const responses = await Promise.all([ fetch(endpoint1), fetch(endpoint2), ]); } catch (err) { // ❌ Which failed & which succeeded? We have no idea console.log(`error: ${err}`); } // ... }

✅ After ES11:

Promise.allSettled(): Wait for every Promise to fail or resolve.

JavaScript
// ✅ Promise.allSettled() async function fetchData() { const apiUrl = 'api.tariibaba.com'; const endpoint1 = `${apiUrl}/route1`; const endpoint2 = `${apiUrl}/route2`; try { const promises = await Promise.allSettled([ fetch(endpoint1), fetch(endpoint2), ]); const succeeded = promises.filter( (promise) => promise.status === 'fulfilled' ); const failed = promises.filter( (promise) => promise.status === 'rejected' ); // ✅ now retry failed API requests until succeeded? } catch (err) { // We don't need this anymore! console.log(`error: ${err}`); } // ... }

3. Optional chaining

?. is all over the place now but it all started from ES11.

We’ve been checking vars for null since the dawn of time but it gets pretty cumbersome when we’re null-checking nested properties.

❌ Before ES11:

JavaScript
const a = { b: { c: { d: { site: 'codingbeautydev.com', name: null, }, }, }, }; // ❌ Must check every property for null if (a && a.b && a.b.c && a.b.c && a.b.c.d.site) { console.log(a.b.c.d.site); }

✅ After ES11:

With the optional chaining operator:

JavaScript
// `?.` auto-checks every property for null // if any prop in the chain is null, short-circuit // and return null if (a?.b?.c?.d?.site) { console.log(a.b.c.d.site); }

4. Nullish coalescing

?? was one of the most impactful JavaScript additions.

A powerful to set a variable to a default value and use it at the same time.

❌ Before ES11:

We repeat the variable unnecessarily:

JavaScript
console.log(str1 ? str1 : 'codingbeautydev.com'); // coding is cool console.log(str2 ? str2 : 'codingbeautydev.com'); // codingbeautydev.com

✅ After ES12:

?? keeps things clean and readable:

JavaScript
const str1 = 'coding is cool'; const str2 = null; console.log(str1 ?? 'codingbeautydev.com'); // coding is cool console.log(str2 ?? 'codingbeautydev.com'); // codingbeautydev.com

It coalesces.

Left and right combine to form a non-null whole:

5. Go big or go home: Big Ints

The name BigInt gives it away: loading up on humongous integer values:

JavaScript
const bigInt = 240389470239846028947208942742089724204872042n; const bigInt2 = BigInt( '34028974029641089471947861048917649816048962' ); console.log(typeof bigInt); console.log(bigInt); console.log(typeof bigInt2); console.log(bigInt2); console.log(bigInt * bigInt2);

Because normal integers can’t:

JavaScript
// ✖️ Stored as double const normalInt = 240389470239846028947208942742089724204872042; const normalInt2 = 34028974029641089471947861048917649816048962; console.log(typeof normalInt); console.log(normalInt); console.log(typeof normalInt2); console.log(normalInt2); // ✖️ Precision lost console.log(normalInt * normalInt2);

Final thoughts

These are the juicy new JavaScript features that arrived in the ES12.

Use them to boost your productivity as a developer and write cleaner code with greater conciseness, expressiveness and clarity.

Nobody wants to use these HTML tags 😭

Trust me, you can do MUCH better than <div> <a> and <p>.

Living images, built-in dialogs, a href hacking…

There’s a whole lot of sophisticated tags to discover.

1. progress and meter

So first there’s progress – your typical drama-free progress bar.

You set a value and max for gradation — pretty straightforward.

HTML
<label for="file" >Downloading knowledge into evil AI</label > <progress id="file" value="0" max="100">32%</progress>

But then there’s meter — also known as progress on a rampage:

HTML
<label for="energy">energy levels after 🍉🍌🍇</label> <meter id="energy" min="0" max="100" low="25" high="75" optimum="80" value="50" />

2. dfn

dfn — for anything we’re gonna define in the page:

HTML
<div> <dfn>Mellifluous</dfn> sounds are smooth, musical🎶, and pleasant to hear </div>

And the definition must be inside the dfn‘s parent tag, or else…

Or else nothing — just a semantic rule you can happily disregard.

3. dialog

New native HTML dialogs!

HTML
<dialog id="dialog"> ⚡Lighting strikes the earth 44 times every second! </dialog> <button>Something interesting</button>
JavaScript
const dialog = document.getElementById('dialog'); const button = document.querySelector('button'); button.addEventListener('click', () => { dialog.showModal(); });

Stay open from the get-go:

HTML
<!-- btw setting open to "false" won't do anything --> <dialog id="dialog" open> 😻 Cats have over 30 different muscles just in their ears, allowing them to swivel them in all directions. </dialog>

Built-in support for closing:

HTML
<dialog id="dialog" open> Your free trial is over! Subscribe for as low as $5 billion per month <form method="dialog"> <button>Get lost</button> </form> </dialog>

And powerful, flexible customization letting you create wonderful UIs like this:

4. map and area

<map> and <area> — powerful combo to create clickable areas in images:

HTML
<img src="workplace.jpg" alt="Workplace" usemap="#workmap" width="400" height="379" /> <map name="workmap"> <area shape="rect" coords="34,44,270,350" alt="Computer" href="computer.html" /> <area shape="rect" coords="290,172,333,250" alt="Phone" href="phone.html" /> <area shape="circle" coords="337,300,44" alt="Cup of coffee" href="coffee.html" /> </map>

We call clickable images like these image maps.

5. bdo

Super cryptic acronym here, what does it do?

This 👇

JavaScript
<!-- dir = direction --> <!-- rtl = right-to-left --> <bdo dir="rtl"> 🥺🥰but when I saw you I felt something I never felt... </bdo>

That’s why it stands for: bi-directional override.

6. base

So you know how relative URLs normally work right? 👇

HTML
<body> <a href="/blog/javascript-functional-try-catch" >This is how functional try-catch transforms your JavaScript code </a> </body>

The <a>‘s use the page’s domain to get the full URL they’ll navigate you to:

But what happens when you create a foundational <base> in the HTML?

HTML
<head> <!-- ✅ <base> tag --> <base href="https://www.codingbeautydev.com" /> <title>codingbeautydev.com</title> </head> <body> <a href="/blog/javascript-functional-try-catch" >This is how functional try-catch transforms your JavaScript code </a> </body>

Now they all use the hardcoded value in the <base>‘s href to get the full URL:

Frameworks like Angular and Flutter Web use it too:

7. time

For dates and times:

HTML
My Journal <br/><br/> <time>2:36pm</time> -- I asked her if she wanted to grab a cup of coffee with me <br /> <time>3:50pm</time> -- Still dealing with the brutal rejection

No fancy visuals but it means a lot to search engines.

With time they better understand the dates in your page and produce smarter results.

Especially with the datetime attribute:

JavaScript
<time datetime="2025-01-07">AI singularity</time> is coming sooner than you think!

8. hgroup

<hgroup> is all about family.

It tells the entire world that a heading tag and some content below are related:

HTML
<hgroup> <h1>Maybe this is the end, but if we go out...</h1> <p>We go out together</p> </hgroup>

Family sticks together:

9. kbd

Represents keyboard inputs:

HTML
Over 30 years professional experience with StackOverflow specializing in <kbd>Ctrl + C</kbd> and <kbd>Ctrl + V</kbd>

And speaking of StackOverflow, <kbd> has a nice styling there and other StackExchange sites.

10. cite

Indicates the title of a book, song, movie, or some other creative work:

HTML
One thing I love about <cite>Wednesday</cite> is how Wednesday doesn't care about fitting in

Final thoughts

So these are 10 of the least known and utilized tags in HTML.

Quite useful in various situations despite their low usage.

5 overlooked ways to make $5000/m online as a programmer

Developers are turning code into cash on the internet every day.

Just look at Pieter Levels, a developer making over $300,000 per month from his laptop.

He’s just one of many who combined ingenuity and skill to create tremendous value through the internet.

If you’ve been coding for a while, you can also provide value with your knowledge in several ways.

1. SaaS: Build it once, sell it forever

This is how Pieter makes most of his money.

It’s the holy grail of online income.

Build it once and sell it forever. It’s as passive as it gets.

The hard part is, what are you building? What problem are you solving?

Ideas are not a dime a dozen. Good ideas are rare.

And how do you find good SAAS ideas?

Look into your life.

What are some problems you face regularly online or offline, and can software solve them?

Uber started because the founders found themselves stuck in Paris with no way to find a taxi.

React, Polymer JS, and many other dev tools came about because the existing alternatives just weren’t good enough.

2. Freelancing the right way

I love freelancing.

It’s packed with new and exciting opportunities with unlimited earning potential.

One minute you’re building a sleek landing page for a startup; the next, you’re diving into an AI project for a company on the other side of the world.

But please don’t make the same mistake I did.

I used to spend hours cold-emailing strangers and applying to random low-quality job listings.

I thought it was all a numbers game.

But it was a complete and utter waste of time.

I stopped cold applying and focused on building your network instead. Warm.

I meet new people from people already in my network on WhatsApp and my email contacts.

These people ended up either becoming clients or referring me to clients.

An even faster way was by joining exclusive freelance networks.

In the networks I’m in I get offered at least 3 new freelancing opportunities every single day.

I could have saved all the time and energy spent on the above — but less control and hard to find and get into legit ones.

3. Create “content”

Every line of code you write has a story behind it. Let’s hear it.

Let’s hear how — tools and techniques.

Let’s hear why — your motivations, thought processes, and breakthroughs.

Don’t just throw your knowledge out there; it’s about storytelling.

Share your discoveries, ideas, and opinions; share what you’re passionate about.

And content doesn’t only mean posting on social media or blogging.

“Content” also includes your portfolio — on GitHub and more.

So it also means creating significant projects in your niche and talking about them.

The point of all this is to broaden your reach.

You either end up earning directly on the platform (like YouTube), or you greatly boost your visibility and attract great opportunities.

4. Coaching: Teach what you know

Nothing beats interactive and personalized learning from another human.

Someone who’s been there done that. They’ve seen it all, they know all the tips and tricks and pitfalls.

If you’ve been coding for more than a few years, this is you. You are the one.

Turn your knowledge into an income stream by teaching others.

And it doesn’t even have to be online. Look into your life.

When I was in uni there were tons of my coursemates who needed someone to guide them on learning coding and the other CS topics.

That was a serious opportunity.

Especially as I was one of the few who had already been coding for quite some time.

5. Patreon and GitHub Sponsors: Rally a community

Donations? Lol

How can anyone make any real money from donations?!

Until you hear of how Caleb Porzio makes over $100K/year from nothing but those same donations🤯

That’s the magic of Patreon and GitHub Sponsors.

By offering exclusive perks—like priority issue responses, educational guides on the project, or early access to your latest builds—you can turn your most devoted fans into your sponsors.

You can even sell advertising space, just like Vuetify does:

It’s not just about code anymore—it’s about building a community around your work, a tribe that’s willing to keep you going.

Final thoughts

Making money online as a programmer is about turning your skills into something bigger than yourself.

Whether you’re a freelancer battling through client projects or a creator gathering an audience, the key is the same: know your value, share it, and let the internet do the rest.