It’s powerful AI from none other than Google DeepMind, the geniuses behind that god-level chess-playing program, AlphaZero.
They’ve conquered the mental realm of chess and Go (unfortunately), so now they’re trying to conquer the physical realm of sports.
(And by the way, they’ve been working on AlphaCode, to destroy all programming jobs — should we be worried?)
And they’re already well on their way: The robot destroyed every single player it faced, at the beginner level.
55% of every intermediate-level player it played against.
For a sport like tennis, not only does the AI need sophisticated algorithms for intelligent decision-making.
It also needs physical components for quick reactions and precise movements to adequately make those decisions in the real world.
So this is the biggest problem that makes it impossible for an expert system or classical algorithm to have any chance:
How can we track this tiny, rapidly moving ball, predict its trajectory, and respond quickly and accurately according to the rules of the game?
Well, like in every problem in Computer Science and programming, it all comes back to input, processing, output.
Inputs
We only need visual input here.
And of course, you know the standard way computers receive visual input.
So the robot has multiple high-speed cameras to constantly capture images at an impressive rate of 125 images per second.
All these images are rapidly fed into a neural network that tracks the ball’s position in real time.
With this position, it can calculate key variables like speed and trajectory.
Processing
For processing the robot has two levels of control.
First there are the low-level controllers, a bunch of specialized neural networks trained to execute specific table tennis skills: backhand drives, forehand topspin… basically anything you could normally do with the ball as a human.
Then we have the high-level controller for more abstract decision-making. It processes the inputs to decide which atomic skill to perform.
I think it’s just like how our brains have regions for higher-level processing like the prefrontal cortex, and then other regions like the motor cortex for lower-level for planning and executing motion.
Output
All that processing would be useless if it couldn’t do anything in the real world; It needs to move.
That’s why the robot has a powerful IRB 1100 robotic arm, allowing it to easily reach almost any part of the table to quickly strike the ball.
In a way you could say the low-level controllers are the output of the high-level one’s processing, but they also do their own processing.
It can be better
It beat all the beginners and much of the intermediates.
But how many advanced players did it beat?
Zero.
It was just too slow for those masters.
One reason for this is that it takes quite some time for the sensors to read input, and also for the actuators to carry out the output in the real world.
It also seems to have issues with balls that are too low/high, or have too much spin.
Early beginnings thought, and overall it’s a great system showing off serious progress being made in AI and robotics.
Animations. A fantastic way to stand out from the crowd and grab the attention of your visitors.
With creative object motion and fluid page transitions, you not only add a unique aesthetic appeal to your website but also enhance user engagement and create a memorable first impression.
And creating animations can’t get any easier with these 10 powerful JavaScript libraries. Scroll animations, handwriting animations, SPA page transitions, typing animations, color animations, SVG animations… they are endlessly capable. They are the best.
With over 43k stars on GitHub, Anime.js is easily one of the most popular animation libraries out there.
It’s a lightweight JavaScript animation library with a simple API that can be used to animate CSS properties, SVG, DOM attributes, and JavaScript objects. With Anime.js, you can play, pause, restart or reverse an animation. The library also provides staggering features for animating multiple elements with follow-through and overlapping actions. There are various animation-related events also included, which we can listen to using callbacks and Promises.
Lottie is a library that parses Adobe After Effects animations exported as JSON with the Bodymovin plugin and renders them natively on mobile and web applications. This eliminates the need to manually recreate the advanced animations created in After Effects by expert designers. The Web version alone has over 27k stars on GitHub.
With Velocity you create color animations, transforms, loops, easings, SVG animations, and more. It uses the same API as the $.animate() method from the jQuery library, and it can integrate with jQuery if it is available. The library provides fade, scroll, and slide effects. Besides being able to control the duration and delay of an animation, you can reverse it sometime after it has been completed, or stop it altogether when it is in progress. It has over 17k stars on GitHub and is a good alternative to Anime.js.
Rough Notation is a JavaScript library for creating and animating colorful annotations on a web page. It uses RoughJS to create a hand-drawn look and feel. You can create several annotation styles, including underline, box, circle, highlight, strike-through, etc., and control the duration and color of each annotation style.
Popmotion is a functional library for creating prominent and attention-grabbing animations. What makes it stand out? – there are zero assumptions about the object properties you intend to animate, but instead provides simple, composable functions that can be used in any JavaScript environment.
The library supports keyframes, spring and inertia animations on numbers, colors, and complex strings. It is well-tested, actively maintained, and has over 19k stars on GitHub.
Vivus is a JavaScript library that allows you to animate SVGs, giving them the appearance of being drawn. It is fast and lightweight with exactly zero dependencies, and provides three different ways to animate SVGs: Delayed, Sync, and OneByOne. You can also use a custom script to draw an SVG in your preferred way.
Vivus also allows you to customize the duration, delay, timing function, and other animation settings. Check out Vivus Instant for live, hands-on examples.
The GreenSock Animation Platform (GSAP) is a library that lets you create wonderful animations that work across all major browsers. You can use it in React, Vue, WebGL, and the HTML canvas to animate colors, strings, motion paths, and more. It also comes with a ScrollTrigger plugin that lets you create impressive scroll-based animations with little code.
Used in over 11 million sites, with over 15k stars on GitHub, it is a versatile and popular indeed. You can use the GSDevTools from GreenSock to easily debug animations created with GSAP.
Three.js is a lightweight library for displaying complex 3D objects and animations. It makes use of WebGL, SVG, and CSS3D renderers to create engaging three-dimensional experiences that work across a wide range of browsers and devices. It is a well-known library in the JavaScript community, with over 85k stars on GitHub.
The ScrollReveal library lets you easily animate a DOM element as it enters or leaves the browser viewport. It provides various types of elegant effects to reveal or hide an element on-scroll in multiple browsers. And quite easy to use too, with with zero dependencies and over 21k stars on GitHub.
One creative way to make your website outstanding is to add lively transitions between the pages as your users navigate between them. This produces a better user experience than simply displaying the new webpage or reloading the browser.
And that’s why Barba.js is so useful; this library lets you create enjoyable page transitions by making the site run like a Single Page Application (SPA). It reduces the delay between pages and minimizes the number of HTTP requests that the browser makes. It’s gotten almost 11k stars on GitHub.
Great library for creating compelling motion graphics.
It provides simple, declarative APIs for effortlessly creating smooth animations and effects that look great on devices of various screen sizes. You can move HTML or SVG DOM elements, or you can create a special Mo.js object, which comes with a set of unique capabilities. It is a reliable and well-tested library, with over 1500 tests written and over 17k stars on GitHub.
It types out a specific string character by character as if someone was typing in real-time, allowing you pause the typing speed, and even pause the typing for a specific amount of time. With smart backspacing, it types out successive strings starting with the same set of characters as the current one without backspacing the entire preceding string – as we saw in the demo above.
Also included is support for bulk typing, which types out a group of characters on the screen at the same time, instead of one after the other. Typed.js has over 12k stars on GitHub and is trusted bySlack and Envato.
The world of web animation is vast and dynamic, constantly evolving with the advent of new technologies and libraries. The animation libraries highlighted in this article offer an array of features to create engaging, interactive, and visually appealing experiences for users. They are a testament to the power and flexibility of JavaScript, and demonstrate how animations greatly enhance the user experience.
As a developer, harnessing these tools will no doubt elevate your projects, making them stand out in an increasingly competitive digital landscape.
To move a line up or down in Visual Studio Code, use this keyboard shortcut:
Windows and Linux: Alt + ↑ (Up arrow) to move line up; Alt + ↓ (Down arrow) to move line down.
Mac: Option + ↑ to move line up; Option + ↓ to move line down.
Move selection up or down in VS Code
Similarly, to move a selection up or down in Visual Studio Code, use this keyboard shortcut:
Windows and Linux: Alt + ↑ (Up arrow) to move selection up, Alt + ↓ (Down arrow) to move selection down.
Mac: Option + ↑ to move selection up, Option + ↓ to move selection down.
Why would you need to move a line/selection up or down in code?
Refactoring: When cleaning up your code, you may need to move lines of code around in and out of functions and classes, to make it more readable and maintainable.
Debugging: Like when fixing that error caused by using a variable before declaration/initializing it; with the keyboard shortcuts you easily move the declaration line up before the usage.
Changing control flow: For those instances where the order of function calls or assignments need to change to reflect a new code logic update.
Commands in Visual Studio Code
In VS Code, we have commands, defined actions that carry our various operations in the editor.
We can easily run a command with the Command Palette, which we can access with these keyboard shortcuts:
Windows / Linux: Ctrl + Shit + P
Mac:Command + Shift + P
The Move Line Up command in VS Code
To move a line/selection up in Visual Studio Code, we use the Move Line Up command.
Or with the keyboard shortcuts:
Windows/Linux: Alt + ↑ (Up arrow)
Mac: Option + ↑
The Move Line Down command in VS Code
In the same manner, to move a line/selection down in Visual Studio Code, we use the Move Line Down command.
Or with the keyboard shortcuts:
Windows/Linux: Alt + ↓ (Down arrow)
Mac:Option + ↓
Change keyboard shortcut to move line up or down
Personally, I think they’re fine, but if you don’t like the keyboard shortcut to move the line up or down, then navigate to the Keyboard Shortcuts page and change the keybinding for the Move Line Up and Move Line Down commands.
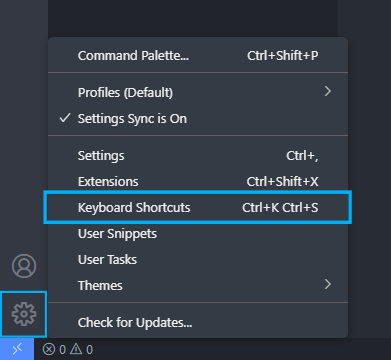
There are multiple ways to get this page; you can click the Keyboard Shortcuts item on the Manage popup shown below or use the shortcut next to the text (Ctrl + K Ctrl + S) here.
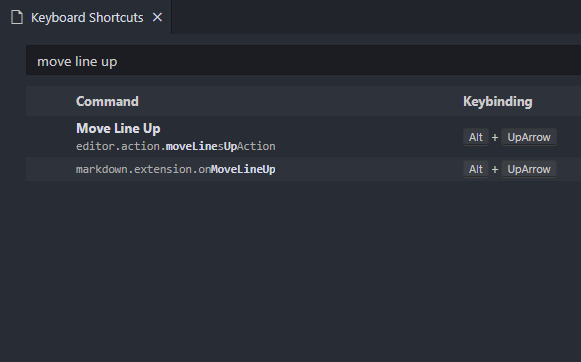
To change the keybinding, search for “move line up” or “move line down” in the search bar.
Then double-click on the Move Line Up or Move Line Down command, type a new keyboard shortcut, and press the Enter key to carry out the change.
The change here was Ctrl + E, Ctrl + E – certainly not the smartest choice, but now you’ve seen how it works.
Key takeaways
To move a line or selection up or down in Visual Studio Code, use the Alt + ↑ (Up arrow) for up and Alt + ↓ (Down arrow).
Moving lines or selections up or down in code can be useful for refactoring, debugging, and changing control flow.
You can change the keyboard shortcut to move a line up or down by changing the Move Line Up and Move Line Down command.
We use the Event preventDefault() method to stop the default action of the event from happening. In this case, that action was a page refresh, so preventDefault() prevented the page refresh on the form submission.
App.jsxCopied!
const handleSubmit = (event) => {
   event.preventDefault();

   // Simulate form submission by clearing input fields
   setEmail('');
   setPassword('');
 };
preventDefault() is a property of an Event object, which lets us access and modify event-related data.
We use the onSubmit prop to add a submit event listener to the form; this listener runs when the user clicks the button to submit the form.
All we did here was reset the form, but of course in the real world, you probably want to make an AJAX request to a server with the form data.
With type="submit", the browser also submits the form when the user presses the Enter key in an input field.
Remove type="submit" from the button to prevent page refresh
To prevent page refresh on form submit in React, you can also remove the type="submit" from the button.
When is this useful? You may want to show an alert message or something before submission. In this case, we wouldn’t want type="submit" since it submits the form on button click.
We used type="button" on the button, but that’s as good as not having a type attribute. It doesn’t do anything on click.
Key takeaways
To prevent page refresh on form submit in React, call event.preventDefault() in the submit event listener.
Set type="submit" to ensure the form submits on button click or Enter press. Remove it when you don’t want this.
Remove type="submit" when you need to do something after the button click before submitting the form, e.g., show a dialog, make an initial request, etc.
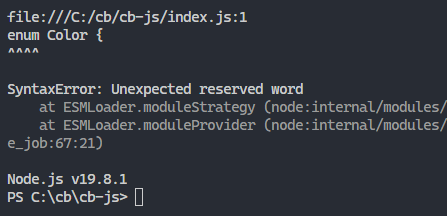
The “Unexpected reserved word ‘enum'” syntax error happens in JavaScript happens because enum is not a valid keyword in JavaScript, but it is reserved.
It was reserved in the ECMAScript specification in case it may become valid in the future.
If it wasn’t reserved, devs could start using it as variable names in their code – making future keyword use impossible!
JavaScriptCopied!
// ❌ SyntaxError: Unexpected reserved word 'enum'
enum Color {
  Red,
  Blue,
  Green
}

const color = Color.Red;
To fix it, represent the enumeration in another way, or change the file to TypeScript.
Fix: Create a JavaScript enum the right way
Enums are useful stuff, but since there’s no enum keyword in JS, we’ll have to find others way to create and use them.
One powerful way to create an enumeration is with an object with JavaScript symbol properties:
The “structuredClone is not defined” error occurs when you try to use the structuredClone()/ method in JavaScript, but it’s not defined.
The “structuredClone is not defined” error occuring in a terminal.
To fix it, install Node.js 17 or a newer version. Once you’ve updated Node.js, you can use structuredClone() to clone objects with all their properties and methods.
What causes the “structuredClone is not defined” error?
If you try to use the structuredClone() method in a script that’s running with a Node.js version lower than 17, you will encounter this error.
The structuredClone() method is used to create a deep copy of an object. It’s a built-in function in JavaScript and is used to clone an object with all its properties and methods.
But when the structuredClone() method is not defined, it means that the server environment doesn’t recognize the function and cannot perform the action.
Fix: update Node.js
To fix the “structuredClone is not defined” error in JavaScript, you need to install Node.js 17 or a newer version. If you’re using an older version of Node.js, it will throw an error when you try to use structuredClone().
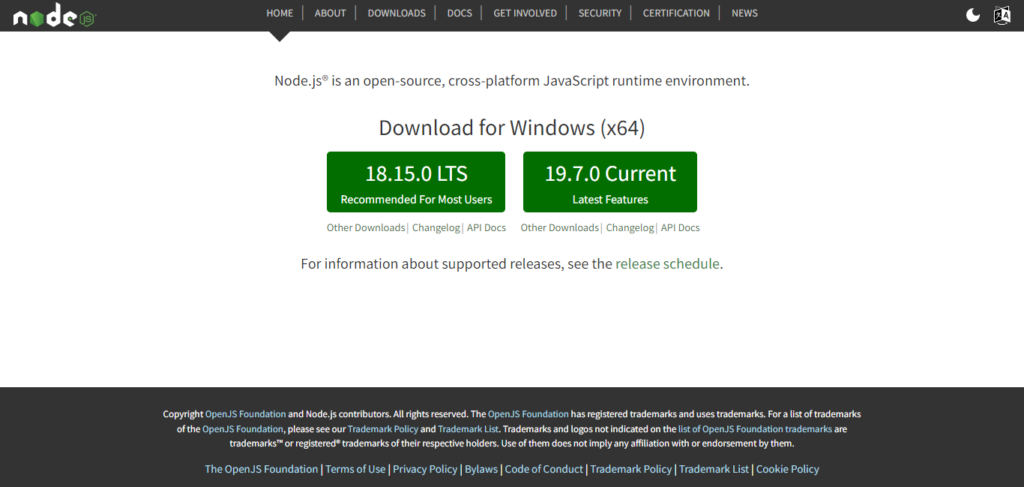
Install from website
To download Node.js, visit the official website and opt for the LTS version, as it offers superior stability. As of the time of writing this article, the most recent LTS release of Node.js is v18.15.0.
The Node.js download page on the official website.
Install with Chocolatey
If you’re using Chocolatey, Node.js is available as the nodejs package, meaning you can easily install it in a terminal using the following command.
ShellCopied!
# Use current LTS version

choco install nodejs --version=18.5.0
After installing, you can use the structuredClone method to clone an object:
If you get the “structuredClone is not defined” error when using the structuredClone() method in JavaScript, it means that the method is unavailable. To fix the problem, update your Node.js to a version newer than 17. You can get the latest version from the official Node.js website or install the nodejs package using Chocholatey.
The “unexpected reserved word (await)” error occurs in JavaScript when you use the await keyword in a function that is not specified as async. To fix it, add an async modifier to the function to mark it as async.
The “Unexpected reserved word ‘await'” error occurring in JavaScript.
Here’s an example of the error occurring:
index.jsCopied!
function getName() {
  // ❌ SyntaxError: Unexpected reserved word
  const str = await Promise.resolve('Coding Beauty');

  return str;
}
Note: As this is a syntax error, the function doesn’t need to be invoked for it to be detected, and no part of the code runs until it is resolved.
The async and await keywords work together in JavaScript (hence the commonly used term, async/await); to use the await keyword in a function, you must add the async modifier to the function to specify that it is an async function.
JavaScriptCopied!
// ✅ Use "async" keyword modifier
async function getName() {
  // ✅ Successful assignment - no error
  const str = await Promise.resolve('Coding Beauty');

  return str;
}
Fix “Unexpected reserved word (await)” error in nested function
If you’re using the await keyword, it’s likely that you already know that it has to be in an async function. What probably happened is that you nested functions and mistakenly ommited the async modifier from the innermost function containing the await keyword.
For await to work, the deepest function in the nesting hierarchy is required to be specified as async. It won’t work even if any or all of the outer functions are marked as async.
So we resolve the error in this case by adding the async modifier to the innermost function:
In this example, we should be able to remove the async keyword from the outer function, as it isn’t performing any asynchronous operations with await, but this depends on whether the caller of createTask() is expecting it to return a Promise or not.
Here’s another example where this mistake frequently happens; using await in an array looping method:
JavaScriptCopied!
// ❌ SyntaxError: Unexpected reserved word
async function processPhotos(photoIds) {
  const data = await Promise.all(photoIds.map((photoId) => {
    const res = await fetch(`http://example.com/photos/${photoId}`);
    return await res.json();
  }));

  // process data...
}
Like in the previous example, the error occurs because the async keyword modifier is absent from the map() callback, even though it’s present in the function that calls map(). The fix is the same, add async to the map() callback.
JavaScriptCopied!
// ✅ No error
async function processPhotos(photoIds) {
  const data = await Promise.all(
    photoIds.map(async (photoId) => {
      const res = await fetch(`http://example.com/photos/${photoId}`);
      return await res.json();
    })
  );
  // processing...
}
Use await at top level
If you’re trying to use await at the top level of your file, you’ll need to set the type attribute to "module" in the script tag referencing the file in the HTML. This works when your code runs in browser environments.
For example:
index.htmlCopied!
<script type="module" src="index.js"></script>
Now you’ll be able to use await at the global scope in your file, e.g.:
We create a reusable toSeconds() function to easily convert the hours and minutes to seconds.
The function is quite easy to understand; 1 hour equals 3600 seconds, so we multiply the hour value by 3600 to get the seconds equivalent. Similarly, 1 minute equals 60 seconds, so we multiply the minute value by 60 to get the seconds equivalent.
After this, we add the equivalent seconds values to the seconds argument to get the total seconds.
We could rewrite the function to accept the time values as named properties of an object, instead of as multiple parameters.
This approach makes it easier to understand the role of each value passed to the function, a
Convert HH:mm:ss to seconds in JavaScript
Sometimes the time input to convert to seconds is a string in a time format, like HH:mm:ss. To convert to seconds in this case, we’ll separate the individual time values by the separator (: in this case), cast them each to numbers, and perform the same time conversion steps done in our previous examples.
The input string here is in the HH:mm:ss format; the hour, minute, and second values are separated by a colon (:) and are each represented by a minimum of 2 digits.
The Stringsplit() method splits a string into an array of substrings separated by a given separator in the original string. We pass a colon as the separator to get an array of the individual time values.
After getting this array, we use the map() method to transform each time value into a number. The map() method takes a callback and calls it on each element of an array and uses the result to populate a new array. For our scenario, the callback is simply the Number() constructor, so each time value in the array is converted to a number.
The second one is longer, but it makes it clear exactly what arguments are passed to the map() callback. In the first one, map() automatically passes 3 arguments to its callback, which could be problematic if the callback returns a different result depending on the number of arguments it receives, for instance, a parseInt() callback.
We then use a destructuring assignment to unpack the number array values into separate hour, minute, and second variables.
After doing this, we perform the same multiplication and addition we did in the first example, to convert the hours and minutes to seconds and get the total seconds.